Warm Your Soul apple Cinnamon Oatmeal

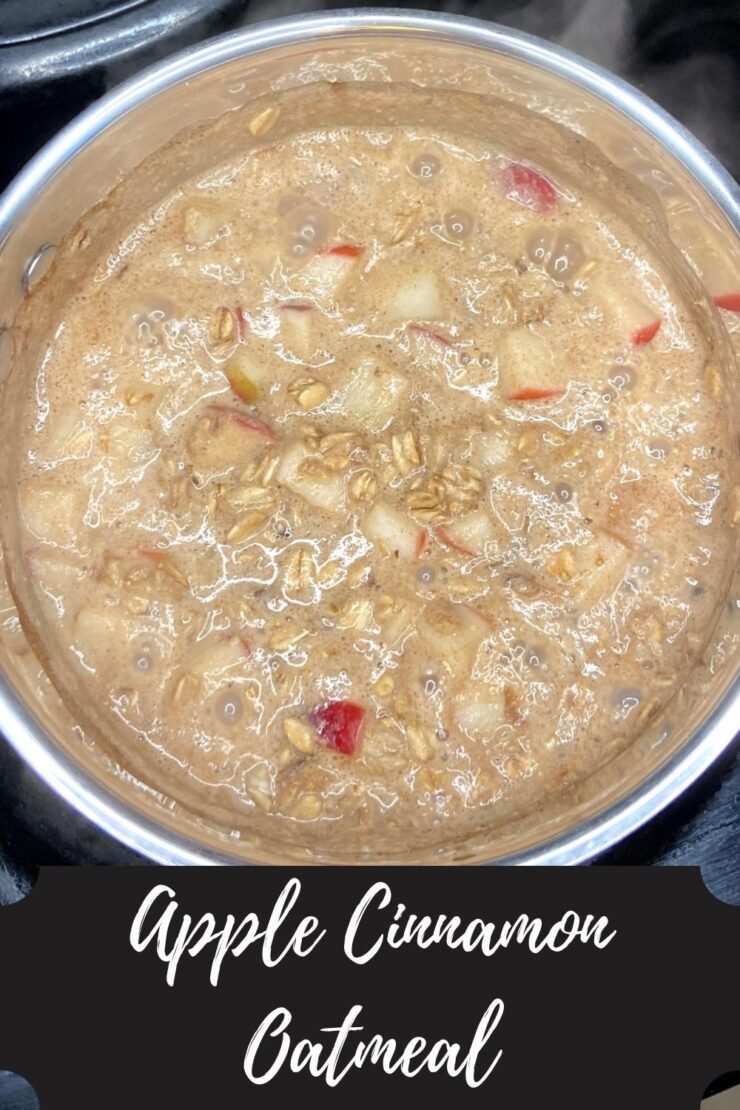
Generally speaking, I am an overnight oatmeal kind of gal. I love that you can prep five servings in five minutes flat on a Sunday evening and be set for the work week. There are so many good for you ingredients in overnight oatmeal: old fashioned oats, chia seeds, honey, cinnamon, almond milk. But sometimes, a good old fashioned bowl of warm, cooked on the stove top oatmeal hits the spot, especially on the weekends. This warm your soul apple cinnamon oatmeal still has the simplicity in terms of mixing together, but is full of big flavor and is perfect as the weather gets cooler. 

While I am going to give you the measurements and all the ingredients, please know that this is a great recipe to play around with. Have some blueberries laying around? Toss those in. Want to give almond extract a try instead of vanilla? Do it! Want to skip the crunch of walnuts? Hey, go for it, I won’t judge.

Here’s the low down on the ingredients to Warm Your Soul Apple Cinnamon Oatmeal!

Your Ingredients (for one serving)

  • ¾ cup unsweetened vanilla almond milk (or your favorite milk of choice)
  • 1 tablespoon pure maple syrup 
  • ¼ teaspoon vanilla extract
  • Pinch of salt 
  • ¼ teaspoon cinnamon 
  • ⅓ cup diced apples
  • ½ cup old fashioned oats

Your Steps to Apple Cinnamon Oatmeal

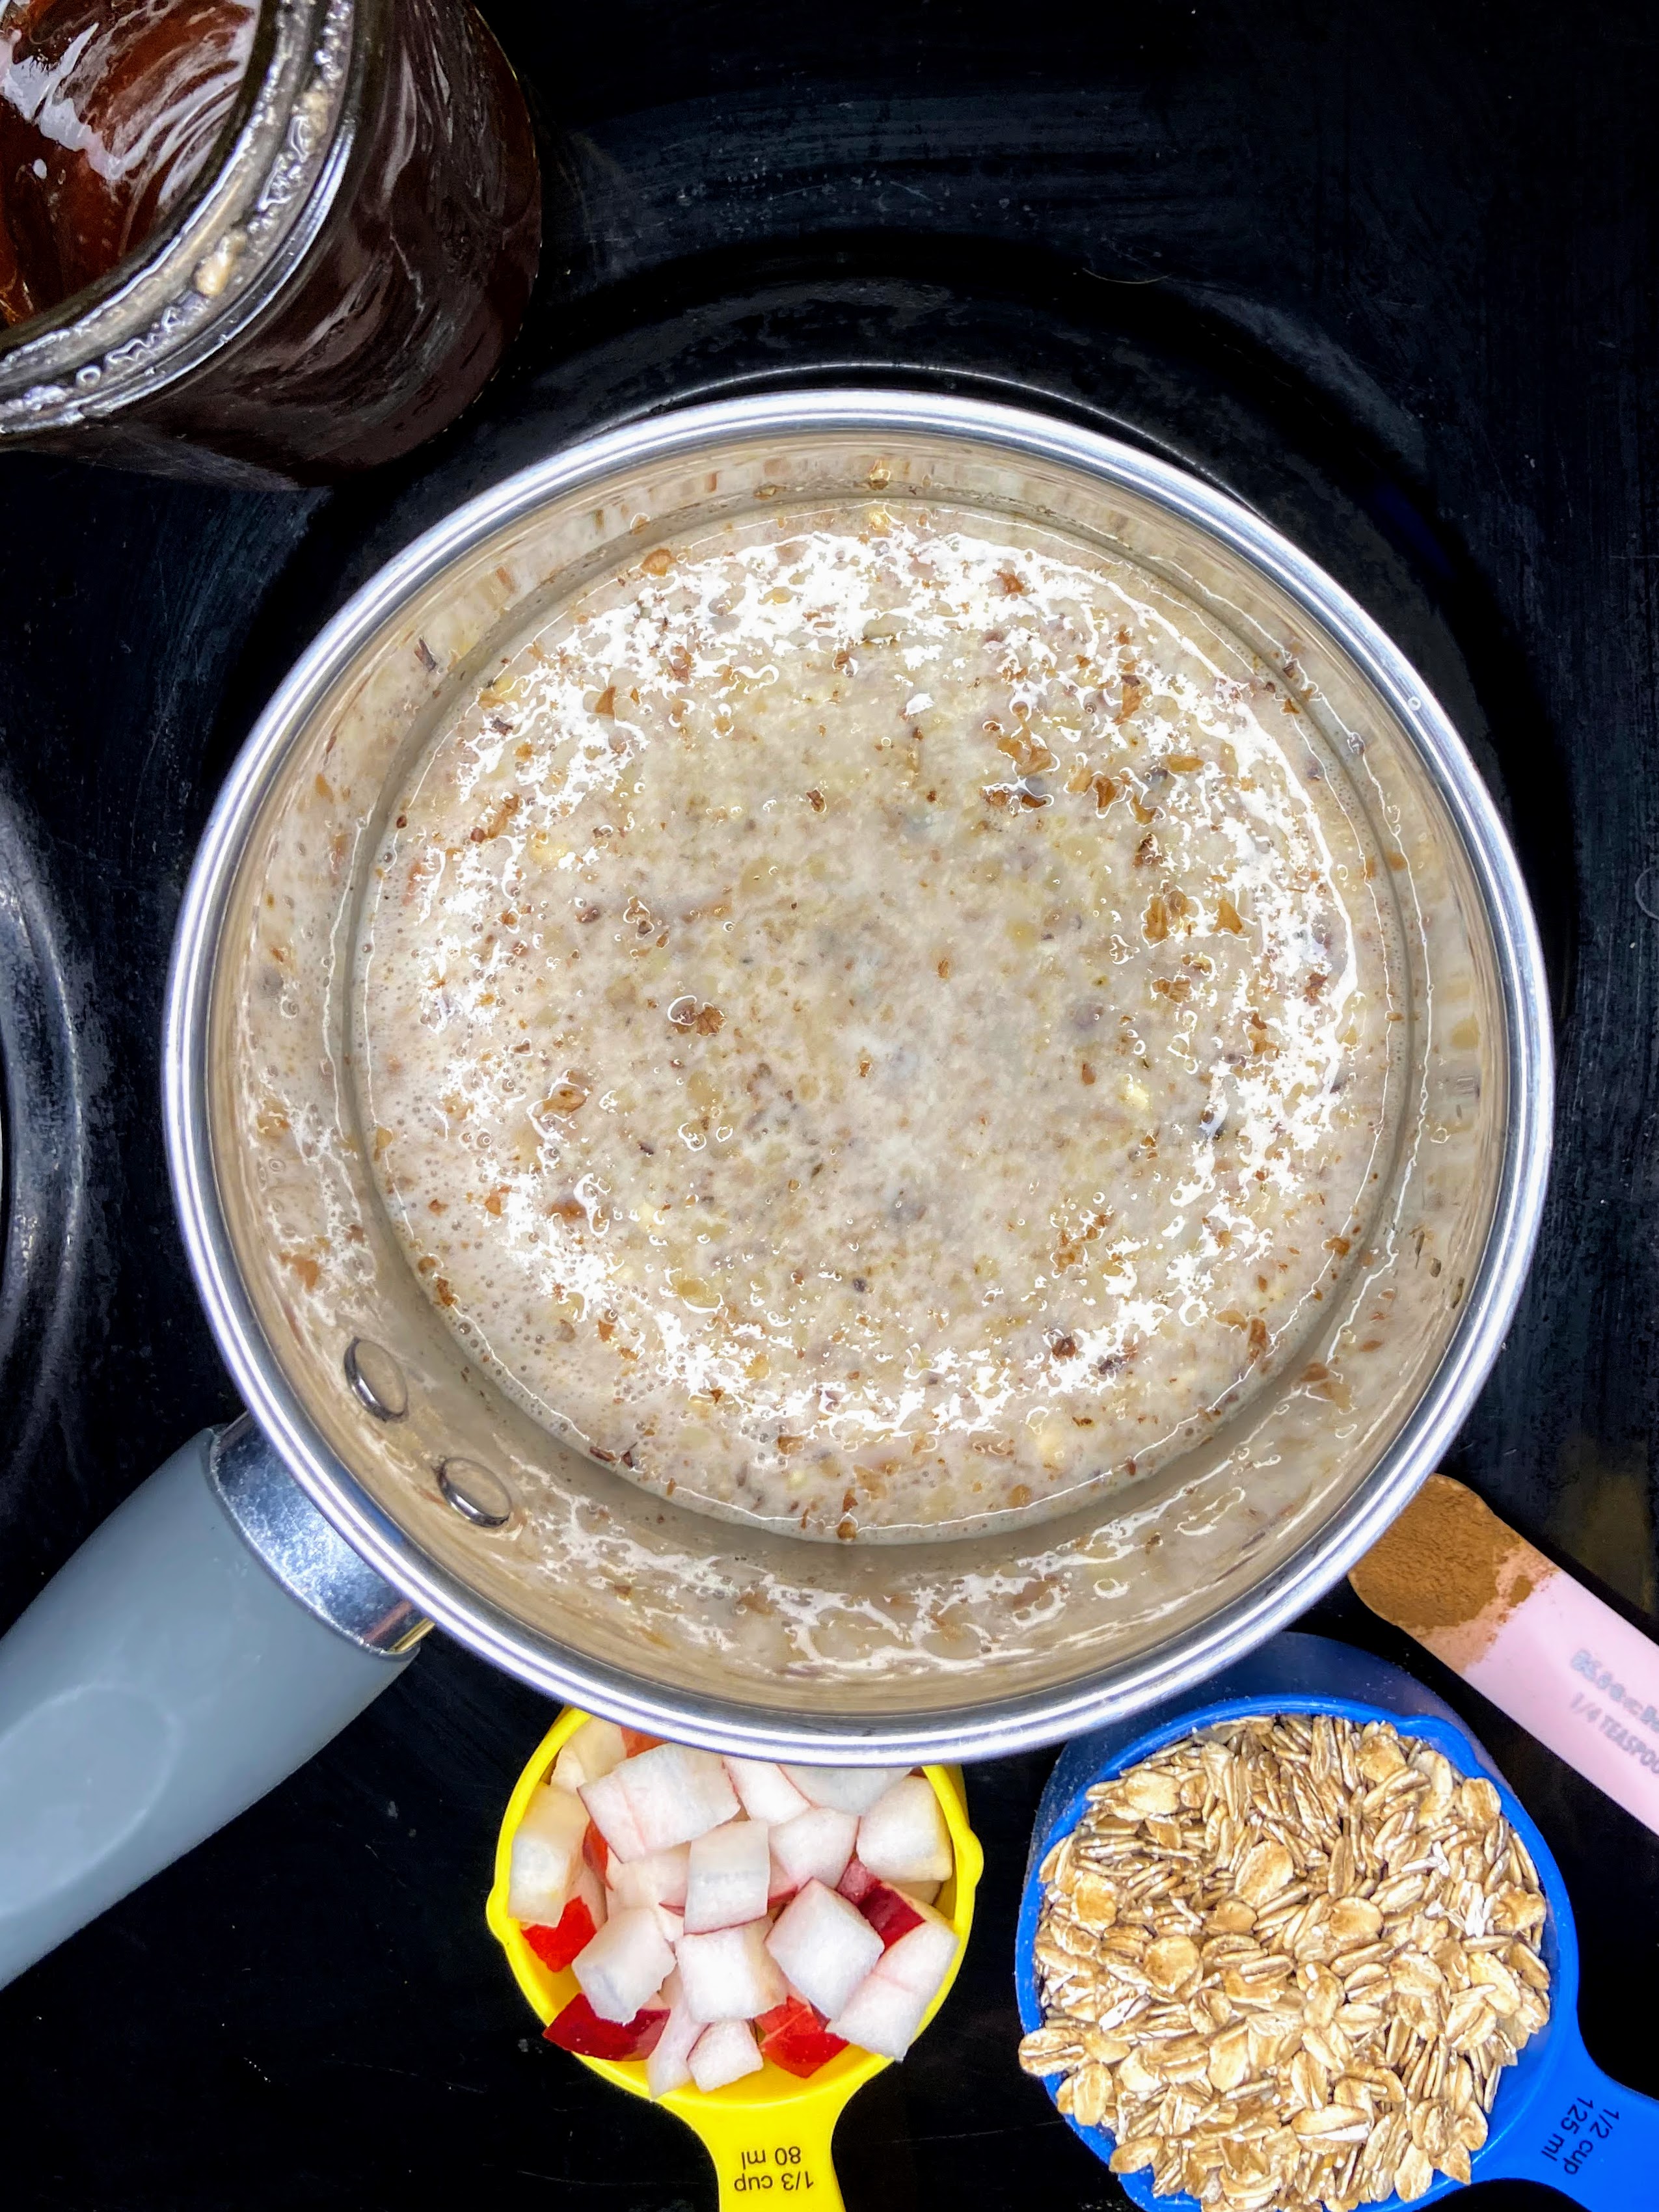
In a small soup kettle, combine the almond milk, syrup, vanilla, and walnuts. Bring to a boil over medium high heat. Lower to a simmer. Stir in the apples, oats, and cinnamon. Simmer for five minutes and serve. 

Pro tip: Start the milk mixture on medium heat, go finish your bathroom routine (makeup and the like), and then add the oatmeal. By the time the rest of your breakfast is done, you’ll be done too!

Apple Cinnamon Oatmeal

Seven ingredients combine in this warm your soul apple cinnamon oatmeal perfect for cool mornings. Let's get cooking these classic flavors!
Prep Time 1 minute
Cook Time 8 minutes
Course Breakfast
Cuisine American
Servings 1 serving

Ingredients
  

  • ¾ cup unsweetened vanilla almond milk or your favorite milk of choice
  • 1 tablespoon pure maple syrup
  • ¼ teaspoon vanilla extract
  • Pinch of salt
  • ¼ teaspoon cinnamon
  • cup diced apples
  • ½ cup old fashioned oats

Instructions
 

  • In a small soup kettle, combine the almond milk, syrup, vanilla, walnuts, and pinch of salt.
  • Bring to a boil over medium high heat.
  • Lower to a simmer. Stir in the apples, oats, and cinnamon. Simmer for five minutes and serve.
Keyword apple and cinnamon, apples, Breakfast, dairy free, Gluten Free, oatmeal
Tried this recipe?Let us know how it was!

Milk and Honey Sourdough Bread

Last Updated on September 20, 2021 by Jess

Gosh, I adore sourdough bread. I love watching the starter grow when it gets fed. I feel good about the food I am feeding my family when I serve them bread with three to four ingredients rather than a list of things I can’t pronounce. For years, I did a simple water, flour, salt dough. My kiddos ate it, but they yearned for something better for sandwiches. Something less dense with a little more flavor. I did some research, and have started baking a delicious milk and honey sourdough bread that I am so excited to share with you. 

But first, can I share a SHORT story with you? 

A few years ago, I decided to make a list of 33 random things to do while I was 33. They varied from bake a fruit tart, to compete in a sprint triathlon, go to a concert, visit three new state parks, etc. It was so much fun to challenge myself to try new and fun things I wouldn’t normally do. One item on the list that truly changed my life was, “take a class at one of two foundations in town.” Initially, I took a Restorative Yoga class, which led me to the instructor, which lead me to her studio, and now, I get to lead barre classes 2-4 times a week. This has brought a beautiful community of women into my life that I am grateful for every day. 

I also took a class on sourdough baking put on by Sunrise Flour Mill. And honestly, I knew nothing about sourdough. I knew some people loved it, but had no idea how it was created, baked, anything. The idea of a sourdough starter was foreign to me. But I took a little portion cup of my starter I fondly called “Fred,” and got to work. I made terrible bread. Then I made beautiful bread. I played with sourdough bagels, crackers, tortillas. I made all the things, and I am at a point in my life and gut health that I strive to only eat bread products that I have created. 

Why do I share?  

Because this little list that I was inspired to create truly has molded my life in a way I never could have imagined. I am a teacher at heart, but never thought I would lead fitness classes. I love to bake, but never had heard of sourdough in my life. It led me to buying flour from the natural food store and having better, whole foods in my home for my family. If you at all feel inspired, make yourself a list for a year and do some wonderful and out of your comfort zone things. Future you will thank you. 

But this is a blog post about a delicious milk and honey sourdough bread that I am beyond excited to share with you. Ready to get preparing? I hope so! Oh, and you say you don’t have a sourdough starter? Check out King Arthur’s Flour for a great recipe!

Your Ingredients for Milk and Honey Sourdough Bread

  • 250 grams fresh and active sourdough starter 
  • 300 grams bread flour 
  • 50 grams whole wheat flour (you need a little whole wheat in your life)
  • 250 grams white all purpose flour
  • 20 grams kosher salt
  • 400 grams skim milk 
  • 40 grams honey 

Determining Your Time Line

If your starter hasn’t been doubled in the last 12-24 hours, be sure to start there. I usually do this the morning I am going to put it together or in the evening if I want to mix it up in the morning. The thing about sourdough is that it takes time and determining how to fit it into your schedule can be the hardest part. Here’s what has worked for me: 

If you want to bake in the late morning: 

The morning before, double the starter. 

The evening before, you will mix the dough. It will rest overnight. (Mixing and folding the dough will need about 40 minutes of time, but can be done while you are doing other things)

The morning of, do the final folding of the dough about 2-3 hours before you want to bake it. 

If you want to bake in the evening: 

The evening before, double the starter. 

The morning of, you will mix the dough. It will rest overnight. (Mixing and folding the dough will need about 40 minutes of time but can be done while you’re getting ready for the day)

The evening of, do the final folding of the dough about 2-3 hours before you want to bake it. 

Your Steps to Delicious Milk and Honey Sourdough Bread

Combine all the ingredients in a large bowl with a cover (plastic wrap or bees wraps would work too)  Mix together with hands that have been run under water and then shaken off, but not dried (damp hands?). And I have to say, truth be told, I have forgotten the salt more than I care to admit because I can mix this by memory. Don’t do that! It’s amazing what 20 little grams of salt does to bread. 

Allow the dough to rest, covered, for 10-15 minutes. It WILL be very wet. After the 15 minutes has finished, fold in the “corners” (think, north, south, east, west) of the bed to the center with damp hands. I keep one hand wet and it does the folding the and the other hand spins the bowl. Repeat this process 4-5 times, every 5-10 minutes. (“Alexa, set a timer for 5 minutes” is heard at our house so often. But if you miss the 5 minute mark for any reason, it’s very forgiving.) Cover and allow the rest approximately 12 hours. 

Note: My dough generally rests overnight or during the work day. If you need to speed up the process, find a warmer spot for your dough to hang out. I have set it on the porch on a warm, humid day and had bread ready to go in 5 hours. You can slow it down by putting it in the fridge. 

About 12 hours later

Uncover the dough. Fold in the corners once more. Allow to rest for 10 minutes. Heavily flour a surface (I LOVE to have an old, large spice container for this. It’s a must in the kitchen for a baker). With damp hands, lift the dough out of the container and onto the flour. Cut into two equal pieces (I use a turner in a pinch if you don’t have a pastry scraper). Fold the top and bottom of each piece in. Allow to rest 5-10 minutes. With damp hands, repeat this process, flipping the seam onto the table, resting once more. Place loaves into greased bread pans, cover with a towel, and allow to rest until doubled. I generally preheat my oven at this point, and allow the loaves to rest on a burner that is NOT the vent. This speeds up the doubling process just a little bit. 

When ready to bake, preheat the oven to 400 degrees. Place bread in oven, baking for 30 minutes. If your oven bakes unevenly at all, rotate the bread half way through. 

Now, I challenge you to take it out of the oven and NOT cut right into it. I can’t help it, every time. Fresh bread is just the best. Get a little butter, or homemade jam from my canning page, and man, life is so good. It’s the simple, little things, right? 

Tools of the Trade

Here are a few tools I love to have around when I am baking sourdough!

Dough scrappers are great for not only cutting the dough, but cleaning the mess off the table and getting the dough out of the bowl.

I love that this scale is rechargeable. I can’t tell you how often I used to take out my kitchen scale only to find that the battery was dead and I didn’t have another one on hand. No more waste!

And my go to bread pans. I love bannetons too, but when I am baking sandwich bread, these are the pans I use!

Milk and Honey Sourdough Bread

A simple, seven ingredient milk and honey sourdough bread that is ready for sandwiches, jelly, and more!
Prep Time 40 minutes
Cook Time 30 minutes
Rest TIme 12 hours
Course Side Dish
Cuisine Sourdough
Servings 2 loaves

Ingredients
  

  • 250 grams fresh and active sourdough starter
  • 300 grams bread flour
  • 50 grams whole wheat flour
  • 250 grams white all purpose flour
  • 20 grams kosher salt
  • 400 grams skim milk
  • 40 grams honey

Instructions
 

  • Combine all the ingredients in a large bowl with a cover. Mix together with hands that have been run under water and then shaken off, but not dried.
  • Allow the dough to rest, covered, for 10-15 minutes. It be very wet.
  • After the 15 minutes has finished, fold in the “corners” (think, north, south, east, west) of the bed to the center with damp hands.
  • I keep one hand wet and it does the folding the and the other hand spins the bowl. Repeat this process 4-5 times, every 5-10 minutes.
  • Cover and allow the rest approximately 12 hours.
  • Uncover the dough. Fold in the corners once more. Allow to rest for 10 minutes.
  • Heavily flour a surface With damp hands, lift the dough out of the container and onto the flour.
  • Cut into two equal pieces. Fold the top and bottom of each piece in. Allow to rest 5-10 minutes.
  • With damp hands, repeat this process, flipping the seam onto the table, resting once more.
  • Place loaves into greased bread pans, cover with a towel, and allow to rest until doubled on a preheating stove (400 degrees), but away from the vent.
  • Place bread in oven, baking for 30 minutes. If your oven bakes unevenly at all, rotate the bread half way through.
Keyword sandwich bread, sourdough, sourdough baking
Tried this recipe?Let us know how it was!

Garden Fresh Tomato Sauce

Last Updated on September 6, 2021 by Jess

Canning and preserving from my garden is my jam all summer long. I love the color, the flavor, the dirt under my nails and ALLL the mason jars. Seriously, there isn’t much better than a line of mason jars that are full of the garden’s bounty. I remember when I first started planting our garden, my theory was, “Plant all the plants. The worst thing that happens is that some of the food goes to the chickens, our friends, or the compost pile.” But I love to fill our shelves and freezer with food we grew, so it rarely goes to waste. One of my favorite things to preserve is garden fresh tomato sauce. 

After trying a few different recipes, I developed this lower yield recipe (15 pounds really is a lower yield! Check out any Ball Canning Book to see!). I hear you saying, “But Jess! I don’t have 15 pounds of tomatoes ready at any time and I don’t go to the farmer’s market!”. I’ve got your back with a great solution: The freezer.

The Hack

I rarely have enough tomatoes ripe at one time for 15 pounds. If you are like me, let me share the trick that was an immediate love for me: When you have a large amount of ripe tomatoes on the counter, stem, wash, and dry them. From here, place the tomatoes in a freezer safe container or bag. I like to label them with their weight ahead of time. When you are ready for canning, simply take the bags out a day or two ahead of time to thaw (or you can place them in the sink with warm water to speed up the process). 

This method is awesome for two reasons: 

  1. You can use your own tomatoes, even if you don’t have a ton of plants. They won’t rot on your counter waiting. 
  2. When the tomatoes thaw, the skins come right off. I like to can my sauce with the skin (so many of the nutrients are there!), but it is nice to get rid of a few of them. 

Regardless of how you come by your tomatoes (friends, farmer’s market, your own dirt), let’s get going with some great garden fresh tomato sauce! Oh, and if you plan on canning it and are new to it, check out the National Center for Home Preservation Site for more information! 

Your Ingredients For Garden Fresh Tomato Sauce

  • 15 pounds of tomatoes, cleaned and roughly chopped
  • 2 tablespoons olive oil 
  • 2 cups onions
  • 3 tablespoons minced garlic
  • 1 cup fresh basil, chopped
  • ½ cup fresh oregano
  • 1 ½ teaspoons pepper 
  • 1 tablespoon canning salt 

Your Steps to Garden Fresh Tomato Sauce

Cooking

Begin by heating olive oil over medium heat in a sauté pan. Add onions and garlic. Cook until translucent and soft, about ten minutes, stirring often. 

In a large kettle, combine onion mixture, chopped tomatoes, basil, oregano, salt, and pepper. Continue to simmer over medium heat, stirring often. 

Pro tip

As the sauce is cooking down, you will have a lot of liquid that you are simmering off. You can cut your cook time significantly by bailing out this liquid using a colander and measuring cup. Push the colander down onto the tomatoes, forcing the liquid up. Then use the measuring cup to ladle it out. You can simply dump it or save it as a light tomato juice. I ladle it into mason jars and save it in the fridge for my husband. 

After the tomatoes have begun to break down (about 30-60 minutes later), puree them. I like to use my stick blender to do this. It means less dishes to clean! Alternatively, you can transfer it to a food mill to puree. Once totally in sauce form, continue to cook down until the volume of the sauce has reduced to about one-half the original amount. 

Canning

While the tomatoes are cooking down, you can begin to prepare your canner and jars if you plan on processing them. (If you want to simply place the sauce in the freezer, that’s totally okay. You can transfer it to freezer safe containers or bags and freeze once cool.)

Wash and sanitize pint or quart jars, rings, and lids. Keep warm. Fill the canner with enough water to cover the jars by at least 2 inches of water. Cover and heat on high. Watch the temperature, you want a simmer but not a boil when you place the jars in the water. 

Once the sauce and canner are ready, you can begin to fill the jars. To be sure there is enough acid to have self stable jars, you must add citric acid or bottled lemon juice. 

  • Add ¼ teaspoon citric acid or 1 tablespoon lemon juice to pint jars. 
  • Add ½ teaspoon citric acid or 2 tablespoons lemon juice to quart jars. 

Finish it up!

Ladle the hot tomato sauce into jars, leaving ½ inch headspace. Wipe rims of the jars with a damp cloth, add lids and rings, tightening to fingertip tight. Place in the canner, increasing the heat to high. Once the canner reaches a boil, process pint jars 35 minutes or quart jars 40 minutes. Remove from heat and allow jars to cool in the canner over 5 minutes. Then remove jars from the canner, placing them on the counter. Listen for the ping of the lids over the next 12 hours. Sealed jars are self-stable. If any jar doesn’t seal, simply place it right in the refrigerator and enjoy over the next week or so. 

Looking to preserve more of your garden? Check out my canning and preserving page by clicking the button!

Tools of the Trade

I use my immersion blender ALL the time. It’s so easy to clean!

You can totally can without these tools, but why would you?

I love my Granite Ware waterbath canner.

Garden Fresh Tomato Sauce

Basil, oregano, and garlic flavor this great tomato sauce
Prep Time 30 minutes
Cook Time 2 hours
Processing Time 40 minutes
Course dinner
Cuisine Canning
Servings 3 quarts

Equipment

Ingredients
  

  • 15 pounds of tomatoes cleaned and roughly chopped
  • 2 tablespoons olive oil
  • 2 cups onions
  • 3 tablespoons minced garlic
  • 1 cup fresh basil chopped
  • ½ cup fresh oregano
  • 1 ½ teaspoons pepper
  • 1 tablespoon canning salt

Instructions
 

  • Begin by heating olive oil over medium heat in a sauté pan. Add onions and garlic. Cook until translucent and soft, about ten minutes, stirring often.
  • In a large kettle, combine onion mixture, chopped tomatoes, basil, oregano, salt, and pepper. Continue to simmer over medium heat, stirring often.
  • After the tomatoes have begun to break down (about 30-60 minutes later), puree them. A stick blender or food mill works well. Once totally in sauce form, continue to cook down until the volume of the sauce has reduced to about one-half the original amount.
  • While the tomatoes are cooking down, you can begin to prepare your canner and jars if you plan on processing them. (If you want to simply place the sauce in the freezer, that’s totally okay. You can transfer it to freezer safe containers or bags and freeze once cool.)
  • Wash and sanitize pint or quart jars, rings, and lids. Keep warm. Fill the canner with enough water to cover the jars by at least 2 inches of water. Cover and heat on high. Watch the temperature, you want a simmer but not a boil when you place the jars in the water.
  • Once the sauce and canner are ready, you can begin to fill the jars. To be sure there is enough acid to have self stable jars, you must add citric acid or bottled lemon juice.
  • Add ¼ teaspoon citric acid or 1 tablespoon lemon juice to pint jars. Add ½ teaspoon citric acid or 2 tablespoons lemon juice to quart jars.
  • Ladle the hot tomato sauce into jars, leaving ½ inch headspace.
  • Wipe rims of the jars with a damp cloth, add lids and rings, tightening to fingertip tight. Place in the canner, increasing the heat to high.
  • Once the canner reaches a boil, process pint jars 35 minutes or quart jars 40 minutes.
  • Remove from heat and allow jars to cool in the canner over 5 minutes. Then remove jars from the canner, placing them on the counter.

Notes

As the sauce is cooking down, you will have a lot of liquid that you are simmering off. You can cut your cook time significantly by bailing out this liquid using a colander and measuring cup. Push the colander down onto the tomatoes, forcing the liquid up. Then use the measuring cup to ladle it out. You can simply dump it or save it as a light tomato juice.
Keyword Canning, from the garden, preserving, tomato sauce, tomatoes
Tried this recipe?Let us know how it was!