For the Freezer Apple Pie Filling to Quick Apple Bars

Last Updated on August 26, 2021 by Jess

Cortland, right off the tree. Does it get much better?

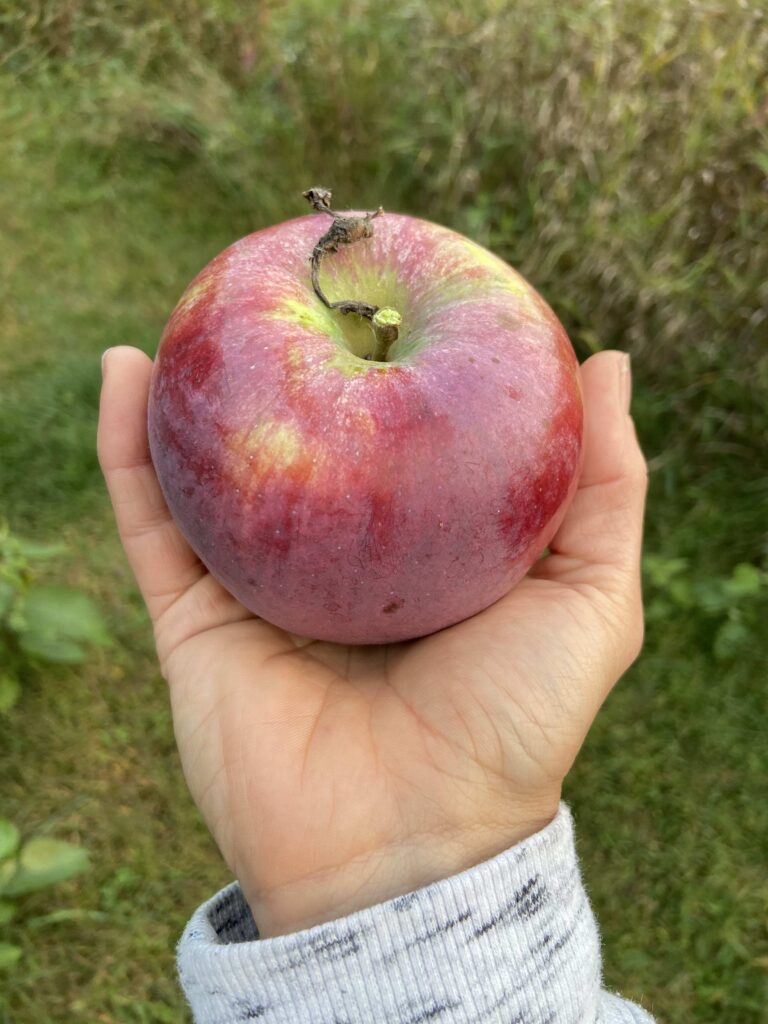
Garden season is giving way to orchard season and the apples are ripe for the picking in Northern Wisconsin. At our house, we have planted a few fruits every year over the last ten years, and have reached an “orchard” of about sixteen fruit trees, nine of which are various apple trees. I have to love my husband as he researches types of apples and makes sure we have apples through the whole season. A favorite go to recipe that I do every year is freezer apple pie filling. 

It’s a simple recipe with minimal work that fills your freezer with fresh apples so that you can enjoy and create pies and crisps all year long in ten minutes flat! Who doesn’t love a dessert that looks and tastes like you were in the kitchen forever, but really, you had it put together basically during the commercial break of your favorite show? (Does anyone even have commercial breaks anymore? I guess I am getting old 😉 )

In all seriousness, if you are a person who LOVES hitting up the local orchards, you need this apple pie filling in your freezer. It will bring back all the good memories and joy the orchard brought you and your family as you hit it up in your flannels and boots 🙂

Your Ingredients 

  • 6 pounds of apples, peeled, cored and sliced after measuring out your weight
  • 1 1/2 cups sugar
  • 1/4 cup flour
  • 1 1/2 teaspoon cinnamon
  • 1/4 teaspoon nutmeg
  • 2 tablespoons lemon juice

Your Steps 

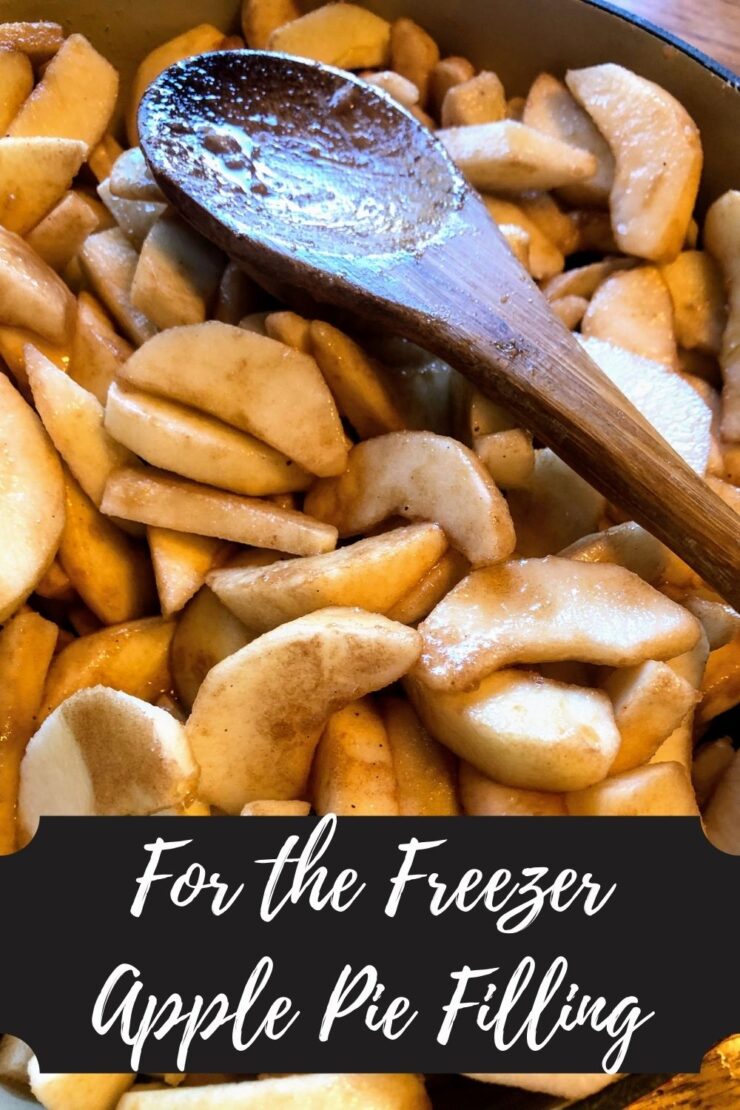
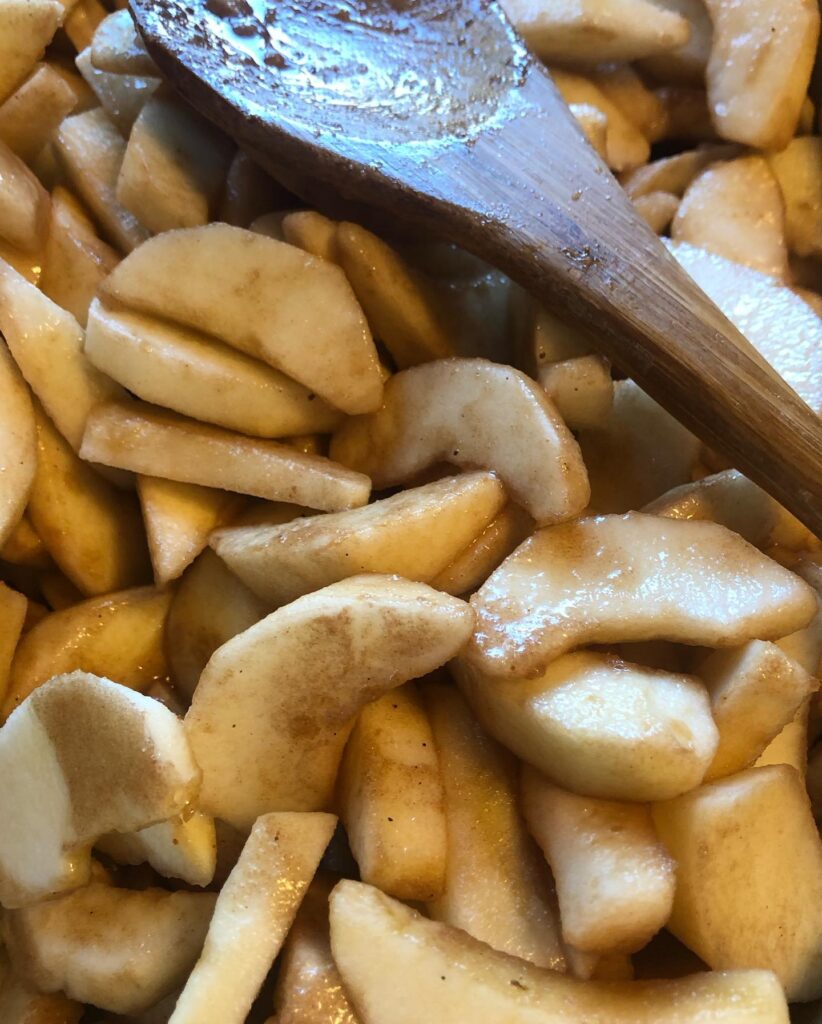
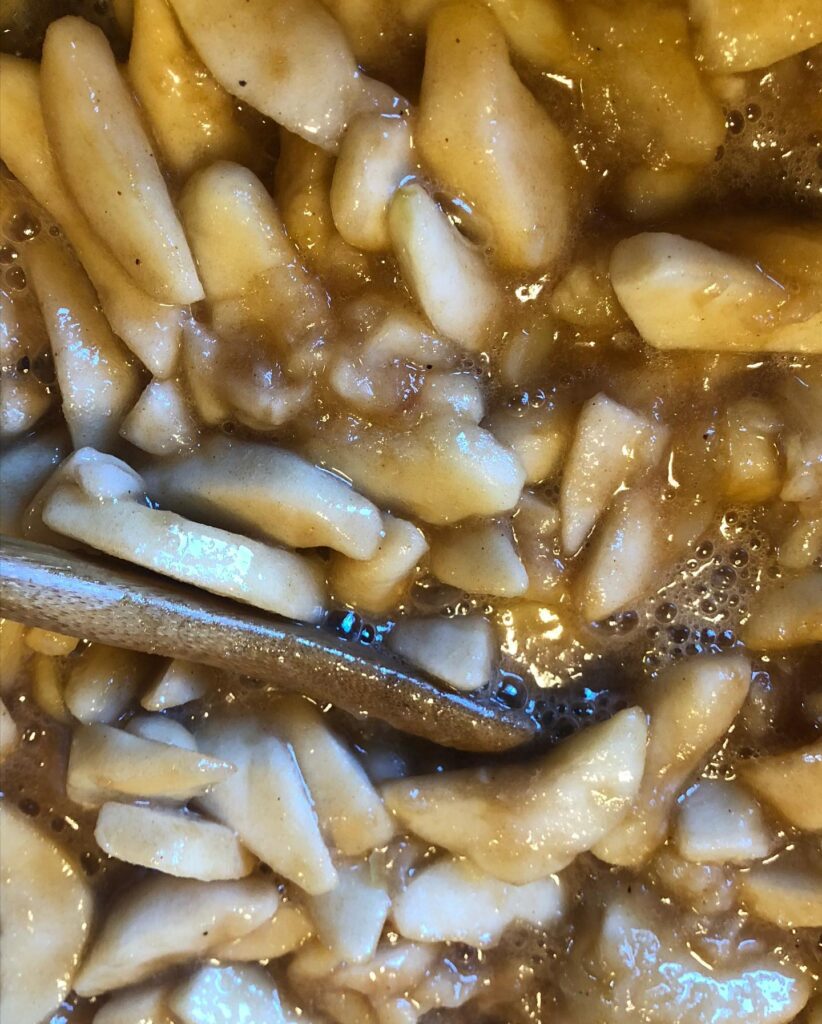
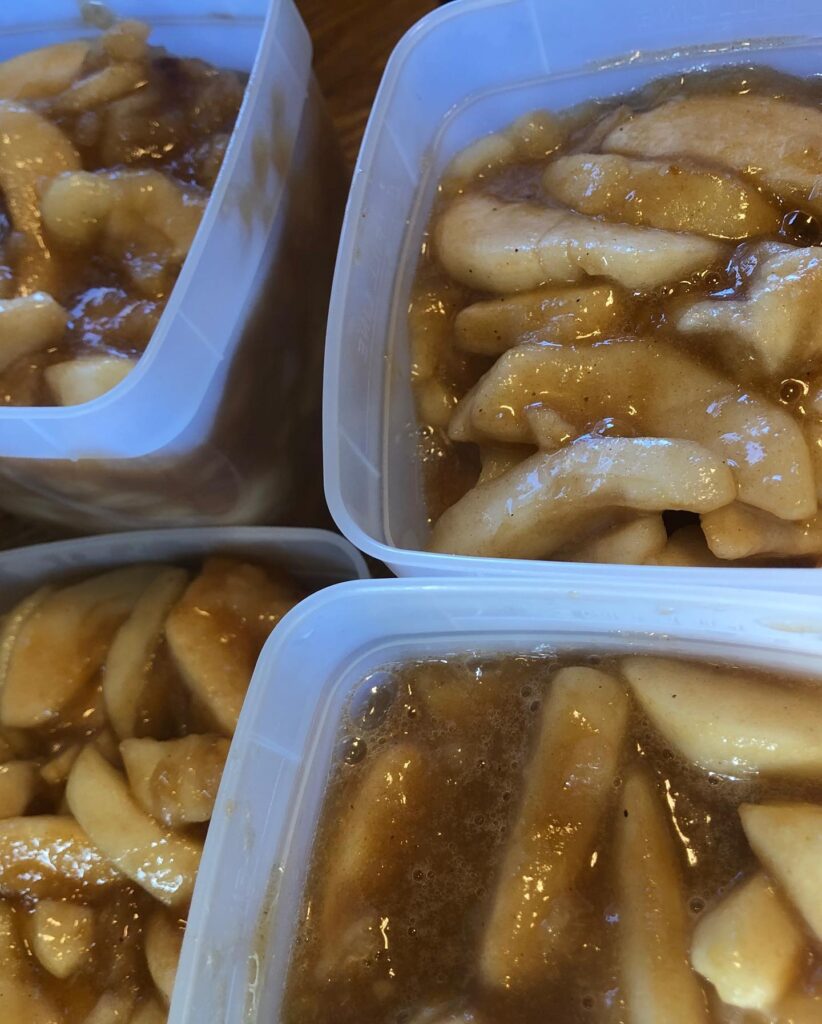
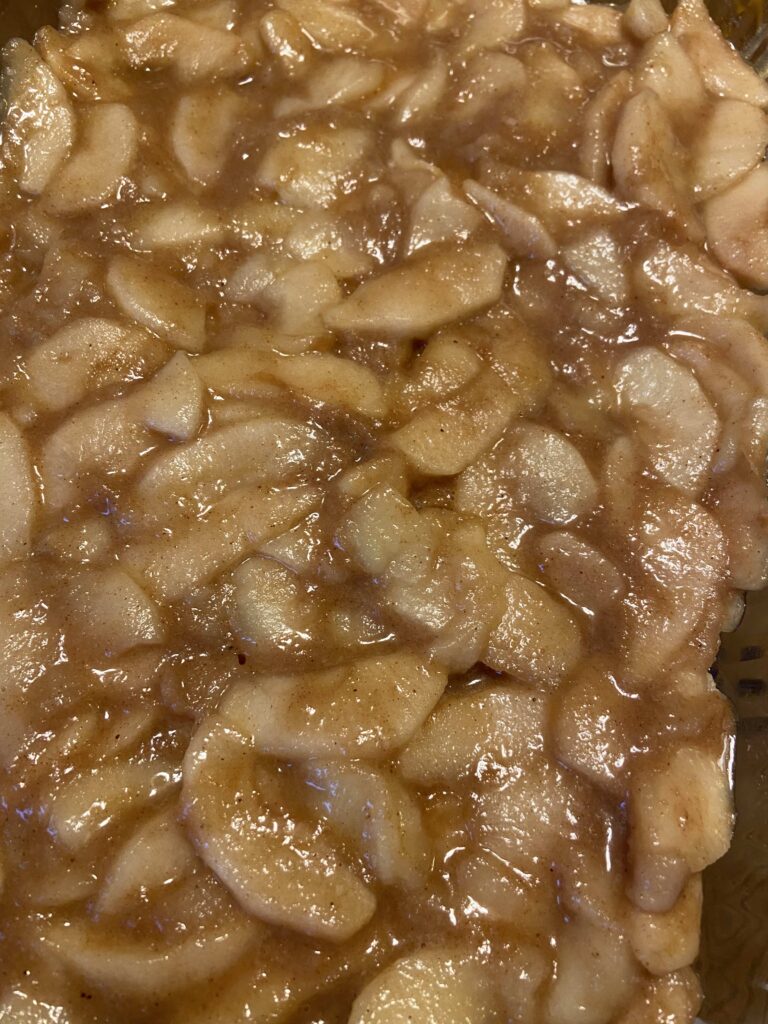
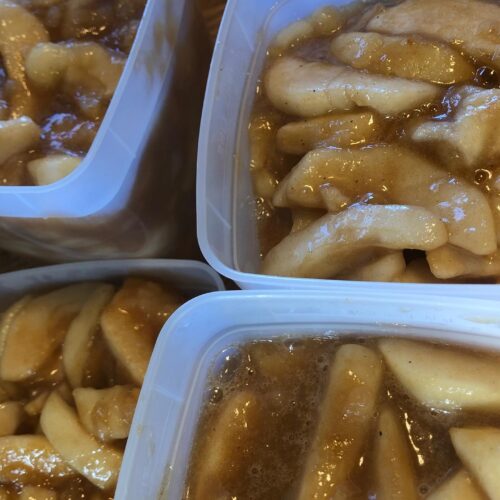
Place sliced apples in a large kettle (I love my Dutch oven here). Mix sugar, flour, cinnamon, and nutmeg in a small bowl. Stir into apples. Let the apples and spices stand for 30 min to allow the juices to flow. Stir in lemon juice. Place apples on the stove and heat over medium heat until the mixture thickens, stirring often. This should take approximately 20 minutes. Pour into freezer safe quart containers (I love the Arrow containers I have linked below for this). Allow containers to cool with the lids ajar for 1-2 hours. Cover and label. Place apple pie filling in the freezer. When you are ready to use them, pull out of the freezer and place in the refrigerator 1-2 prior to using.  Keep reading for a great recipe that uses these delightful containers of apples!

Oh, and save those peels and cores! You can make a great apple scrap jelly with those. Get the recipe here!

Prepped in 5 minutes flat Apple Bars 

Ready to bake with this great apple pie filling, but not feeling a pie? Let me share what I love to throw together when I need a dessert and am short on time to prep. 

Your Ingredients

  • 1 ½  cups all purpose flour
  • ½ cup oil (whatever oil suits you: olive, vegetable, coconut)
  • 1 teaspoon salt 
  • 2 tablespoons milk 
  • ¼ teaspoon cinnamon (optional)
  • ¼ teaspoon nutmeg (optional) 
  • 1 tablespoon sugar 
  • 1 quart thawed apple pie filling

Your Steps

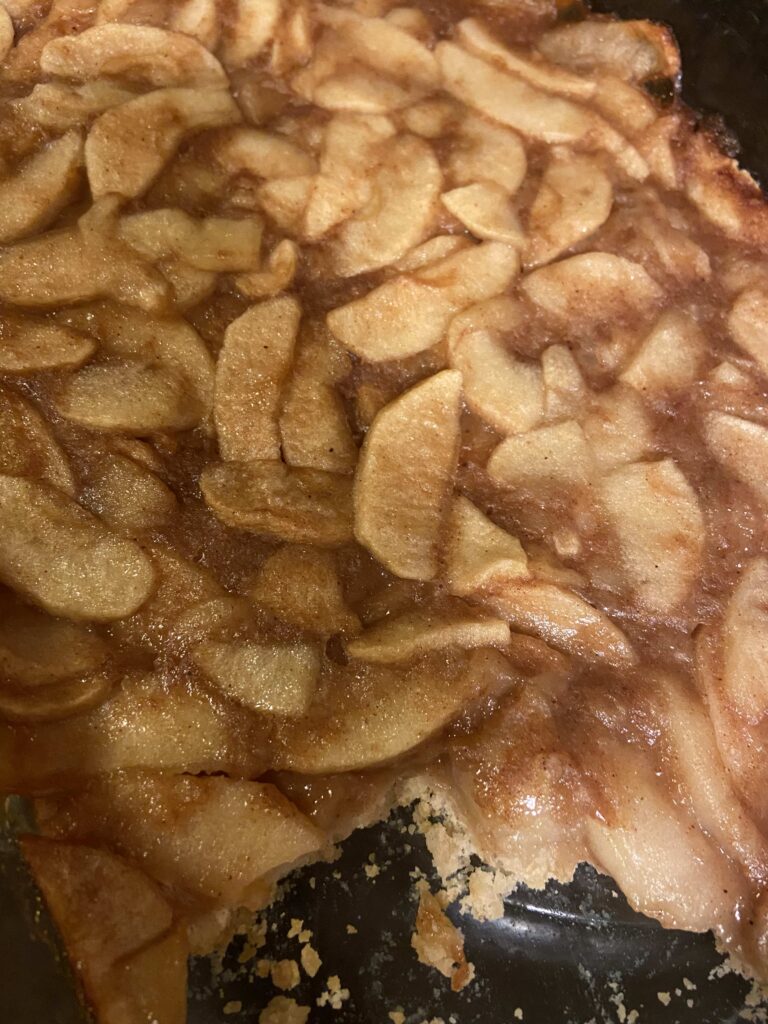
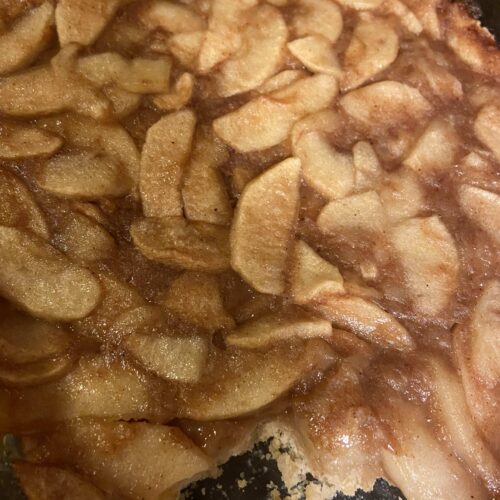
Preheat the oven to 450 degrees. While the oven is preheating, combine all the ingredients besides the pie filling in a small bowl. It will be moist. Using your fingers, press the crust into an ungreased brownie pan (8×8 or 11×7). If you don’t have that size, a regular 9×13 pan works just fine too! It will just be a thin crust. 

Spread apple pie filling evenly over the crust. That’s it. Place in the oven and bake for 15 minutes at 450 degrees. Lower the temperature to 350 degrees and bake an additional 20-30 minutes, depending on the size of your pan. Twenty minutes was perfect when I used a 9×13 pan. 30 minutes if you use a brownie pan instead. 

If you are looking for a “healthy” apple bar, serve it up with vanilla Greek yogurt. But a scoop of ice cream right out of the oven would be delicious too!


Tools of the trade

This is my go to pan. I really appreciate that it’s between a brownie pan and a cake pan.

These are seriously awesome. They freeze well and double as leftover containers for us when we use whatever was frozen in them.

Cast iron may be heavy, but does it ever cook nice. I also adore that it can go from stove top to oven for all my baking and roasting needs.

Looking for other recipes? Check out the page below:

For the Freezer Apple Pie Filling

Sliced apples and five simple ingredients combine to make this perfect for the freezer apple pie filling.
5 from 1 vote
Prep Time 30 minutes
Cook Time 10 minutes
Course Dessert
Cuisine American
Servings 12

Ingredients
  

  • 6 pounds of apples peeled, cored and sliced after measuring out your weight
  • 1 1/2 cups sugar
  • 1/4 cup flour
  • 1 1/2 teaspoon cinnamon
  • 1/4 teaspoon nutmeg
  • 2 tablespoons lemon juice

Instructions
 

  • Place sliced apples in a large kettle.
  • Mix sugar, flour, cinnamon, and nutmeg in a small bowl. Stir into apples.
  • Let the apples and spices stand for 30 min to allow the juices to flow.
  • Stir in lemon juice.
  • Place apples on the stove and heat over medium heat until the mixture thickens, stirring often, about 20 minutes.
  • Pour into freezer safe quart containers.
  • Allow containers to cool with the lids ajar for 1-2 hours. Cover and label. Place apple pie filling in the freezer.
  • When you are ready to use them, pull out of the freezer and place in the refrigerator 1-2 prior to using.
Keyword apple bars, apple dessert, apple pie filling, apple recipe, apples, dessert
Tried this recipe?Let us know how it was!
Print Recipe
5 from 1 vote

Apple Pie Filling Quick Apple Bars

Apple pie filling frozen in the fall provides the delicious base for these quick and easy bars.
Prep Time10 minutes
Cook Time40 minutes
Course: Dessert
Cuisine: American
Keyword: apple bars, apple pie filling, apples, dessert
Servings: 9

Ingredients

  • 1 ½ cups all purpose flour
  • ½ cup oil whatever oil suits you: olive, vegetable, coconut
  • 1 teaspoon salt
  • 2 tablespoons milk
  • ¼ teaspoon cinnamon optional
  • ¼ teaspoon nutmeg optional
  • 1 tablespoon sugar
  • 1 quart thawed apple pie filling

Instructions

  • Preheat the oven to 450 degrees.
  • While the oven is preheating, combine all the ingredients besides the pie filling in a small bowl. It will be moist.
  • Using your fingers, press the crust into an ungreased brownie pan (8×8 or 11×7).
  • Spread apple pie filling evenly over the crust.
  • Place in the oven and bake for 15 minutes at 450 degrees.
  • Lower the temperature to 350 degrees and bake an additional 20-30 minutes, depending on the size of your pan.

From the Garden Midwest Harvest Soup

Last Updated on August 8, 2022 by Jess

Summer is winding down in Northern Wisconsin and that means it’s turning to my favorite season. No, not autumn. Okay, I adore autumn. But with autumn comes soup season! A large kettle of soup, a salad, and some fresh baked sourdough bread just can not be beat, and luckily I love making it all. Since the weather dipped into the lower 30’s last week, I had to put together a new soup. I talked with my lady friends, and we christened it Midwest Harvest Soup. I think it is incredibly fitting. 

Picture it: the end of garden season. You are harvesting the last of your tomatoes, peppers, and zucchini. Maybe you grew onions too. And it is also time to clean out the freezer because it is almost hunting season which means a new batch of venison to process and store in the freezer. You want to use it all up. This, my friends, is where a Midwest Harvest Soup comes into play. 

Before we begin…

Let me share that each year, we process our own venison. While doing so, we grind and combine some of it with pork butt 50/50 and mix in the seasonings that go with Italian sausage. We dig the mixture put together by Taste of Lizzy T. We freeze our version of Italian sausage in one pound packages and pull it out for all our Italian dishes; think: pasta, baked ziti, etc. It’s fantastic, adds tons of flavor, and keeps the fat down since the pork is only 50% of the mixture. You can bet that if a recipe of mine calls for Italian sausage, I am using this venison version. 

Is it cold where you’re at today? Or do you just love soup like me? Let’s get simmering up a batch of this delicious Midwest Harvest Soup to warm your bellies and your souls. 

Your Ingredients: 

  • 1 pound Italian sausage
  • ¼ cup Italian seasoned bread crumbs
  • ¼ cup finely diced onion
  • pepper, to taste (¼ – ½ teaspoon)
  • 2 cups chopped sweet pepper (any color) 
  • 1 cup chopped onion 
  • ½ tablespoon minced garlic
  • ½ teaspoon pepper 
  • ¼ teaspoon salt
  • 1 tablespoon olive oil 
  • 3 cups chopped tomatoes
  • 3 cups chopped zucchini, skins on
  • ½ tablespoon dried oregano
  • ½ tablespoon dried basil 
  • 5 cups beef broth (I dig Orrington Farm’s beef base)
  • 2 cups water
  • ¾ cup orzo 

Your Steps

Preheat oven to 425 degrees and prepare a baking sheet by lining it with foil. Combine Italian sausage, bread crumbs, onion, and ¼ teaspoon pepper. Form into 1-1 ½ inch meatballs and place on the baking sheet. Bake for 15-20 minutes, or until cooked through. 

Meanwhile, heat olive oil in a large Dutch oven. Add sweet peppers, onion, garlic, salt, and pepper. Cook 6-8 minutes, until the vegetables have begun to soften. Add tomatoes, zucchini, oregano and basil, cooking an additional 6-8 minutes, stirring often. Add broth and water. Stir in meatballs. Bring to a boil and add uncooked orzo. Simmer for 9-12 minutes, until orzo is cooked through. 

Of course, you should serve this Midwest Harvest soup with crusty, fresh bread and a side salad for good measure. But even if you don’t have those things on hand, a warm bowl of soup is delightful all on its own. 

Note

It will thicken over a few days, so if you are preparing this with the intent of eating it over a few days like I do, know that it will become more stew like in the coming days. If that isn’t your jam, you can always add an additional cup or two of beef broth.

Tools of the Trade

This broth base is amazing. It allows you to control the amount of sodium when you make your stock. It doesn’t get weird and clumpy like other stock bases I have used and is my go to in our home.

I ADORE my cast iron Dutch Oven from The Lodge. The enamel makes me worry less about rust and oh man, it just makes soups better.

Midwest Harvest Soup

End of the season harvests combine with orzo and Italian sausage meatballs to create this comforting and warm you soul Midwest Harvest Soup.
Prep Time 20 minutes
Cook Time 30 minutes
Total Time 50 minutes
Course Main Course
Cuisine American
Servings 6

Ingredients
  

  • 1 pound Italian sausage
  • ¼ cup Italian seasoned bread crumbs
  • ¼ cup finely diced onion
  • ¼ teaspoon pepper
  • 2 cups chopped sweet pepper any color
  • 1 cup chopped onion
  • ½ tablespoon minced garlic
  • ½ teaspoon pepper
  • ¼ teaspoon salt
  • 1 tablespoon olive oil
  • 3 cups chopped tomatoes
  • 3 cups chopped zucchini skins on
  • ½ tablespoon dried oregano
  • ½ tablespoon dried basil
  • 5 cups beef broth
  • 2 cups water
  • ¾ cup orzo

Instructions
 

  • Preheat oven to 425 degrees and prepare a baking sheet by lining it with foil or parchment paper.
  • Combine Italian sausage, bread crumbs, onion, and ¼ teaspoon pepper.
  • Form into 1-1 ½ inch meatballs and place on the baking sheet. Bake for 15-20 minutes, or until cooked through.
  • Meanwhile, heat olive oil in a large Dutch oven. Add sweet peppers, onion, garlic, salt, and pepper.
  • Cook 6-8 minutes, until the vegetables have begun to soften.
  • Add tomatoes, zucchini, oregano and basil, cooking an additional 6-8 minutes, stirring often.
  • Add broth and water. Stir in meatballs. Bring to a boil and add uncooked orzo.
  • Simmer for 9-12 minutes, until orzo is cooked through.
Keyword from the garden, Italian sausage, orzo, soup, soups and stews
Tried this recipe?Let us know how it was!

Kick in the Taste buds Cucumber and Pepper Relish

Last Updated on September 6, 2021 by Jess

A blog or two ago, I wrote about my zucchini crop and how it is producing beautifully this year. I could copy and paste that paragraph and exchange each “zucchini” with “cucumber.” It’s been a CRAZY cucumber year. A year ago, I believe I grew enough to perhaps make one batch of pickles. This year, I can not keep up and have been giving them away. Gardening life, right? It keeps you on your toes. Because of this bumper crop, I have put together more than one batch of this fantastic cucumber and pepper relish. 

I don’t know about you, but when I hear relish, I think of that neon green stuff you put on top of Chicago style hot dogs. Not my jam. This, my friends, is not that kind of relish. Can you still eat this on top of hot dogs? Sure thing. But I will tell you what, I love this spice-ful relish on the side of any grilled dinner. So freaking good. 

I can’t quite figure out how to describe the flavor. The cinnamon, all spice, cloves, and mustard seed provide a depth of flavor that is unreal. It’s full of chunky cut vegetables that are slightly sweet from the brown sugar and sour from the vinegar. Let’s just say this, it’s a party for your tastebuds. 

One more thing before we get started! This is a great recipe to use up those cucumbers that “get away from you” in the garden. You know the ones, hiding under leaves until they are the size of your forearm. Since you are dicing the cucumbers, I reccommend cutting whole cucumbers in half length wise and then in half once again (as if you are making spears). Then you can cut out the seeds and dice from there. You’re looking for ½ inch chunks. 

Okay, I lied.

I have ONE more thing. This recipe does require time to sit. You will want to start prepping about 24 hours prior to when you want to actually waterbath can it. There isn’t a lot of actually work to do beyond the chopping, but know that you will need to plan ahead for this cucumber and pepper relish.

Let’s get canning! 

Your Utensils:

  • Water bath canner with rack and lid
  • Eight pint jars with lids and rings (wide or narrow mouth)
  • Large, non reactive kettle to cook the cucumbers and onions in the pickling brine

Before you begin…

If you’re new to canning, be sure to check out Ball’s Book of Canning or The National Center for Home Food Preservation for more detailed information. I will give you the low down, but it will be short and sweet. You will want to read up more, I promise 🙂

Your Ingredients

  • 8 cups chopped cucumbers 
  • 4 cups chopped sweet peppers (any combination of green, red, yellow, orange)
  • 2 cups chopped onion 
  • 1 tablespoon turmeric 
  • ½ cup canning salt 
  • 4 quarts of water, divided
  • 1 ½ cups brown sugar 
  • 1 quart vinegar, 5-6% acidity 
  • 2 sticks cinnamon 
  • 1 tablespoon mustard seed 
  • 2 teaspoons whole allspice 
  • 2 teaspoons whole cloves 

Combine chopped cucumbers, bell peppers, and onions in a large, non-reactive kettle that has a cover. Sprinkle turmeric on top. Combine 2 quarts of water and canning salt, stirring until the salt has dissolved. Pour the water over the vegetables. Cover and let rest in the refrigerator. 

Rest Time: 3-4 Hours 

Using the cover of the kettle, carefully drain off the water. Pour remaining 2 quarts of cold water over the chopped vegetables. Cover and let rest in the refrigerator. 

Rest Time: 1 Hour

While vegetables are resting, place cinnamon, mustard seed, all spice, and cloves in a spice bag (I don’t have spice bags on hand, so I use a tea pot “fill your own tea bags” that I can seal. They work marvelously. I find them at the local natural food store.) If you don’t have anything on hand, these drawstring soup bags would work great! Place vinegar, brown sugar, and spice bag in a medium saucepan and bring to a boil over medium heat, stirring to help dissolve the brown sugar. 

Once 1 hour has elapsed, drain water off of vegetables. Pour hot pickling liquid over chopped vegetables and allow to cool. Cover and replace in the refrigerator one more time, likely overnight. 

Rest Time: 12-18 Hours

After rest time (I just reread that, and it made me think of being in Kindergarten. Ah, the simpler times 🙂 ), begin to prepare jars, lids, and rings by washing and keeping warm. I generally set the jars in the rack of canner and have it rest above the water.  Begin heating the water bath canner (make sure water will be at least one inch above jars once submerged). It is better to have too much water than too little. 

Remove the spice bag. Bring the cucumber and pepper relish with the vinegar mixture to a boil over medium-high heat, be sure to stir so as not to burn to the bottom. Ladle into hot pint jars, leaving ½ inch headspace. Remove air bubbles, wipe the rim with a clean, damp cloth, and add lid and ring, tightening to finger tip tight. 

Lower jars into the simmering waterbath canner. Cover, increase heat, and bring to a boil. Once a boil is reached, process for 10 minutes, adjusting for altitude (since I am over 1000 feet, I add 5 minutes, but check online for your own location). Remove the canner from heat, and allow jars to rest 5 min. Remove from the canner and allow to cool at least 12 hours before storing jars. 

There is no need to tighten rings. In fact, it is recommended they are removed entirely while storing. Generally, I get between 5-6 pint jars with this recipe. 

TOOLS OF THE TRADE

While you can truly can with any deep kettle and rack to keep the jars off the bottom of the canner, it is definitely easier if you invest in a few of the tools listed below!

Looking for more ways to savor summer in a jar? Check out the link below!

Cucumber and Pepper Relish

A little bit of spicy. A little bit of sweet. This cucumber and pepper relish uses all those cucumbers you grew! A dance for your tastebuds!
Prep Time 1 hour
Cook Time 15 minutes
Rest Time 22 hours
Course Side Dish
Cuisine Canning
Servings 12 people

Equipment

Ingredients
  

  • 8 cups chopped cucumbers
  • 4 cups chopped sweet peppers any combination of green, red, yellow, orange
  • 2 cups chopped onion
  • 1 tablespoon turmeric
  • ½ cup canning salt
  • 4 quarts of water divided
  • 1 ½ cups brown sugar
  • 1 quart vinegar 5-6% acidity
  • 2 sticks cinnamon
  • 1 tablespoon mustard seed
  • 2 teaspoons whole allspice
  • 2 teaspoons whole cloves

Instructions
 

  • Combine chopped cucumbers, bell peppers, and onions in a large, non-reactive kettle that has a cover. Sprinkle turmeric on top. Combine 2 quarts of water and canning salt, stirring until the salt has dissolved. Pour the water over the vegetables. Cover and let rest in the refrigerator for 3-4 hours.
  • Using the cover of the kettle, carefully drain off the water. Pour remaining 2 quarts of cold water over the chopped vegetables. Cover and let rest in the refrigerator for one hour.
  • While vegetables are resting, place cinnamon, mustard seed, all spice, and cloves in a spice bag. Place vinegar, brown sugar, and spice bag in a medium saucepan and bring to a boil over medium heat, stirring to help dissolve the brown sugar.
  • Once 1 hour has elapsed, drain water off of vegetables. Pour hot pickling liquid over chopped vegetables and allow to cool. Cover and replace in the refrigerator one more time for 12-18 hours.
  • After the vegetables have rested, begin to prepare jars, lids, and rings by washing and keeping warm.
  • Remove the spice bag. Bring the chopped vegetable and vinegar mixture to a boil over medium-high heat, be sure to stir so as not to burn to the bottom. Ladle into hot pint jars, leaving ½ inch headspace. Remove air bubbles, wipe the rim with a clean, damp cloth, and add lid and ring, tightening to finger tip tight.
  • Lower jars into the simmering water bath canner. Cover, increase heat, and bring to a boil. Once a boil is reached, process for 10 minutes, adjusting for altitude (since I am over 1000 feet, I add 5 minutes, but check online for your own location). Remove the canner from heat, and allow jars to rest 5 min. Remove from the canner and allow to cool at least 12 hours before storing jars.
Keyword Canning, cucumbers, peppers, relish
Tried this recipe?Let us know how it was!