For the Holidays Cranberry Apple Preserves

Last Updated on October 2, 2021 by Jess

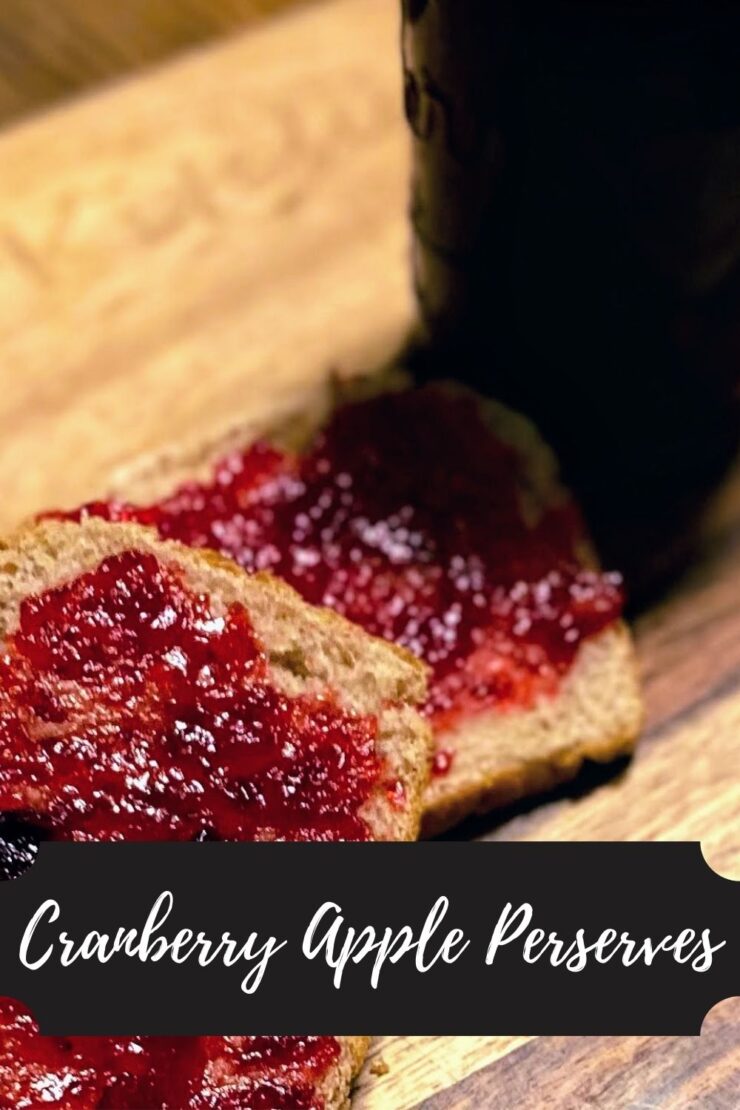
“Tis the season for cranberries, right? Now if you ask me, any season is cranberry season. But right now, fresh, whole cranberries are fully stocked at all the grocery stores, just yearning to create something delicious in your kitchen. I know Thanksgiving is over, but that doesn’t mean your time with cranberries needs to be. Give these cranberry apple preserves a try! 

One of my favorite things about living in Wisconsin is that all things cranberry are readily available. I thought that was standard in all states. I was telling a friend in Texas how much I adore cranberry wine (I am not a fancy wine girl, clearly). Her response was, “THEY MAKE CRANBERRY WINE?!” Yup, they do. And it’s delish. If you’re interested, check out Door Peninsula Winery (I love their Cranbernet) or Three Lakes Winery (I love…all their wine. All of it.) They even ship to lots of states! 

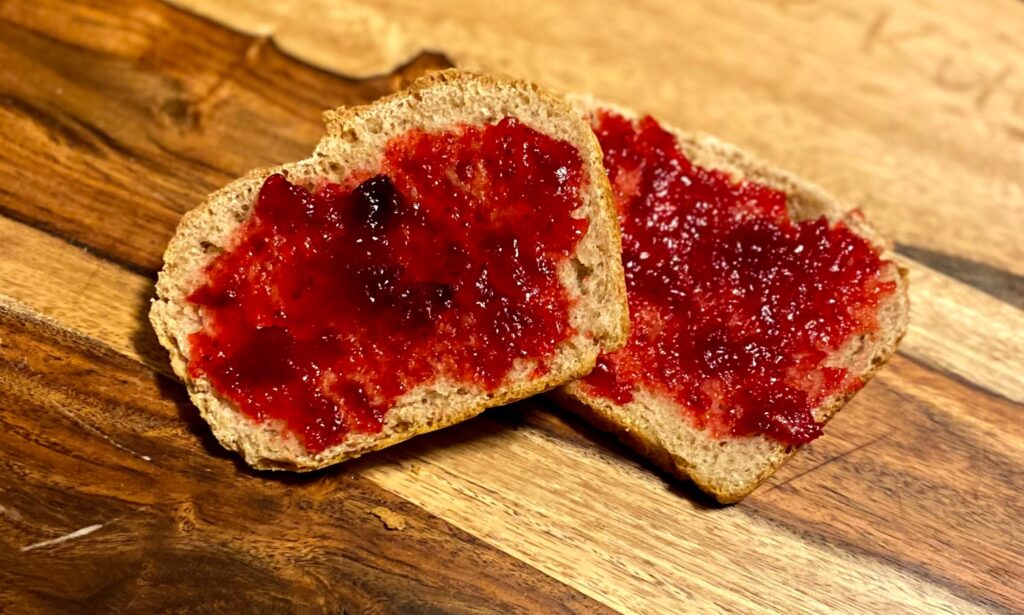
I will buy anything cranberry related. Add some citrus, and I am in heaven. So this cranberry apple preserve recipe is a great one. It has all the deliciousness of a well prepared cranberry sauce while being the consistency of jam. Can you go wrong?! Even if you aren’t a typical canner, you can do this recipe. 

Before we Start, The supplies

This cranberry apple preserves recipe will result in approximately seven 8 ounce jelly jars. You can use wide mouth or narrow mouth jars. Just be sure you have rings and lids for them and that they will all fit in your canner at once. 

You will need a water bath canner or large stock pot with a lid. The jars need to be off the bottom of the pot. A water bath canner will have a rack to use if you go that route. If you use a stock pot, I would invest in canning racks. You can also put a towel down in a pinch, but it is MESSY in terms of getting water everywhere.  

It is also helpful to have the tools in a canning kit like this, but it isn’t necessary. Canning would be crazy challenging without the jar funnel and jar tongs. The lid lifter is also very handy. 

New to canning? Check out the Ball’s Book of Canning or The National Center for Home Food Preservation for more detailed information. I will give you the low down, but it will be short and sweet. You will want to read up more, I promise  

Your Ingredients

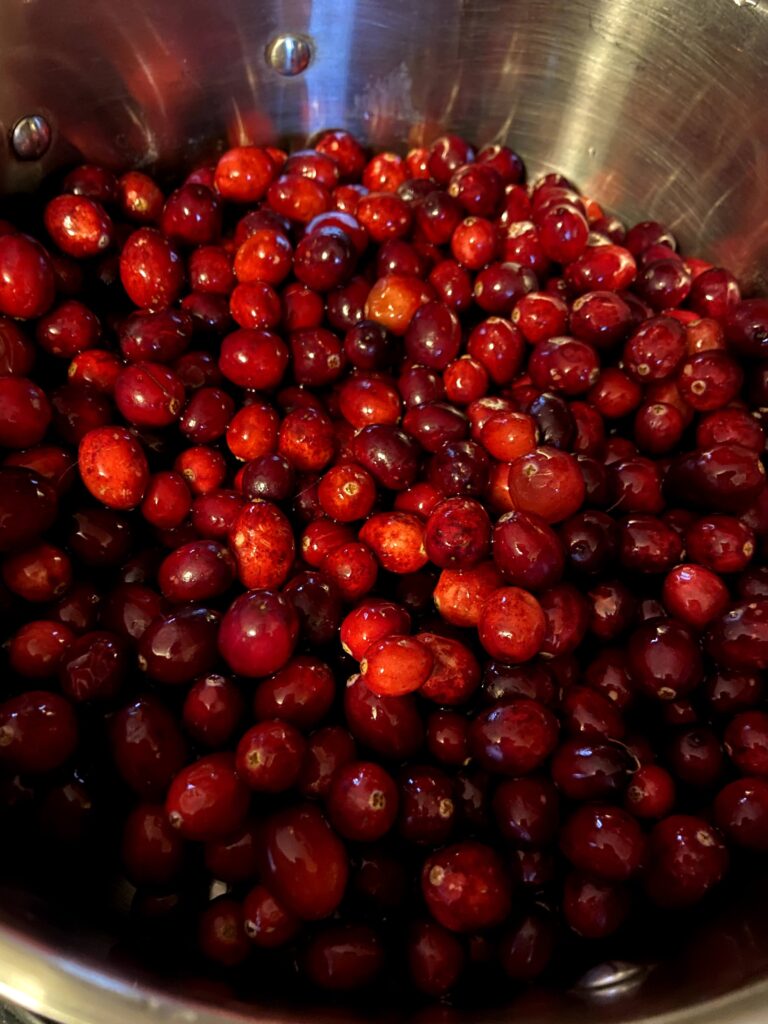
  • 24 ounces whole cranberries, rinsed and picked through 
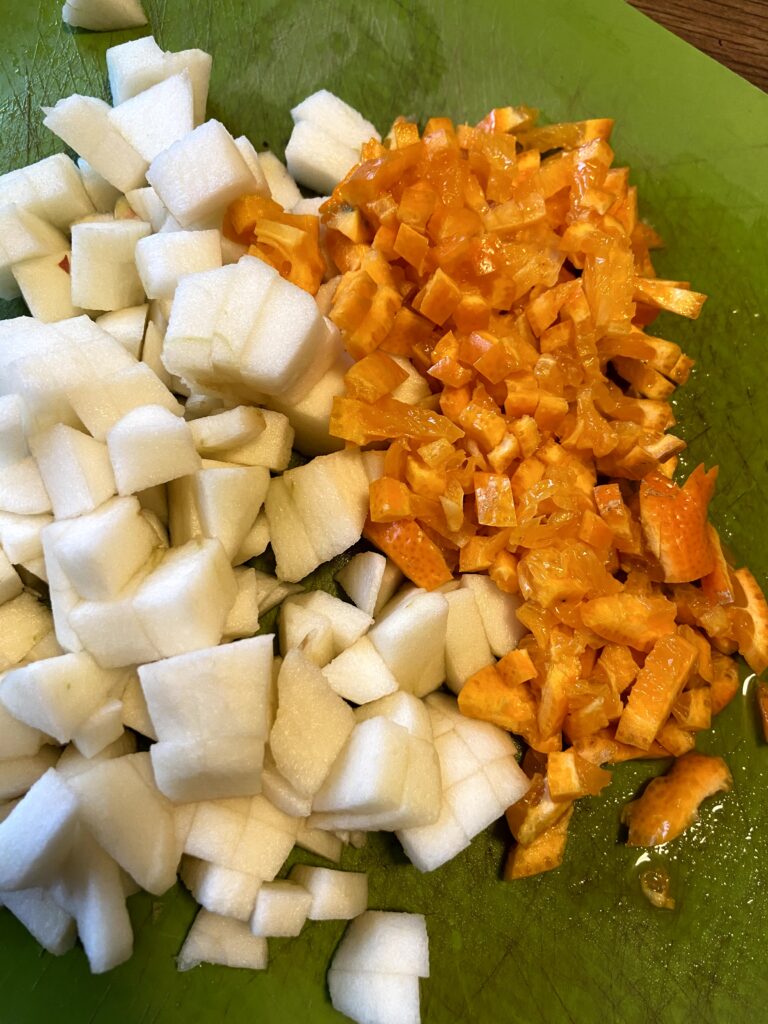
  • 3 apples, cored, peeled and diced
  • 1 clementine orange, chopped finely with peels
  • 2 ¾ cup sugar
  • 2 cups water 
  • ⅓ cup honey 

Your Steps to Cranberry Apple Preserves 

To begin, prepare your water bath canner. Fill the canner with enough water so that once the jars are in the canner, they will be covered by at least one inch of water. Too much water is better than not enough, but remember that some water will be displaced by the jars. Cover and begin to heat over a medium heat. 

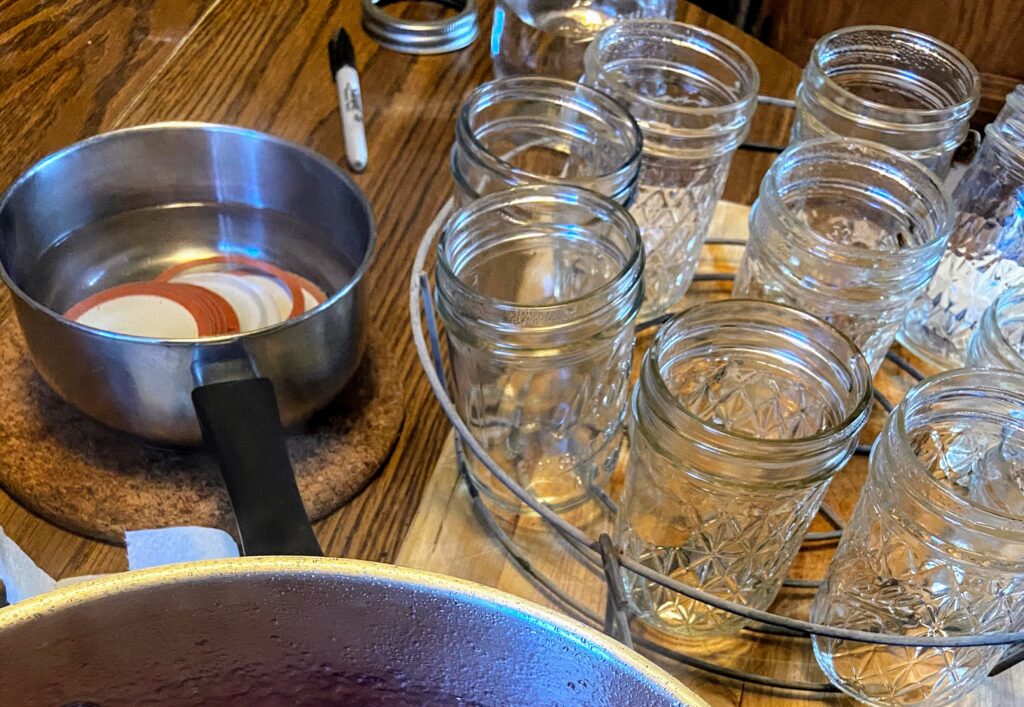
You will also need to wash and prepare 8 ounce canning jars (approximately 7 jars will be produced with this recipe). I typically do this while my preserves are just starting to cook down. Wash rings, lids, and jars. Place jars in the rack in the canner, elevated above the water. This will keep them warm. Follow directions for your specific lids. I typically wash and place in simmering water on the stove. 

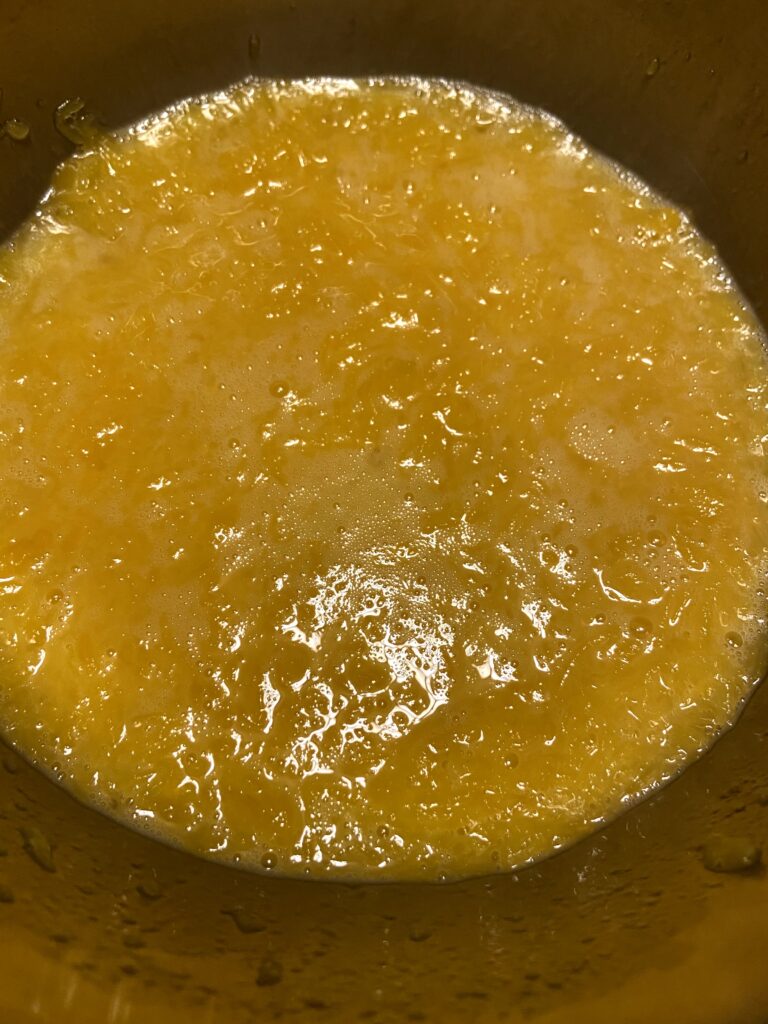
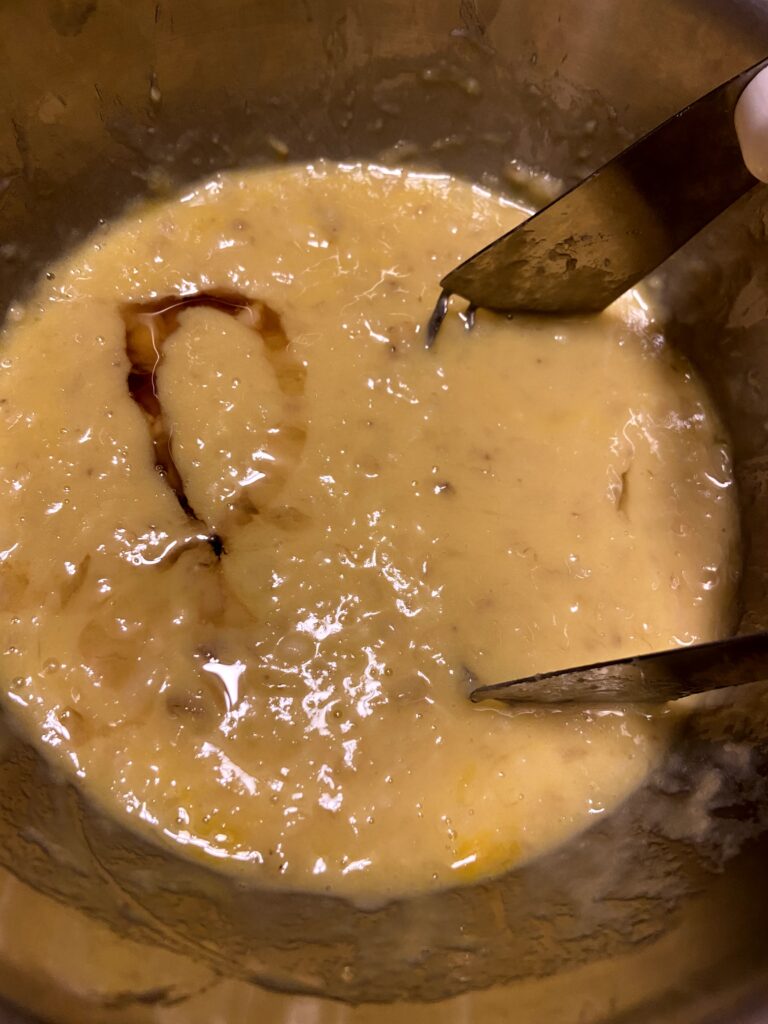
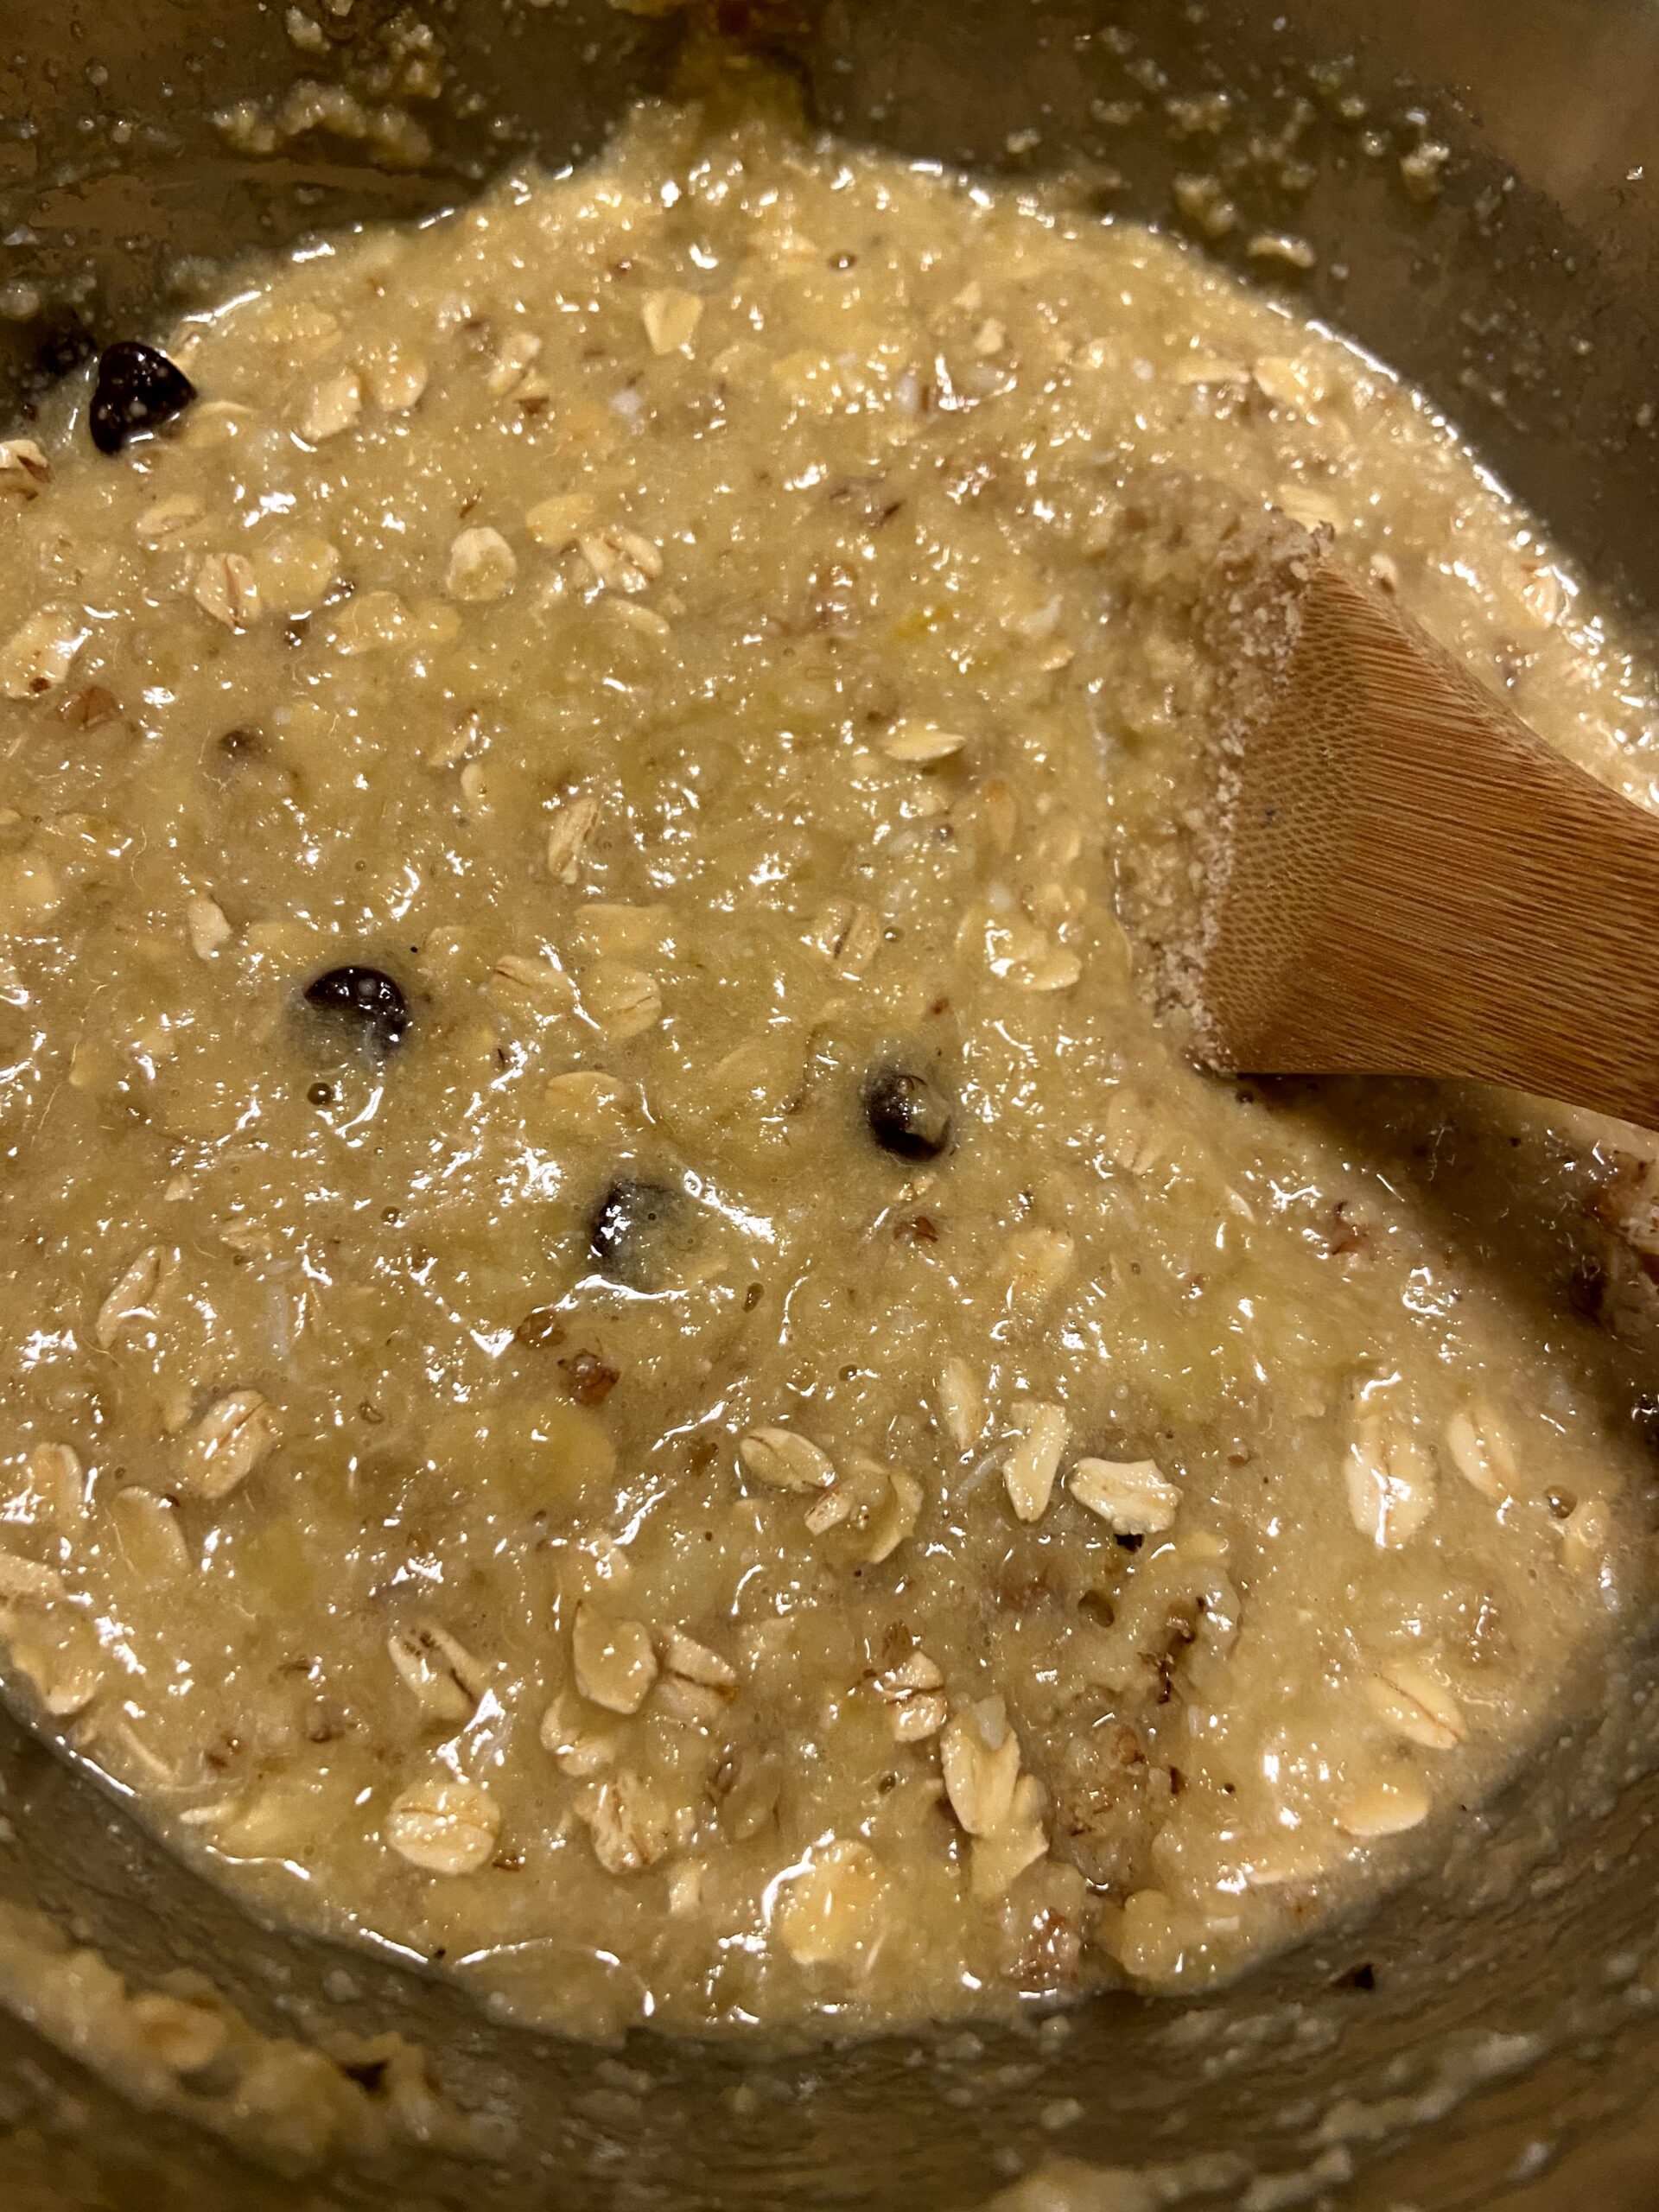
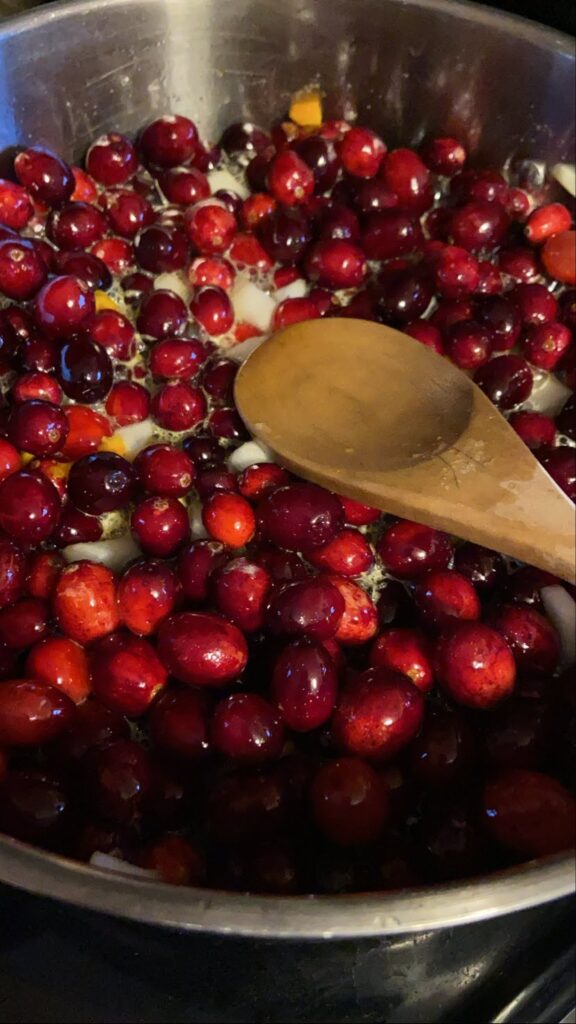
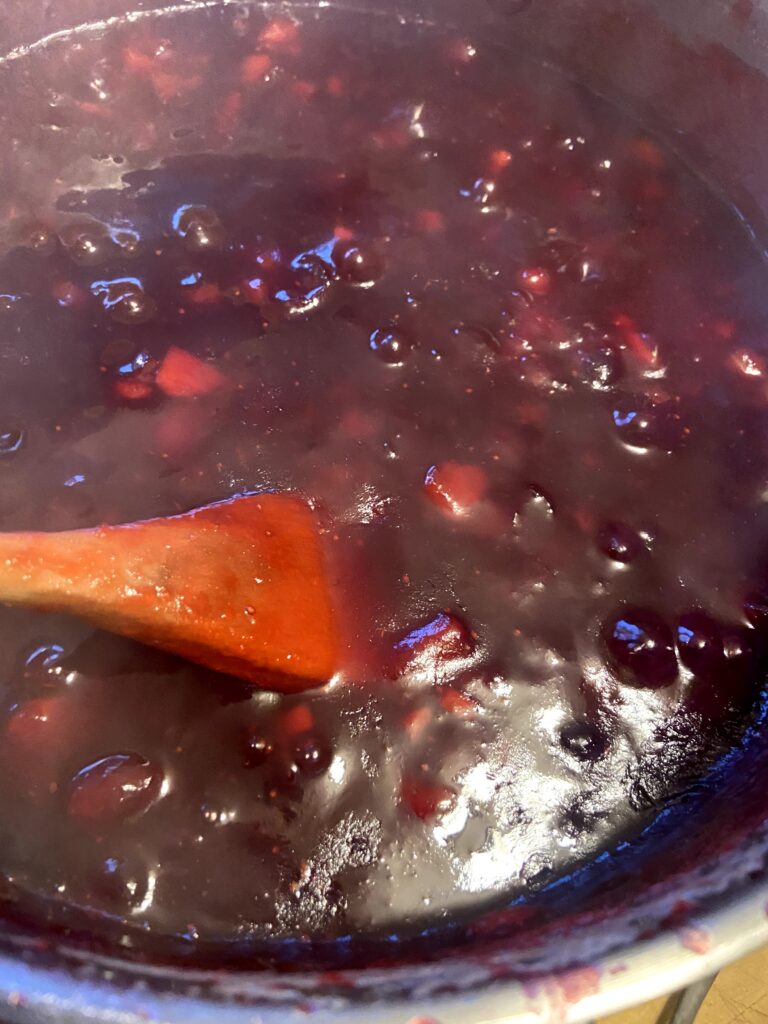
Now, begin to prepare the jam. Combine all ingredients in a large saucepan. Bring to a boil over a high heat, stirring until the sugar dissolves. Continue to cook and stir over the high heat until the mixture reaches 219 degrees (However, for every 1000 feet of altitude you have, subtract 2 degrees). Once temperature is reached, remove from heat. (Note: It takes some time to reach this temperature. But it will go from 214 degrees to done quicker than you expect. Just watch the temperature closely)

Time to Can!

Ladle hot preserves into hot jars, leaving ¼ inch headspace. Wipe rims with a damp cloth, add lids and adjust band to fingertip tight. Place jars into water bath canner and process for 15 minutes. Turn off heat and remove cover. Allow jars to cool 5 minutes in the canner, then remove and allow to cool for 12-24 hours. Do not retighten bands. Check seal after cool to be sure they are self-stable. Label and store. Any jars that did not seal can be stored in the refrigerator. 

Tools of the Trade

Not a Canner (…yet)? 

You can 100% complete this recipe and store it in the refrigerator. Fill the jars with hot jam, wipe, adjust lid and ring. Allow to cool before storing in the refrigerator. Since you will likely get about 7 jars of jam, I would recommend cutting the recipe in half. 

Ready to can and preserve more?

Check out my pages for canning and preserving for other inspiration below:

sourdough and jam

Cranberry Apple Preserves

As the weather gets cooler, cranberries become a tasty, tart treat. These preserves are sure to make your taste buds dance with the combination of cranberry, apple, and orange.
Prep Time 5 minutes
Cook Time 40 minutes
Waterbath 15 minutes
Servings 12

Equipment

Ingredients
  

  • 24 ounces whole cranberries rinsed and picked through
  • 3 apples cored, peeled and diced
  • 1 mandrin orange chopped finely with peels
  • 2 ¾ cup sugar
  • 2 cups water
  • cup honey

Instructions
 

  • Prepare your water bath canner. Fill the canner with enough water so that once the jars are in the canner, they will be covered by at least one inch of water. Cover and begin to heat over a medium heat.
  • Wash and prepare 8 ounce canning jars (approximately 7 jars will be produced with this recipe).
  • Now, begin to prepare the jam. Combine all ingredients in a large saucepan.
  • Bring to a boil over a high heat, stirring until the sugar dissolves.
  • Continue to cook and stir over the high heat until the mixture reaches 219 degrees (However, for every 1000 feet of altitude you have, subtract 2 degrees).
  • Once temperature is reached, remove from heat.
  • Ladle hot preserves into hot jars, leaving ¼ inch headspace.
  • Wipe rims with a damp cloth, add lids and adjust band to fingertip tight.
  • Place jars into water bath canner and process for 15 minutes. Turn off heat and remove cover.
  • Allow jars to cool 5 minutes in the canner, then remove and allow to cool for 12-24 hours. Do not retighten bands. Check seal after cool to be sure they are self-stable. Label and store.

Notes

Any jars that did not seal can be stored in the refrigerator.
Tried this recipe?Let us know how it was!

A Sugar Cookie to Write Home About

Last Updated on October 21, 2022 by Jess

Holidays and baking. They go hand in hand, don’t they? I don’t know what it is about the holiday season, but it seems to bring out the baker in all of us. Maybe it’s the fact that we have less daylight, and we need to do something with our evenings. Maybe it’s because it’s chilly outside and we would just like to warm up the house a little with a preheated oven. Or maybe it’s simply that we are in the giving spirit and we love to show our family and friends we love them with delicious food. I know I can check yes to all those boxes. Because of this, we all need a great sugar cookie recipe in our back pocket. Guess what? I’ve got you covered 😉 

This sugar cookie recipe has been my go to for years and years. My sister in law claims it’s the only cookie that comes close to her mother’s recipe. My aunt makes special requests for these at all holidays. And my dad. He’s a health nut, but can’t say no to a perfectly baked sugar cookie. It warms my heart just thinking of him. 

I am leaving you here with simply the sugar cookie recipe. How you decorate is up to you. Me? I am a light glaze made with almond extract kind of gal. But others live in the school of thought that they love a regular frosting. Or perhaps you add sprinkles before baking and that’s it. Either way, you will have an amazing base of a sugar cookie to add to your cookie tray. 

Oh, and one more thing: This recipe doubles nicely! I’ll leave you will the smaller batch recipe and let you decide if you need to double it (you probably will want to 😉 )

Your Ingredients

  • ¾ cup butter, softened
  • 1 cup white sugar
  • 2 eggs 
  • 1 teaspoon almond extract
  • 2 ½ cups flour
  • 1 teaspoon baking powder
  • ½ teaspoon salt

Your Steps 

In a large bowl, cream butter and sugar until light and fluffy. Add eggs and almond extract. Beat until well combined. Stir in flour, baking powder, and salt. Form into a log, cover in plastic wrap, and chill at least 3 hours (or overnight). 

Preheat oven to 400 degrees. On a well floured surface, roll out dough, ⅓ of the log at a time. Roll ⅛” to ¼” of an inch thick, to your desired thickness. Cut using cookie cutters. Place cookies on ungreased cookie sheets. 

Bake 6-8 minutes, until the edges are just about to brown. Allow to cool 2 minutes before removing and placing on a wire rack to cool completely.

Looking for other baking treats? Check out my baking page below!

Tools of the Trade

These are some of my favorite tools in the kitchen!

Yum!

A Sugar Cookie to Write Home About

Sugar Cookies: the quintessential holiday baking treat! You're seven ingredients and a few hours from the best sugar cookie you'll ever eat!
Prep Time 15 minutes
Cook Time 6 minutes
Rest Time 3 hours
Course Dessert
Cuisine American
Servings 4 dozen

Ingredients
  

  • ¾ cup butter softened
  • 1 cup white sugar
  • 2 eggs
  • 1 teaspoon almond extract
  • 2 ½ cups flour
  • 1 teaspoon baking powder
  • ½ teaspoon salt

Instructions
 

  • In a large bowl, cream butter and sugar until light and fluffy.
  • Add eggs and almond extract. Beat until well combined.
  • Stir in flour, baking powder, and salt.
  • Form into a log, cover in plastic wrap, and chill at least 3 hours (or overnight).
  • Preheat oven to 400 degrees.
  • On a well floured surface, roll out dough, ⅓ of the log at a time. Roll ⅛” to ¼” of an inch thick, to your desired thickness.
  • Cut using cookie cutters. Place cookies on ungreased cookie sheets.
  • Bake 6-8 minutes, until the edges are just about to brown.
  • Allow to cool 2 minutes before removing and placing on a wire rack to cool completely.
Keyword baking, Cookies, holiday treats, sugar cookies
Tried this recipe?Let us know how it was!

Looking for other cookie inspiration?

Check out one of the recipes below!

Double Chocolate Chip Peppermint Cookies

Last Updated on September 28, 2021 by Jess

Do you ever envision a recipe and simply crave it for weeks? Thinking about how it might come together and how good it can taste? No? I am alone in this? I hope not. While I know it is still fall and not even Thanksgiving, I have been daydreaming about Double Chocolate Chip Peppermint Cookies for weeks. 

I am a sucker for all things peppermint. Candy Cane Chapstick? I stock up while they are in stores so have them year round. Peppermint mocha creamer? I can’t get enough. I even find myself treating myself to an Andes Candies Candy Bar at Kwik Trip whenever we have long car trips. Since we are living in the craziness of 2020, all the early Christmas decorations have me wanting peppermint even more. 

And while peppermint is divine, mixing it with chocolate takes it to a new level. I knew I needed a simple drop chocolate and peppermint cookie in my life, and I was certain others did too. This Double Chocolate Chip Peppermint Cookie came together nicely. Since it is drop cookie, it takes minimal work. Beyond the peppermint chips, the ingredients are pantry items that you likely have on hand. Always a big win in my book. 

I hope you give them a try. They dip so well in milk and get better the next day, taking on a brownie flavor that’s “close your eyes and enjoy” worthy. Yum. 

Your Ingredients

  • 2 sticks butter, softened
  • 1 cup brown sugar, packed
  • ½ cup white sugar
  • 2 eggs 
  • 1 ½ teaspoons vanilla extract
  • ½ teaspoon peppermint extract
  • 1 ¾ cup all purpose flour
  • ½ cup cocoa powder
  • 1 teaspoon salt 
  • 1 teaspoon baking soda
  • ½ cup peppermint chips
  • 1 cup chocolate chips

Your Steps to Double Chocolate Chip Peppermint Cookies

Preheat oven to 350 degrees. In a large bowl, cream butter, brown sugar, and white sugar until light and fluffy. Add eggs and extracts. Stir until well combined. 

If you are an awesome baker, you’ll mix the dry ingredients (flour, cocoa powder, salt and baking soda) in a separate bowl and then gradually add it to the wet ingredients, stirring until just combined. I HATE creating more dishes than I need to (the dishwasher here is named “Jess”), so I simply put the dry ingredients on top of one another, stir slightly to distribute the salt and baking soda, and call it good. This method has served me well. You do you though 😉 

Once the dry ingredients have been mixed in, add peppermint and chocolate chips. Fold in. Place dough on an ungreased baking sheet by the tablespoonful. Bake 8-11 minutes. Enjoy as all good cookies should, straight out of the oven (Okay, wait maybe 2 minutes so you don’t burn your mouth, but seriously, aren’t fresh baked cookies the best?!). Also, I ten out of ten recommend dipping in milk. Freaking yum. 

Looking for other sweet treats? Check out my baking page below!

Tools of the Trade

I love baking on silicone baking mats. Eliminates the waste that comes from parchment. Something I am passionate about.

I was gifted this set for Christmas a few years ago and it’s my go to when I bake cookies. Love it!

I can’t bake without wooden spoons. That’s all there is to it.

Double Chocolate Chip Peppermint Cookies

Is there any greater combination that chocolate and peppermint? They come together in an easy drop cookie!
Prep Time 20 minutes
Cook Time 8 minutes
Course Breakfast
Cuisine American
Servings 3 dozen

Ingredients
  

  • 2 sticks butter softened
  • 1 cup brown sugar packed
  • ½ cup white sugar
  • 2 eggs
  • 1 ½ teaspoons vanilla extract
  • ½ teaspoon peppermint extract
  • 1 ¾ cup all purpose flour
  • ½ cup cocoa powder
  • 1 teaspoon salt
  • 1 teaspoon baking soda
  • ½ cup peppermint chips
  • 1 cup chocolate chips

Instructions
 

  • Preheat oven to 350 degrees.
  • In a large bowl, cream butter, brown sugar, and white sugar until light and fluffy.
  • Add eggs and extracts. Stir until well combined.
  • In a separate bowl, combine flour, cocoa powder, salt, and baking soda. Add to wet ingredients slowly, stirring until just incorporated.
  • Add peppermint and chocolate chips. Fold in.
  • Place dough on an ungreased baking sheet by the tablespoonful. Bake 8-11 minutes.
Keyword chocolate and peppermint, Cookies, drop cookies, peppermint cookies
Tried this recipe?Let us know how it was!

Slow Cooker Italian Sausage Casserole

Last Updated on September 28, 2021 by Jess

I never utilize the slow cooker as often as I should. To the extent that I actually have a Pinterest board called, “Crockpot: Not Used Enough at My House.” What can I say? It’s fun to create silly names on Pinterest, right? That being said, once I pull out the slow cooker, I am all over it for a week or so. This week I began with making some crockpot applesauce. Then I roasted a ham (so easy!). Since my clean slow cooker was still on my counter, I decided to throw this little ditty together for dinner: Slow Cooker Italian Sausage Casserole. 

To me, this recipe has a “hot dish” feel about it. Never heard of Hot Dish? It’s the Midwest comfort food; A term used for casseroles that have a starch, a protein, and some vegetables, especially in Minnesota. Some may say it is even the state food in Minnesota. Often, the starch is a tater tot. Because of this, my husband told me I couldn’t name it a hot dish. We are also die hard Wisconsinites, so that may be why he declared it a casserole instead 😉 Want to learn more about hot dish and its history? Check it out here

But really, does the name matter?

Regardless of the name, this slow cooker Italian sausage casserole has comfort food written all over it. With many people working from home during this pandemic, it’s a great recipe that can be prepared mid afternoon with minimal prep work. If you have followed me much at all, you know I love to sneak extra vegetables in all I cook and this is no exception. This slow cooker Italian sausage casserole is chuck full of fresh vegetables that are kid friendly. My kids not only went for seconds, but thirds. They requested it for lunch when it was leftover day. That’s a big win, right? 

Perhaps the best part is the minimal dishes that are created. I don’t know about you, but I love being able to minimize the clean up part of cooking and this recipe helps you do that. Ready to start your prep and have a fantastic dish for dinner tonight? Let’s go! 

Your Ingredients

  • 1 pound ground Italian sausage
  • 1 white onion, chopped
  • 2 cups zucchini, chopped (about 1 medium) 
  • 1 sweet pepper, chopped (any color)
  • 2 cups button mushrooms, chopped 
  • ½ tablespoon minced garlic 
  • 1 teaspoon dried basil
  • 1 teaspoon dried oregano 
  • black pepper, to taste
  • ¼ teaspoon red pepper flakes, if you like a little kick
  • 2 15 ounce cans diced tomatoes (I used Italian seasoned. If you don’t have them on hand, add a little more spice, if you’re so inclined)
  • 1 15 ounce can tomato sauce 
  • 2-3 cups water
  • 12 ounces tri color rotini, uncooked
  • 2 cups Italian blend shredded cheese 
  • ½ cup grated Parmesan

Your Steps to Slow Cooker Italian Sausage Casserole 

In a large skillet, brown sausage. To this, add chopped sweet pepper, onion and garlic. Cook 3 minutes over medium heat. Add mushrooms, zucchini, oregano, basil, black pepper, and red pepper flakes (if using). Cook an additional 3 minutes, stirring often. 

From here, transfer sausage and vegetable mixture into your slow cooker. Add diced tomatoes (undrained) and tomato sauce. Cook on low for 5-6 hours to allow all those flavors to mingle. Approximately 35-45 minutes before you would like to eat, add water, rotini, and cheeses. Stir. Turn the slow cooker to high and cook for 35-45 additional minutes, checking the noodles for your desired texture. 

A complete meal right in your bowl: protein, vegetables, and a starch. A hot dish that will warm your belly and your soul. The perfect comfort food.

Tools of the Trade

I may or may not have about 5 slow cookers, but who is counting?

I ADORE flexible cutting boards and are my go to anytime I have to cut anything.

This is honestly my favorite knife we own. My mom broke mine once cutting candy. I had to immediately buy a new one!

Looking for other dinner inspiration? Check out my cooking page below!

Slow Cooker Italian Sausage Casserole

Italian sausage, zucchini, mushrooms, diced tomatoes, and pasta. What's not to love in this slow cooker dish?!
Prep Time 20 minutes
Cook Time 4 hours
Course Main Course
Cuisine Italian
Servings 8

Equipment

Ingredients
  

  • 1 pound ground Italian sausage
  • 1 white onion chopped
  • 2 cups zucchini chopped (about 1 medium)
  • 1 sweet pepper chopped (any color)
  • 2 cups button mushrooms chopped
  • ½ tablespoon minced garlic
  • 1 teaspoon dried basil
  • 1 teaspoon dried oregano
  • black pepper to taste
  • ¼ teaspoon red pepper flakes if you like a little kick
  • 2 15 ounce cans basil garlic, and oregano diced tomatoes, undrained
  • 1 15 ounce can tomato sauce
  • 2-3 cups water
  • 12 ounces tri color rotini uncooked
  • 2 cups Italian blend shredded cheese
  • ½ cup grated Parmesan

Instructions
 

  • In a large skillet, brown sausage.
  • Add chopped sweet pepper, onion and garlic. Cook 3 minutes over medium heat.
  • Add mushrooms, zucchini, oregano, basil, black pepper, and red pepper flakes (if using). Cook an additional 3 minutes, stirring often.
  • Transfer sausage and vegetable mixture into your slow cooker.
  • Add diced tomatoes (undrained) and tomato sauce.
  • Cook on low for 5-6 hours (or 3 hours on high) to allow all those flavors to mingle.
  • Approximately 35-45 minutes before you would like to eat, add water, rotini, and cheeses. Stir. Turn the slow cooker to high and cook for 35-45 additional minutes, checking the noodles for your desired texture.
Keyword crockpot, Italian casserole, Italian sausage, slowcooker
Tried this recipe?Let us know how it was!

Creamy Chicken and Wild Rice Soup

Last Updated on July 13, 2021 by Jess

My darling son is ten years old. For about as long as I can remember, chicken noodle soup has been his favorite. So much so that he has requested it for his birthday meal for the last four years, regardless of where we are celebrating. Then I put together this creamy chicken and wild rice soup. I think his favorite meal changed. He makes this glorious face when he eats food he loves: closing his eyes, taking in the flavor, all while a small grin spreads across his face. His first bite brought on this expression, telling me we had a winner of a recipe. 

What I love about this creamy chicken and wild rice soup is that it has all the creamy goodness all while leaving out the heavy or processed ingredients found in many creamy soups. It eats like a soup the first day and more like a stew the second, as the rice absorbs more liquid. 

Usually from scratch soups are reserved for cozy weekends, but I recently made this soup on a weeknight. The weather had changed from warm fall days to chilly winter, complete with some snow. I don’t know about you, but those first snow falls just call for a kettle of soup. It took me exactly one hour start to finish, including cooking the chicken. Is it a great weekend recipe? Absolutely. But is it doable on a weeknight? Sure!

Enough talking! Let’s get cooking! 

Your Ingredients

  • ½ cup long grain brown rice, uncooked
  • ½ cup wild rice, uncooked
  • 2 ½  cups water
  • 2 cups diced cooked chicken 
  • 1-2 tablespoons olive oil
  • 1 cup sliced mushrooms
  • 2 cups sliced carrots
  • 1 ½ cups sliced celery
  • 1 ½ cup diced onion 
  • ½ tablespoon minced garlic
  • 3 tablespoons butter
  • 3 tablespoons flour
  • 2 cups milk (I used skim)
  • 2 cups chicken stock
  • ¾ teaspoons dried thyme
  • ½ – 1 teaspoon pepper, to taste
  • ½  teaspoon salt 

Before we begin cooking…

If you don’t have cooked chicken on hand, you can 100% start cooking it when you start the rice and your timing will be just fine. I seasoned two chicken breasts with salt and pepper and cooked them over medium heat in a cast iron skillet (I just love cast iron. I have the Lodge Skillet). If you would like to do like me, cook them for about 8 minutes on each side. Then put in a preheated 400 degree oven. Finish them in the oven, cooking to 165 degrees.

YOUR STEPS FOR CREAMY CHICKEN AND WILD RICE SOUP 

Start by bringing water to a boil in a saucepan with a cover. Add rice (and maybe a little salt and pepper if you are so inclined), cover, and lower temperature to a simmer. Cook for 40 minutes, stirring periodically. Once complete, leave the rice, even if there is remaining liquid. We will add it all to the soup. 

While the rice is cooking, prepare the vegetables. Add olive oil to a soup kettle (again, I adore my cast iron Dutch oven for soups), and heat over medium heat. Once oil is hot, add onions, celery, carrots and garlic. Cook for 8-10 minutes, until they are beginning to soften. Add mushrooms and cook an additional 4-5 minutes. 

Remove vegetables from the kettle. Lower the temperature slightly. Add butter and allow to melt. Once melted, add flour, creating a roux. Cook for 2-3 minutes, stirring constantly. SLOWLY add milk, about ⅓ cup at a time, stirring the whole time, allowing the mixture to just begin to boil before you add more. (Be patient here. I have gone too fast too many times to count, and then you miss the creaminess!). Add the chicken stock in a similar nature. Add thyme, salt, and pepper.  

From here, stir in the rice from the saucepan, including any remaining liquid. It will help keep the soup thick. Reincorporate the vegetables and stir in the chicken. Allow to cook an additional 10-20 minutes if you have the time. The flavors will mingle and simply get better if you can wait 🙂 

Looking for other dinner ideas? Check out my cooking page!

Tools of the Trade

I truly believe every home kitchen needs a selection of good cast iron pans. We cook everything in them, from corn bread to chicken, from sourdough bread to soups and stews. They can go from stove top to oven and create beautiful food. These are some of my favorites!

Creamy Chicken and Wild Rice Soup

A hearty belly warming recipe full of fresh roasted chicken, vegetables and perfectly cooked rice.
Prep Time 30 minutes
Cook Time 30 minutes
Course Soup
Cuisine American
Servings 8

Ingredients
  

  • ½ cup long grain brown rice uncooked
  • ½ cup wild rice uncooked
  • 2 ½ cups water
  • 2 cups diced cooked chicken
  • 1-2 tablespoons olive oil
  • 1 cup sliced mushrooms
  • 2 cups sliced carrots
  • 1 ½ cups sliced celery
  • 1 ½ cup diced onion
  • ½ tablespoon minced garlic
  • 3 tablespoons butter
  • 3 tablespoons flour
  • 2 cups milk
  • 2 cups chicken stock
  • ¾ teaspoons dried thyme
  • ½ – 1 teaspoon pepper to taste
  • ½ teaspoon salt

Instructions
 

  • Bring water to a boil in a saucepan with a cover. Add rice (and additional salt and pepper, to taste), cover, and lower temperature to a simmer. Cook for 40 minutes, stirring periodically.
  • While the rice is cooking, prepare the vegetables. Add olive oil to a soup kettle and heat over medium heat.
  • Once oil is hot, add onions, celery, carrots and garlic. Cook for 8-10 minutes, until they are beginning to soften. Add mushrooms and cook an additional 4-5 minutes.
  • Remove vegetables from the kettle. Lower the temperature slightly. Add butter and allow to melt.
  • Once melted, add flour, creating a roux. Cook for 2-3 minutes, stirring constantly.
  • Slowly add milk, about ⅓ cup at a time, stirring the whole time, allowing the mixture to just begin to boil before you add more. Add the chicken stock in a similar nature. Add thyme, salt, and pepper.
  • Stir in the rice from the saucepan, including any remaining liquid. Reincorporate the vegetables and stir in the chicken. Allow to cook an additional 10-20 minutes.
Keyword chicken, chicken and wild rice soup, chicken soup, from scratch
Tried this recipe?Let us know how it was!

Oatmeal Pumpkin Muffins: Clean Eating Style

Last Updated on October 4, 2021 by Jess

Recently, I put together some delightful sourdough pumpkin muffins. However, all my friends who aren’t sourdough bakers yet (You know you want to! Here’s a great link by King Arthur’s Flour on how to get started!) requested a non-sourdough pumpkin muffin, preferably of the healthy persuasion. After a little bit of testing and trying, here it is! Oatmeal Pumpkin Muffins (with chocolate chips!). 

This Oatmeal Pumpkin Muffin pairs well with a warm cup of coffee in the morning. I love that it isn’t overly sweet and that it’s a baked good I can feel good about putting into my body. While it pains me at times, I just can’t do too much sweet in the morning. It leaves me a feeling out of sorts and not fueled the right way to tackle all the big goals I have! 

One more note: This recipe was created using a home roasted pumpkin. If you haven’t tried roasting your own pumpkin yet, I highly recommend it and the time is still right. Pick up a pumpkin or two from the local market, roast them up using the directions you can find here. Then freeze some so you can have fresh pumpkin baked goods all year round!

Okay, enough talking, let’s get baking some Oatmeal Pumpkin muffins my friends! 

Your Ingredients (about 18 muffins)

  • 2 cups pumpkin puree 
  • 2 eggs, room temperature 
  • ⅓ cup real maple syrup (if you like things on the sweeter side, up this to ½ cup) 
  • 2 tablespoons coconut oil, melted 
  • 1 ½ cups whole wheat flour 
  • 1 cup old fashioned oats
  • ¾ teaspoon pumpkin spice (or a combination of cinnamon and nutmeg with a dash of clove)
  • 1 teaspoon baking soda
  • ½ teaspoon salt 
  • ⅓ cup chopped walnuts 
  • ⅓ cup chocolate chips 

Your Steps to great Oatmeal Pumpkin Muffins

Preheat the oven to 350 degrees. Prepare two muffin tins with muffin cups or by spraying with non-stick cooking spray. 

In a large bowl, combine puree, eggs, and maple syrup. Combine flour, oats, pumpkin spice, baking soda, and salt. Add to wet ingredients and stir until just combined. Fold in the walnuts, and chocolate chips. Add coconut oil and stir once more. 

Spoon into prepared muffin tins, filling approximately ¾ of the way. Bake for 15-20 minutes, until cooked all the way through. Marvel at the beautiful texture and promptly pop one in your mouth. Aren’t the melty chocolate chips just the best?!

Tools of the trade

If you’re baking, you need a great muffin tin. If you are fortunate enough to have a pumpkin to roast, I recommend a nice thick baking sheet lined in foil. Looking to get a new one? Check out the links below!

Oatmeal Pumpkin Muffins

Oatmeal Pumpkin Muffins: Good for you ingredients combine in these pumpkin muffins made from freshly roasted pumpkin!
Prep Time 10 minutes
Cook Time 20 minutes
Course Breakfast
Cuisine American
Servings 18 muffins

Ingredients
  

  • 2 cups pumpkin puree
  • 2 eggs room temperature
  • cup real maple syrup if you like things on the sweeter side, up this to ½ cup
  • 2 tablespoons coconut oil melted
  • 1 ½ cups whole wheat flour
  • 1 cup old fashioned oats
  • ¾ teaspoon pumpkin spice or a combination of cinnamon and nutmeg with a dash of clove
  • 1 teaspoon baking soda
  • ½ teaspoon salt
  • cup chopped walnuts
  • cup chocolate chips

Instructions
 

  • Preheat the oven to 350 degrees. Prepare two muffin tins with muffin cups or by spraying with non-stick cooking spray.
  • In a large bowl, combine puree, eggs, and maple syrup.
  • Combine flour, oats, pumpkin spice, baking soda, and salt. Add to wet ingredients and stir until just combined.
  • Fold in the walnuts, and chocolate chips.
  • Add coconut oil and stir once more.
  • Spoon into prepared muffin tins, filling approximately ¾ of the way.
  • Bake for 15-20 minutes, until cooked all the way through.
Tried this recipe?Let us know how it was!

Oh So Good Banana Bread (Gluten Free!)

Last Updated on March 24, 2021 by Jess

I have this great banana bread recipe. In fact, I had declared it THE best banana bread. It was clean and gluten free, which, let’s be honest, when combined can mean it doesn’t taste that great. But my friends and family will agree, it is darn good banana bread. You can get the recipe by clicking here

However, THE best banana bread requires the baker to create oat flour by putting all the dry ingredients in a food processor. I love my food processor, but the other evening, I was not interested in heading to the basement to grab it to make banana bread. Yes, I know this is slightly lazy. Okay, a lot lazy. But out of my refusal to grab an appliance, another great recipe was born. 

This recipe is STILL gluten free. While I am not gluten free myself, I dig being able to create for my friends who are. It still doesn’t have refined sugar. While I still love me some sugar, I enjoy finding good substitutes for my friends who try hard to cut extra sugar from their life. So if you are gluten free, watching your sugar, or you’re like me who really just loves a great banana bread recipe, I hope you give this a try. My husband (who doesn’t love banana bread) definitely went for seconds. And thirds. 

Ready? Let’s get baking!

Your Ingredients

  • 3 very ripe bananas, mashed
  • 2 eggs, room temperature
  • 2 tablespoons coconut oil, melted (olive oil would do fine too!)
  • ¼ cup real maple syrup
  • ½ teaspoon vanilla extract
  • 1 ½ cups almond flour
  • ¾ cup old fashioned oats
  • 1 teaspoon baking soda
  • ½ teaspoon salt 
  • ¼ cup chopped walnuts 
  • ¼ cup dark chocolate chips 

Your Steps for Great Banana Bread 

Preheat oven to 350 degrees. Lightly grease a 9×5 quick bread pan. In a large bowl, combine mashed bananas, eggs, maple syrup, and vanilla. Stir in oil. Combine flour, oats, baking soda, and salt. Stir into the wet mixture. Fold in walnuts and chocolate chips. If you want it to look extra beautiful, sprinkle a few extra chocolate chips on top. Pour into prepared pan. Bake for 45-60 minutes, until cooked through. 

Looking to bake other delicious treats? Head on over to my baking page for more inspiration!

Tools of the Trade

There isn’t much you need for a quick bread, but I want to share out the tools I love when I am baking!

Oh So Good Banana Bread

Oh So Good Banana Bread (Gluten Free!): Clean eating doesn't have to be flavorless. This banana bread is to die for and is gluten free too!
Prep Time 20 minutes
Cook Time 55 minutes
Course Breakfast
Cuisine American
Servings 12

Ingredients
  

  • 3 very ripe bananas mashed
  • 2 eggs room temperature
  • 2 tablespoons coconut oil melted (olive oil would do fine too!)
  • ¼ cup real maple syrup
  • ½ teaspoon vanilla extract
  • 1 ½ cups almond flour
  • ¾ cup old fashioned oats
  • 1 teaspoon baking soda
  • ½ teaspoon salt
  • ¼ cup chopped walnuts
  • ¼ cup dark chocolate chips

Instructions
 

  • Preheat oven to 350 degrees. Lightly grease a 9×5 quick bread pan.
  • In a large bowl, combine mashed bananas, eggs, maple syrup, and vanilla.
  • Stir in oil. Combine flour, oats, baking soda, and salt. Stir into the wet mixture.
  • Fold in walnuts and chocolate chips. Sprinkle a few extra chocolate chips on top.
  • Pour into prepared pan. Bake for 45-60 minutes, until cooked through.
Keyword Banana Bread, bananas, Breakfast, Quick Bread
Tried this recipe?Let us know how it was!