Last Updated on January 22, 2023 by Jess
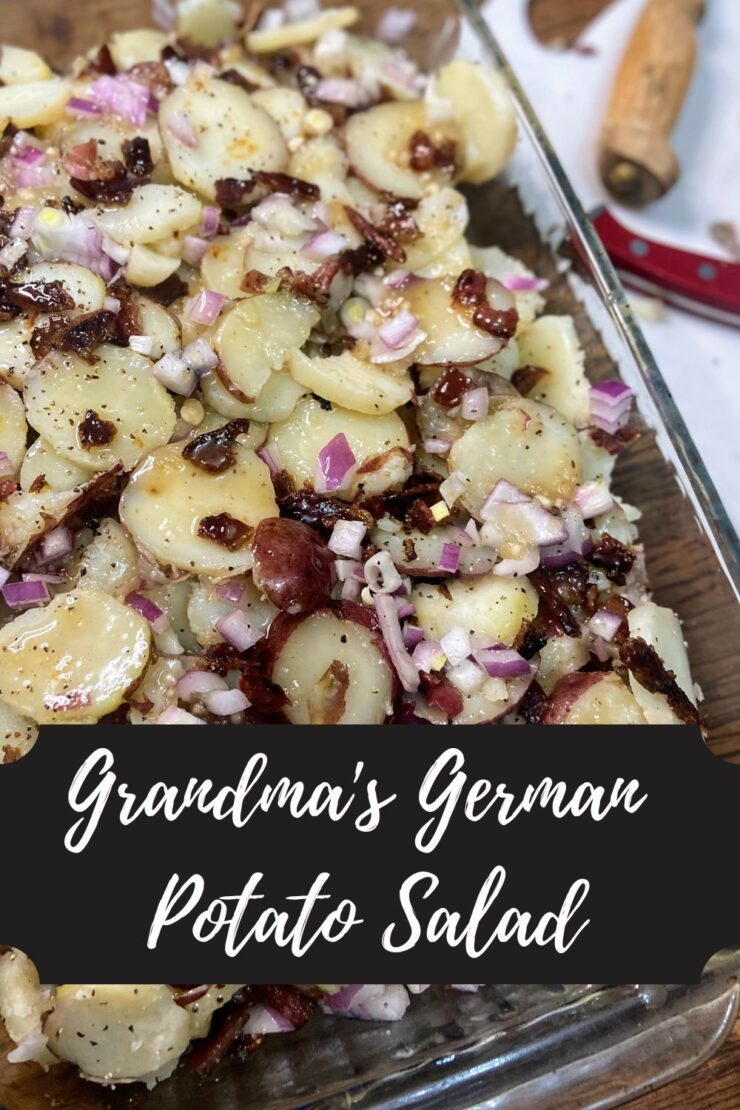
My Grandma’s German Potato Salad.
I wasn’t sure if I should share this or keep it a secret in our family, but that just seems silly. The world can always use another ‘grandma’ recipe. One written on a half sheet of paper in beautiful cursive, feeling as though it was just written yesterday and written decades ago at the same time. We all need that in our digital world, right?
Growing up, my parents had moved about four hours north of all of their family (they grew up about a mile apart in a suburb of Milwaukee) so we didn’t see family as often as most. But my mom’s mom would come up for a week each summer. Special traditions filled that week. We would swim. Grandma would walk every day. You sure couldn’t interrupt grandma and mom’s Scrabble game.
Tradition also surrounded the food we ate: We ALWAYS had a fish fry. My grandma would buy Lorna Doone shortbread cookies, Oreos, and Pecan Sandies. We also always had breaded and pan fried pork chops with German Potato Salad. I, for one, am not someone who loved getting all the little bits of meat off the bone of the pork chops so my mom would watch my plate and steal up those bones to nibble on. Fond memories, to be certain.
But the German Potato Salad?
I NEVER ate it growing up. Maybe I tried it once at a young age, and decided it wasn’t for me; I can’t be certain. But I know that I “didn’t like it,” and never ate it, even as I was going into high school.
I think I might have been in my twenties when I thought, “Maybe I should give this a try again.” And my goodness, I was instantly in love. The sweet sour from the dressing. The perfect combination of potatoes, onions, and bacon. So dang good.
And I am so dang happy to share it with you. My grandma was the most wonderful woman with the biggest heart, a love for theater and acting, and just a joy. I hope you can taste it in this recipe when you share it with your family.
Your Ingredients
- 3 pounds potatoes
- 5-6 slices of bacon, depending on quality
- 1 medium onion, chopped
- ½ cup white vinegar
- ½ cup water
- ½ cup granulated sugar
- ½ – 1 tablespoon flour
- Salt and pepper, to taste
Your Steps to Grandma’s German Potato Salad
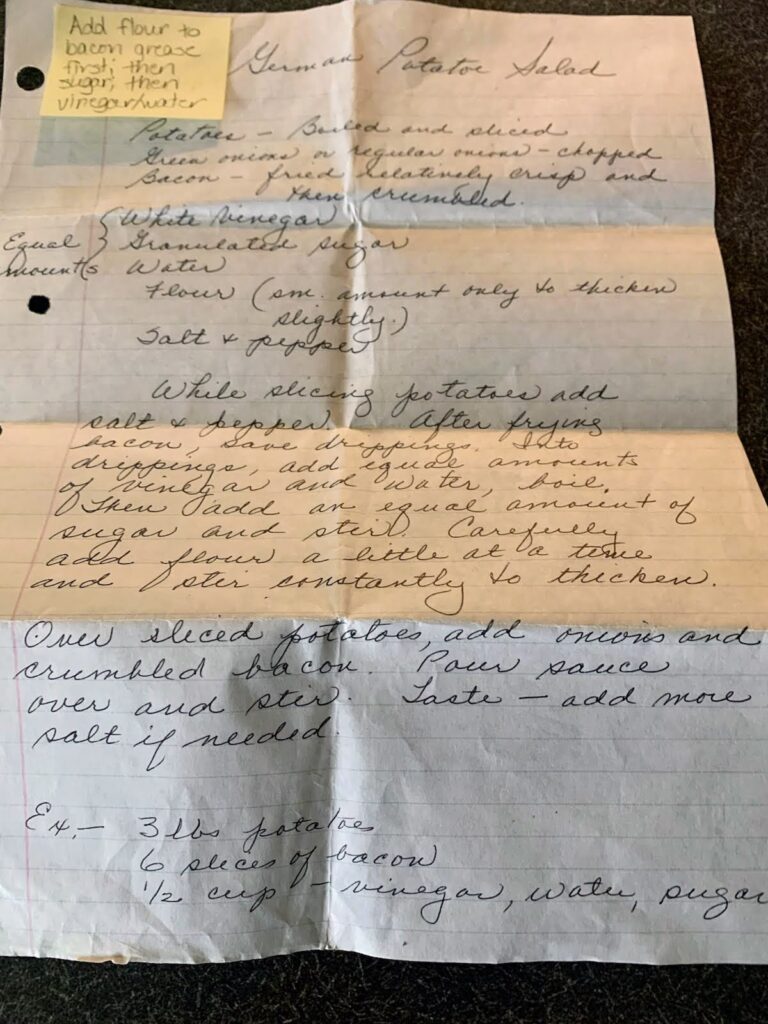
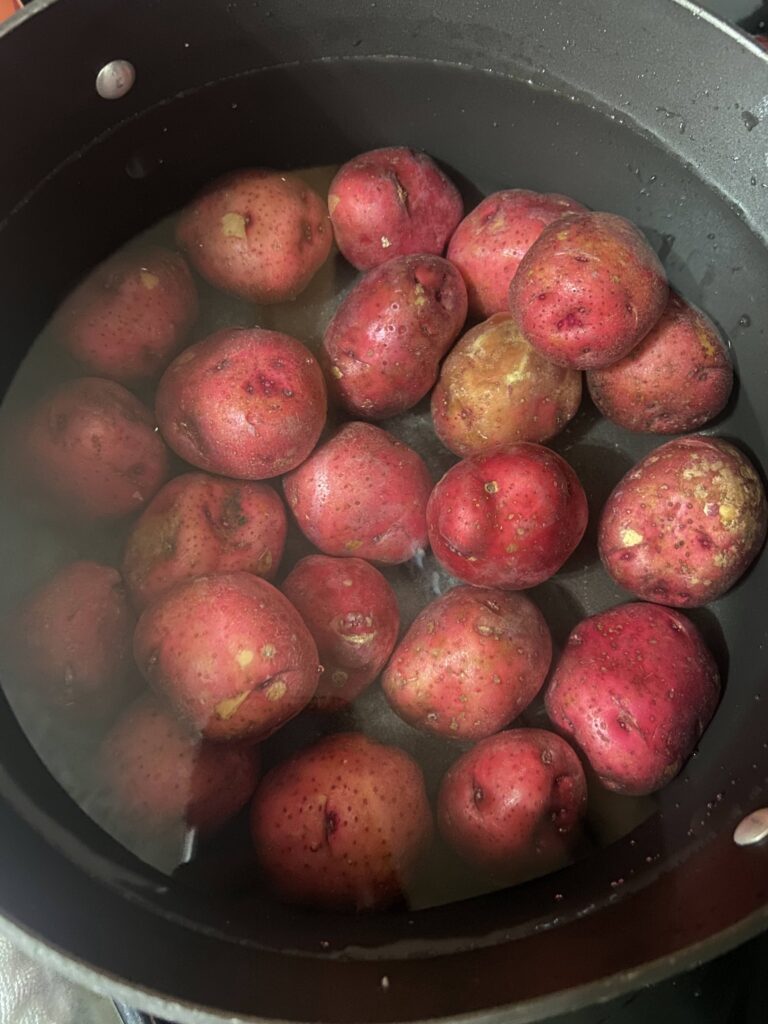
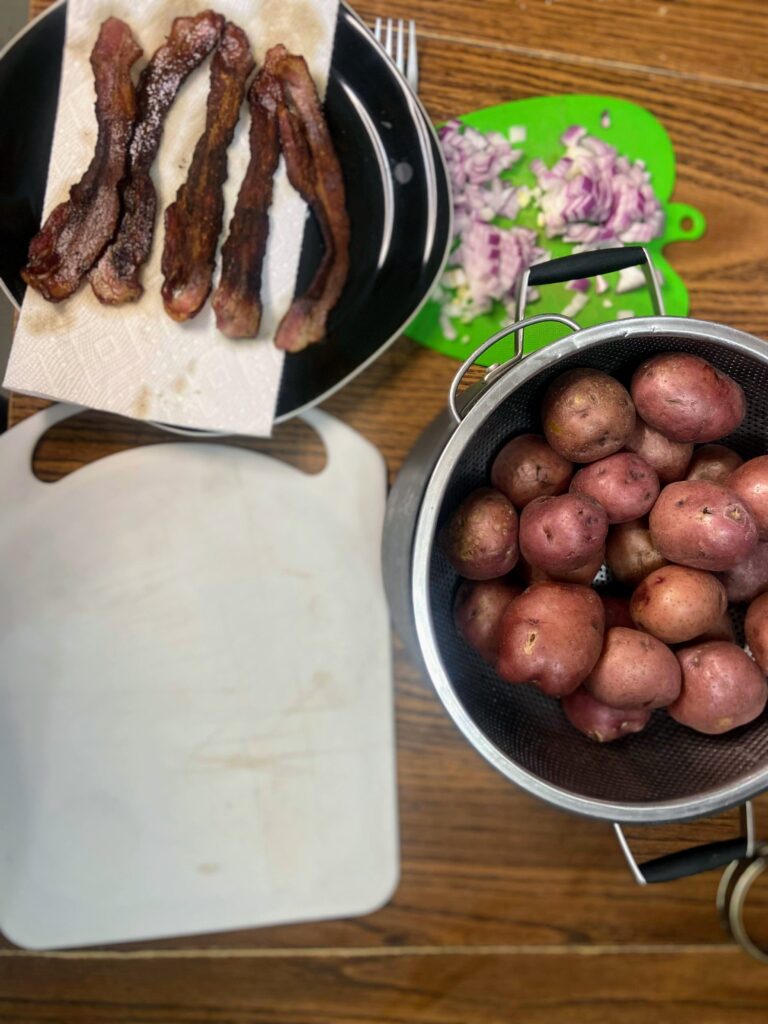
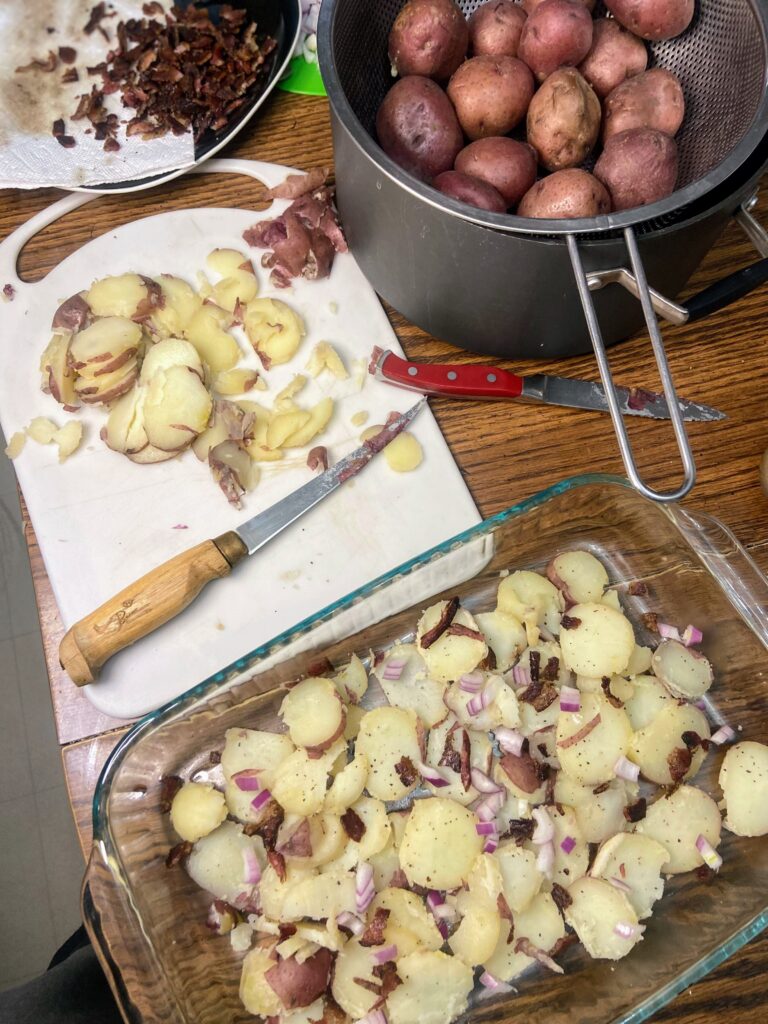
Leaving the skin on the potatoes, boil whole in salted water until fork tender. While the potatoes are boiling, fry bacon until crispy, reserving about half of the drippings.
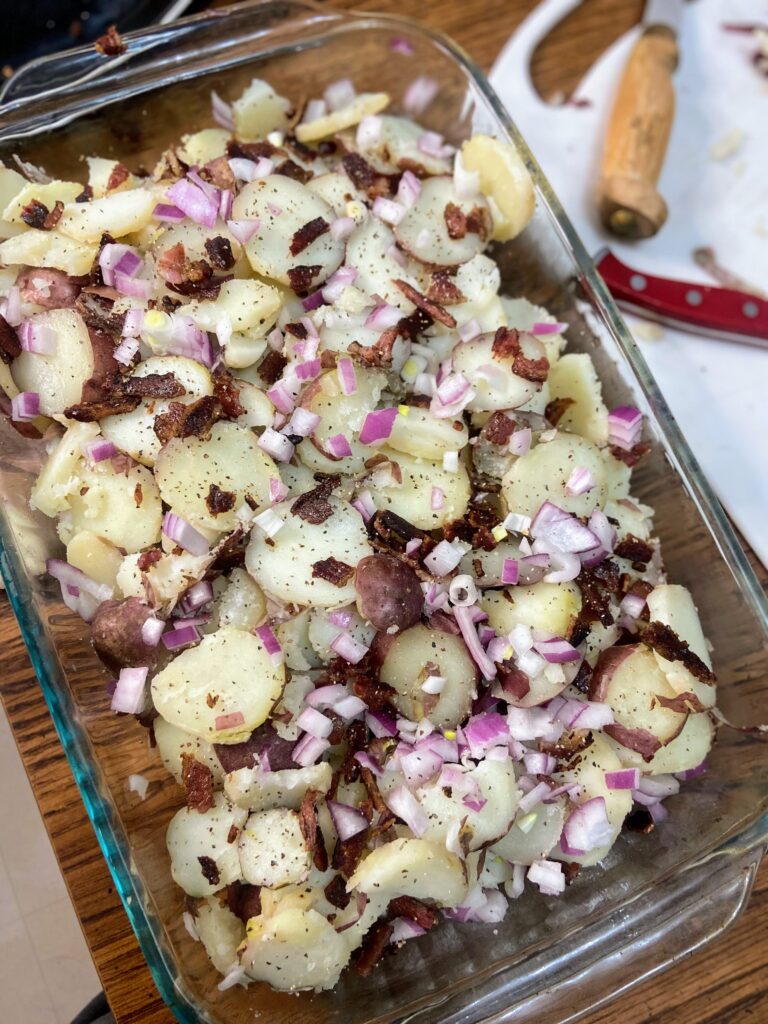
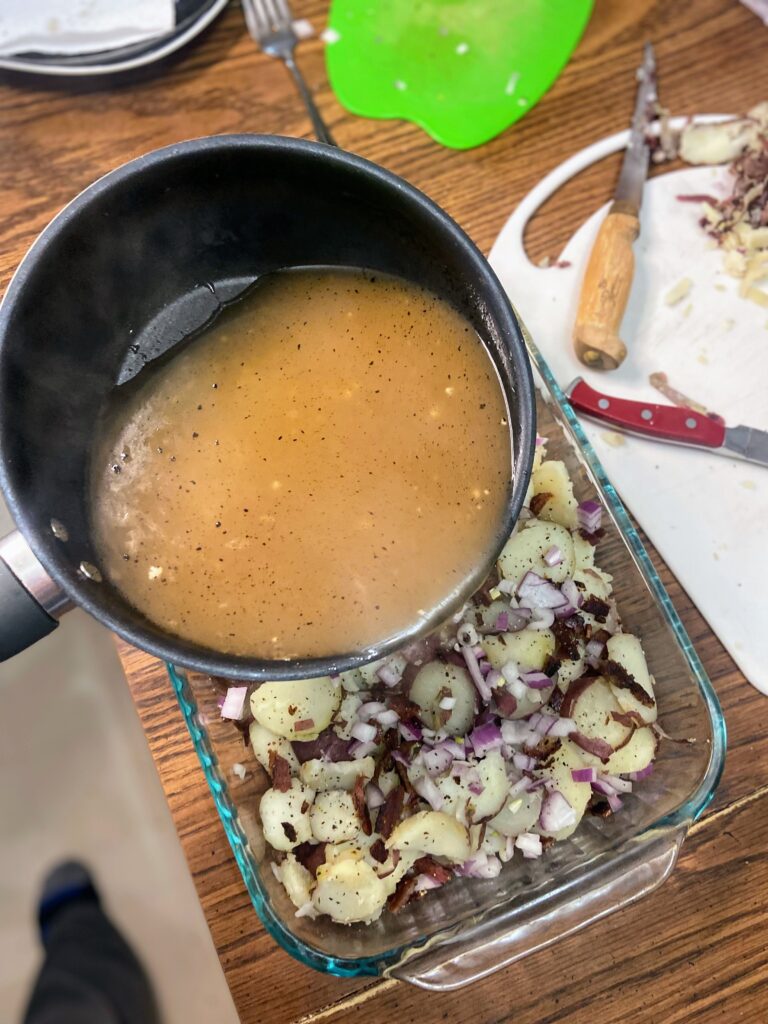
Slice and layer the potatoes in a shallow dish, sprinkling each layer with salt and pepper and adding chopped onions and bacon to each layer.
In the reserved bacon drippings, add the flour. Whisk until a roux is formed. Add the sugar and then the vinegar and water. Bring to a boil, stirring constantly until thick.
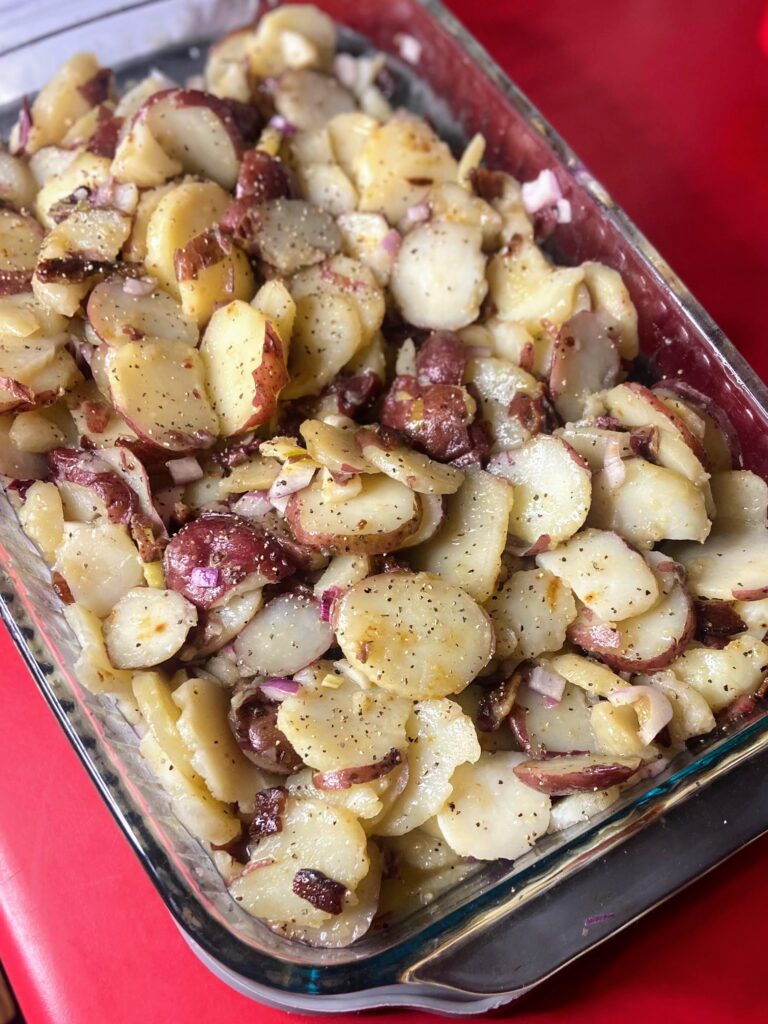
Pour sauce over the potatoes and stir. Taste, and add more sauce as necessary. This potato salad is best if made the day before so the flavors can sink into the potatoes, but can be served right away as well.
Note: My mom loves her potato salad on the juicy side, so she recommends doing ¾ cup of vinegar, water, and sugar. I mean, it doesn’t hurt to have extra, but I wanted to stay true to my grandma’s handwriting.

Grandma’s German Potato Salad
Ingredients
- 3 pounds potatoes
- 5-6 slices of bacon
- Green onions or regular onions chopped
- ½ cup white vinegar
- ½ cup water
- ½ cup granulated sugar
- ½ – 1 tablespoon flour
- Salt and pepper to taste
Instructions
- Leaving the skin on the potatoes, boil whole in salted water until fork tender. While the potatoes are boiling, fry bacon until crispy, reserving about half of the drippings.
- Slice and layer the potatoes in a shallow dish, sprinkling each layer with salt and pepper and adding chopped onions and bacon to each layer.
- In the reserved bacon drippings, add the flour. Whisk until a roux is formed. Add the sugar and then the vinegar and water. Bring to a boil, stirring constantly until thick.
- Pour sauce over the potatoes and stir. Taste, and add more sauce as necessary. This potato salad is best if made the day before so the flavors can sink into the potatoes, but can be served right away as well.
Looking for some other fun recipes?
Check out a couple of the posts below!