Homemade Sourdough Pizza Crust

Last Updated on April 17, 2024 by Jess

One thing at a time is what I am telling myself, but I am not so good at that. Earlier this week, I went on Facebook Live to share out how I work with my sourdough starter and how to bake bread from scratch. I am by no means an expert (both at sourdough and at going live on Facebook haha) and it was so scary for me. I wish you could have felt my heart beating. It was crazy! Back to the one thing at a time…I have a list a mile long of things I want to get up on my blog, but with friends starting sourdough starters, I wanted to quickly share out our FAVORITE use of our extra sourdough starter: Pizza Crust.

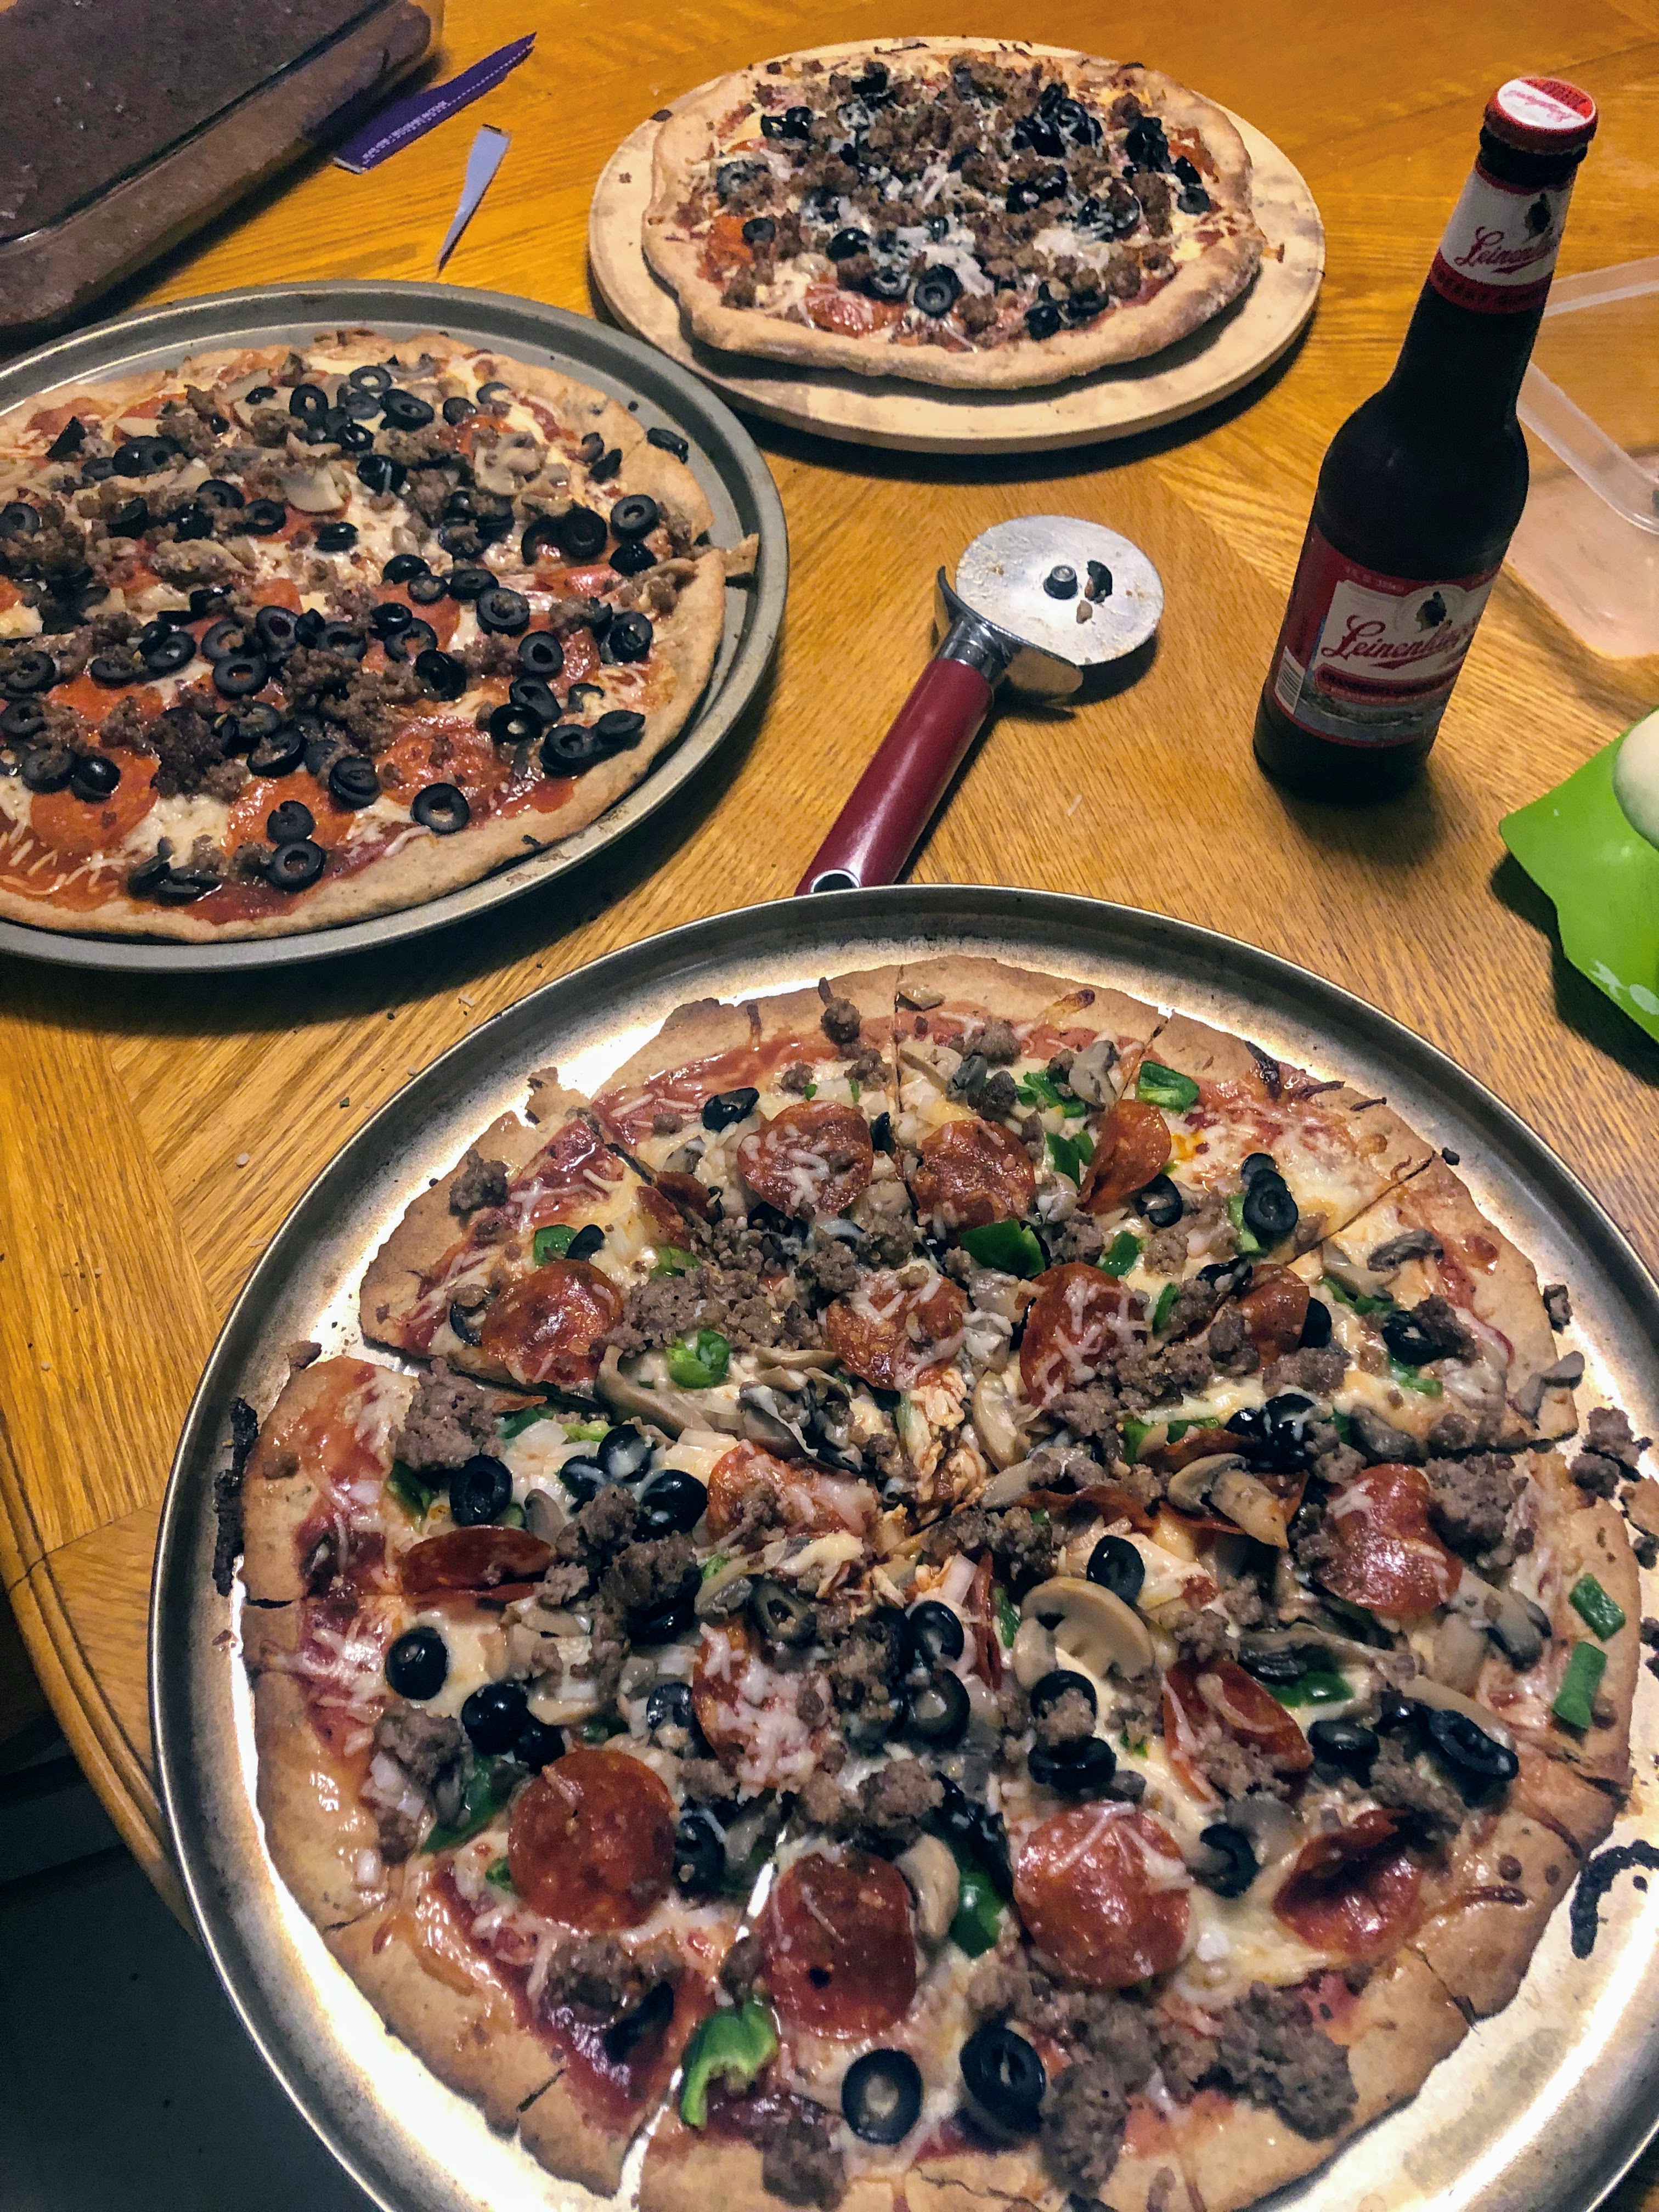
Homemade pizza has always been a go to at our home. My husband would make a yeast dough that we would have to plan hours ahead and it was good. Then I started doing sourdough and had the inevitable extra that happens when you double your starter and hated wasting it. A friend joined us on the sourdough adventure and stumbled on a pizza crust recipe, which he shared with us. This is our version of the pizza crust he found and our go to whenever we are craving pizza (about every other week). (Edit: I just read this aloud to my husband and he said, “Once a week! Generally on the weekend!”–And yes, that might be true because I double on the weekends 🙂 )

Your ingredients (for one thick crust or two thin on 13 inch pizza pans):

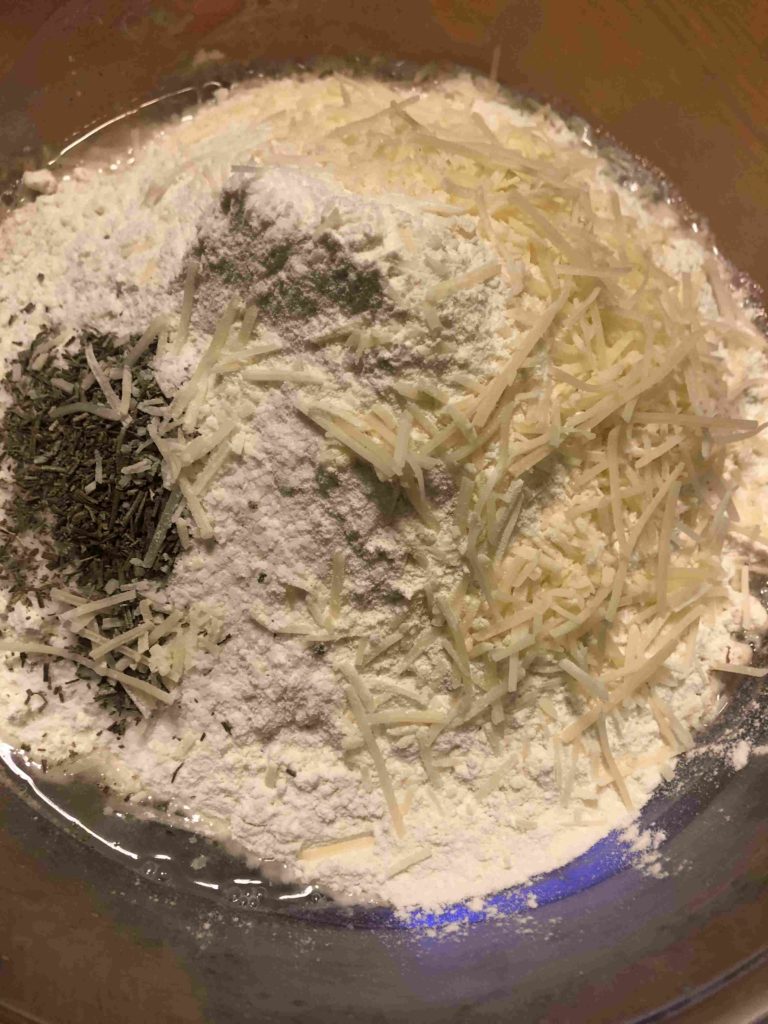
  • 2 cups active sourdough starter (that being said, we OFTEN use starter that has been in the fridge for a few days. It still works)
  • 1 tablespoon olive oil
  • 1-1 1/2 cups flour, to consistency
  • 1 teaspoon salt
  • Optional mix-ins: 1 teaspoon dried oregano, basil and/or garlic powder. When I am feeling especially fancy, I might mix in 1/4 cup or so of shredded parmesan as well.
  • extra olive oil

Your Steps for Sourdough Pizza Crust

Measure out and mix all ingredients in a large glass bowl until it forms a nice ball. It will come together with a little flour on the outside. Cover and allow to rest for at least 30 minutes. The dough won’t rise too much so don’t worry if yours is approximately the same size after resting.

Preheat your oven to 450 degrees. If you are making 2 crusts, cut the dough in half here. Grease the pan(s) using olive oil (cooking spray [our go to!] or regular). Place dough on the pan and spread by hand (keep your hands floured so it doesn’t stick!). Once the dough is spread, brush or spray the dough with additional olive oil.

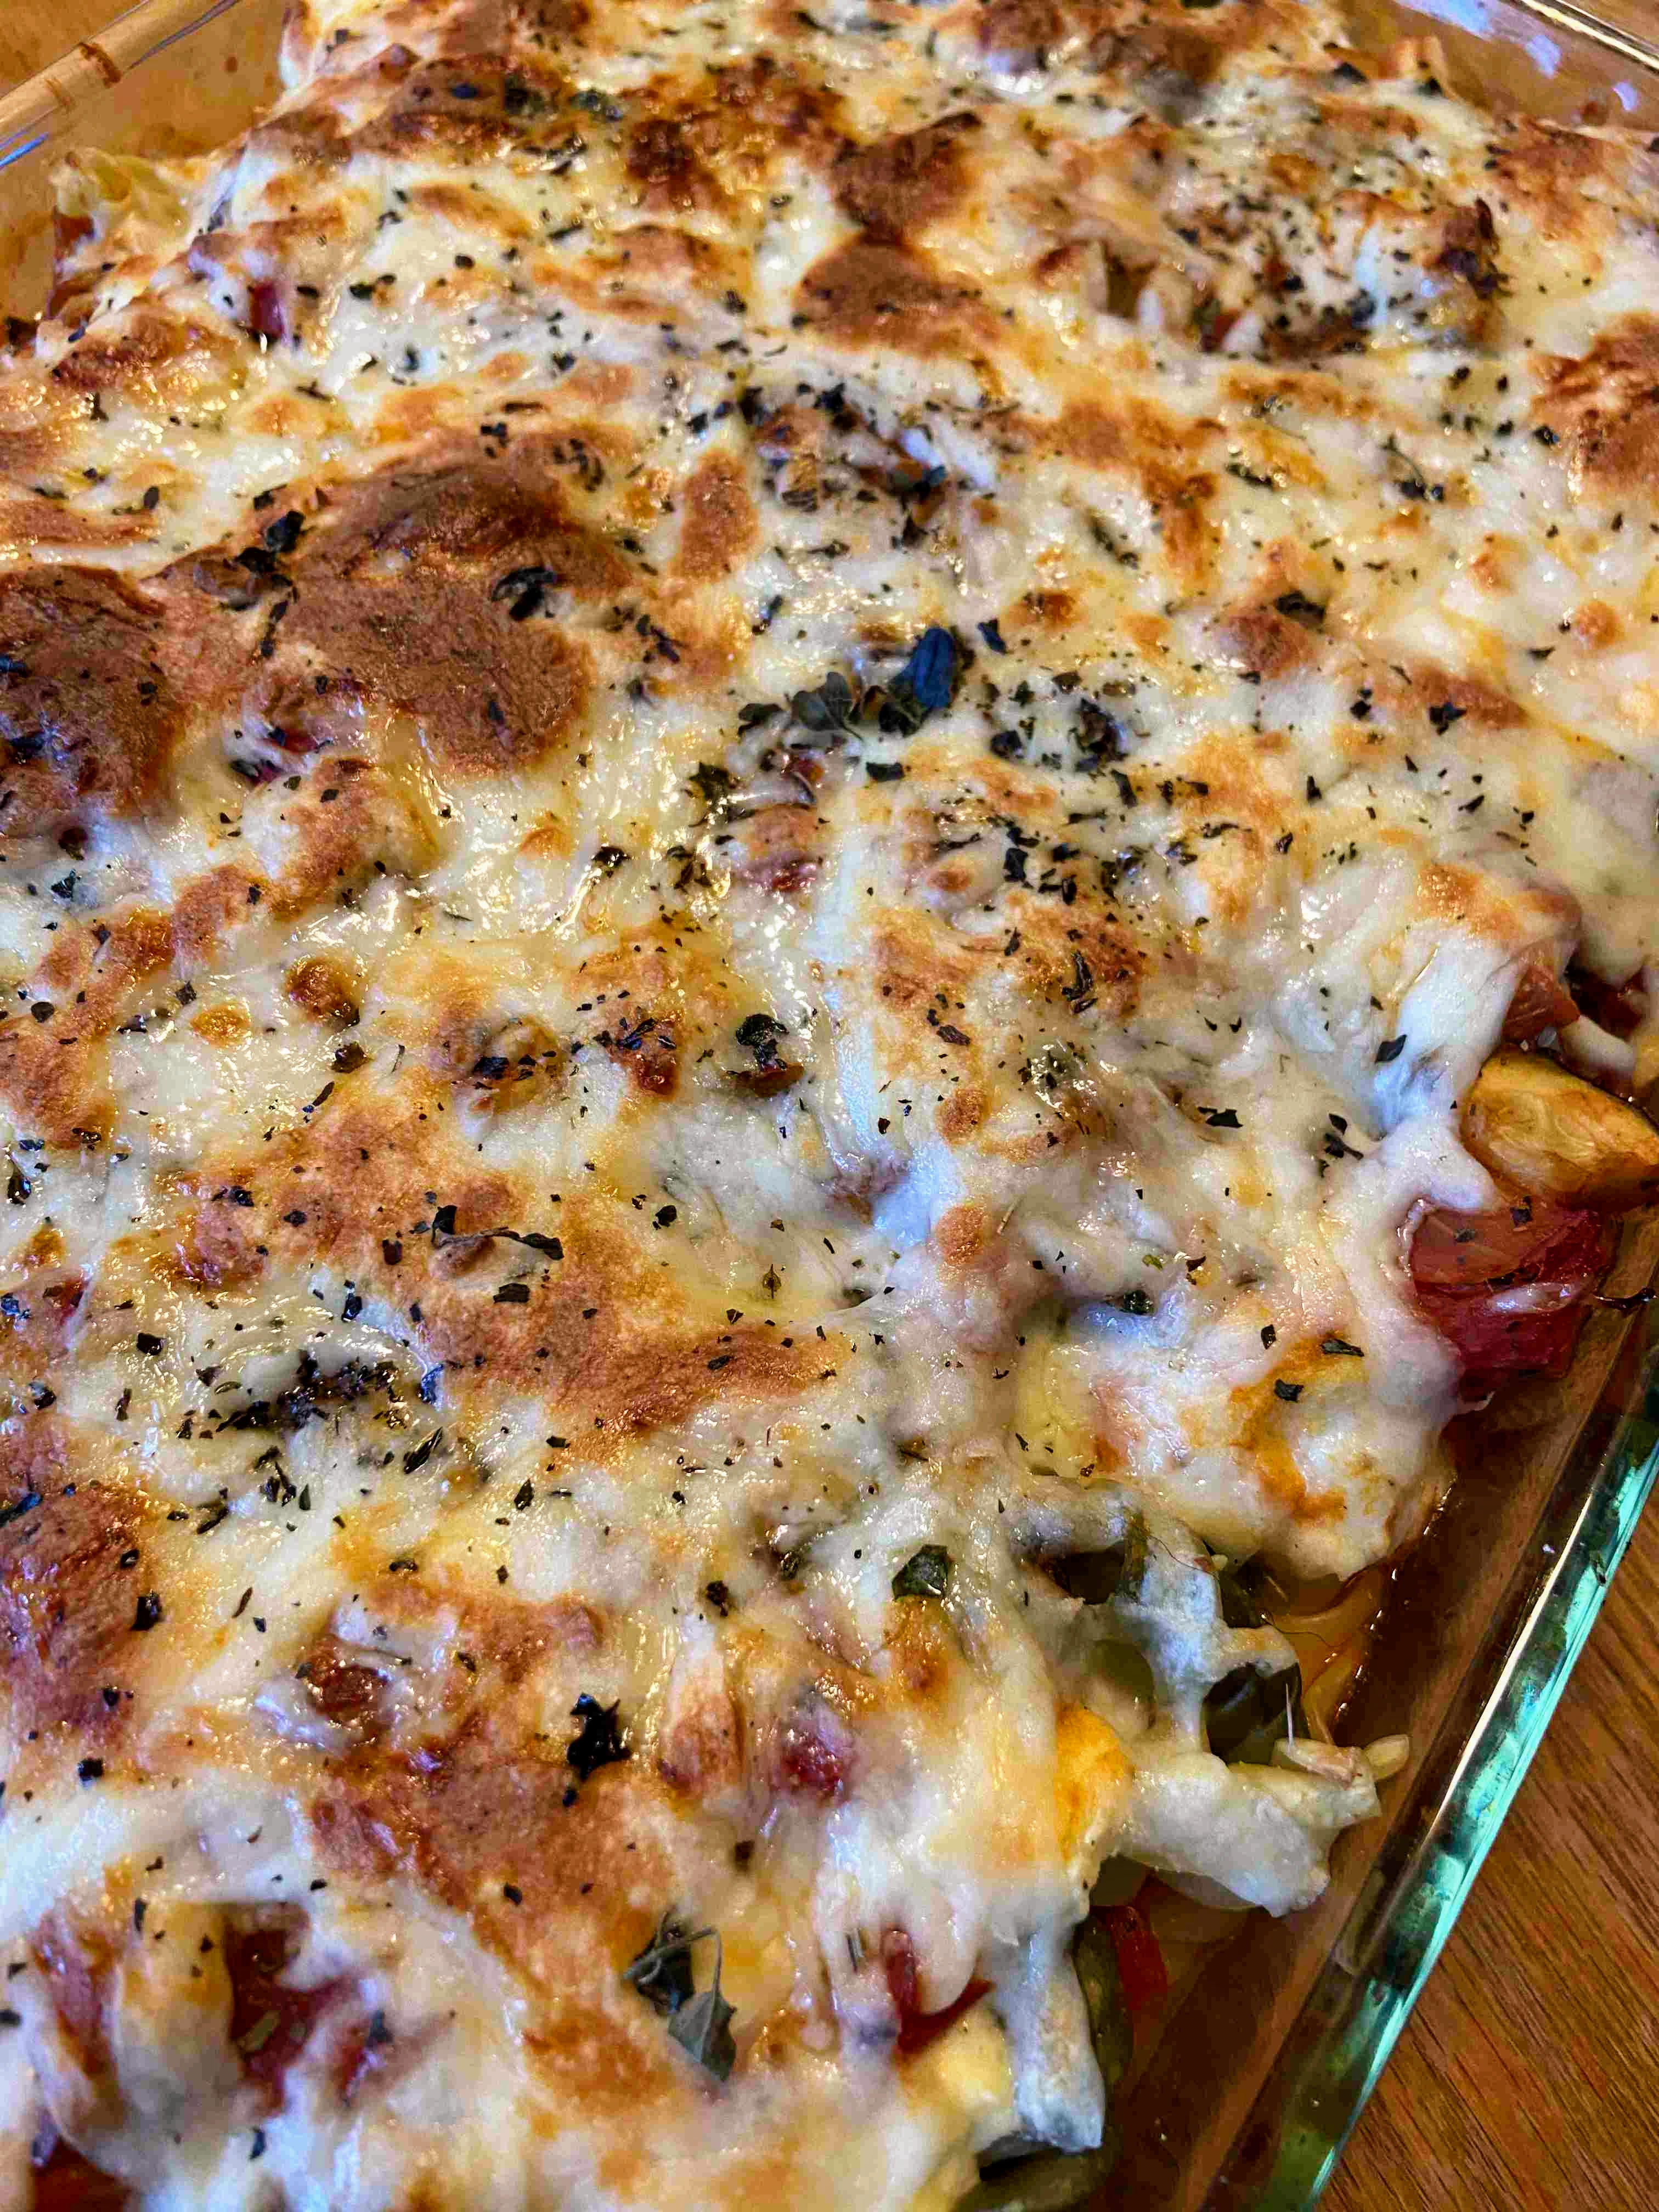
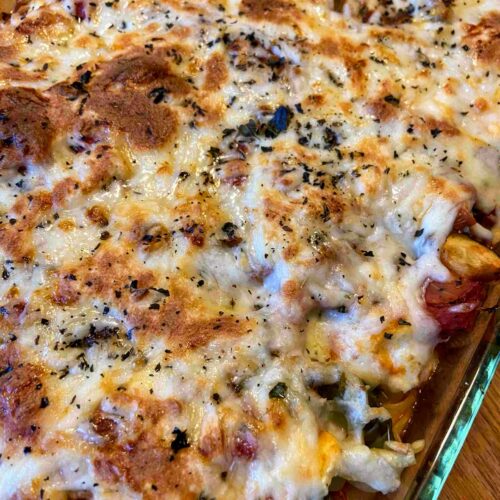
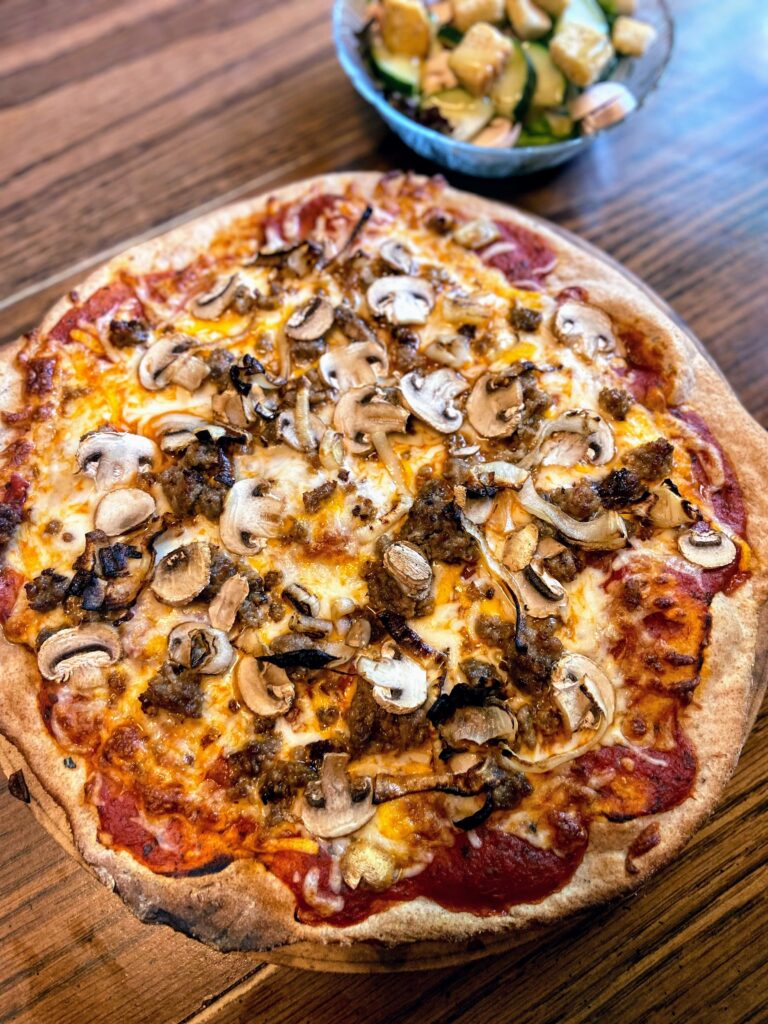
Note: The crust will shrink as it bakes so spread out to the edges as much as possible. Bake for 10-15 minutes, until the the bottom is becoming golden brown (less time for thin crust). Remove from oven and top with your favorite toppings. Return to oven and bake until the cheese is golden brown, approximately 8 minutes for us. If you’re Wisconsin born and raised like us, enjoy during a Packer game with a nice cold beer :). If you aren’t fortunate enough to be Wisconsin born and raised, you should probably still enjoy your pizza with a Packer game and a cold beer.

Other hints:

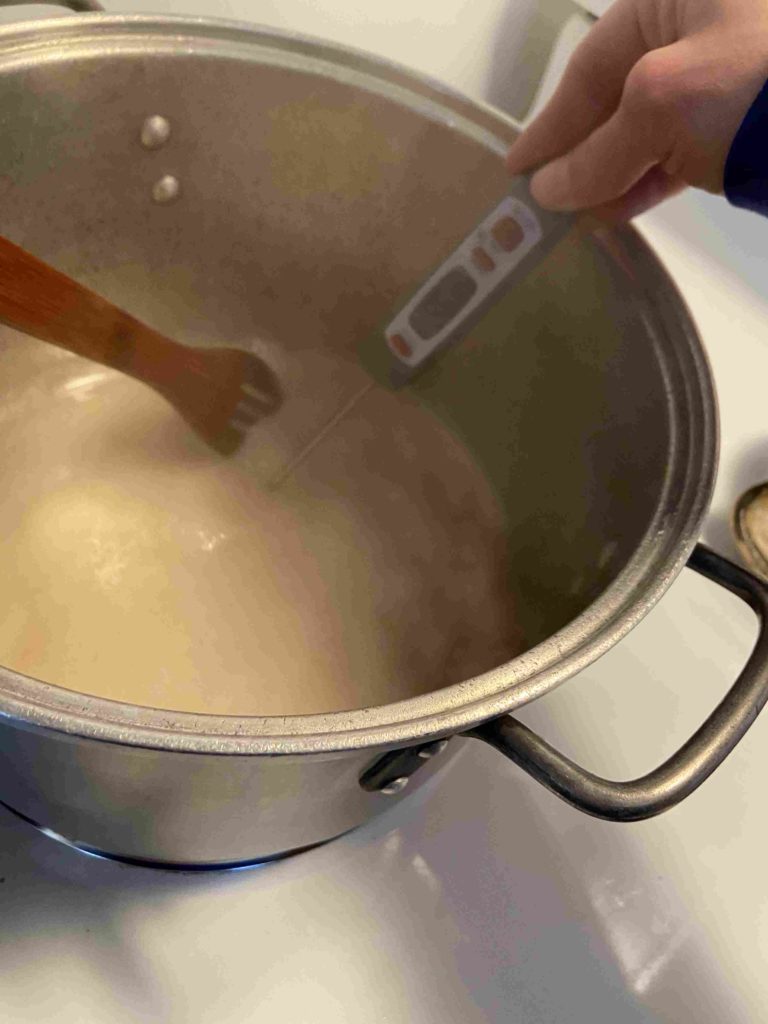
  • We canned our own pizza sauce this summer, but quickly ran out. In a pinch we will use store bought, but our go to has become one 15 ounce can of tomato sauce mixed with some basil, oregano, garlic powder, dried minced onion and maybe some red pepper flakes to taste. We heat it on the stove to a boil and then bring it down to a low heat, stirring often. We cook it down until it thickens, approximately 30 minutes. We start it shortly after we finish putting the crust together to rest.
  • Since the pizza isn’t cooking all too long with the toppings on it, you may want to sauté some of the vegetables first (I am thinking onions, green peppers, etc)
  • I like to be extra fancy and sprinkle a little more basil and oregano on top of the cheese before I put the pizza in the oven. 🙂

tools of the trade

You don’t need much to create a stunning homemade pizza. But a great baking stone is a good place to start! Not only do I use it while making pizza, but I also bake some “fancy” sourdough bread on it. A nice addition to your kitchen if you’re a baker like me!

Looking for other sourdough recipes? Check out my sourdough page.

Homemade Sourdough Pizza Crust

A few simple ingredients and some sourdough discard and you are set with some homemade pizza!
Prep Time 10 minutes
Cook Time 18 minutes
Rest Time 40 minutes
Course Main Course
Cuisine Italian
Servings 6 people

Ingredients
  

  • 2 cups active sourdough starter
  • 1 ½ tablespoon olive oil
  • 1 cups flour to consistency
  • 1 teaspoon salt
  • extra olive oil
  • Optional mix-ins: 1 teaspoon dried oregano basil, garlic powder, and Parmesan cheese

Instructions
 

  • Measure out and mix all ingredients in a large glass bowl until it forms a nice ball.
  • It will come together with a little flour on the outside. Cover and allow to rest for at least 45 minutes.
  • Preheat your oven to 450 degrees. If you are making 2 crusts, cut the dough in half here.
  • Grease the pan(s) using olive oil.
  • Place dough on the pan and spread by hand (keep your hands floured so it doesn’t stick!).
  • Once the dough is spread, brush or spray the dough with additional olive oil. Note: The crust will shrink as it bakes so spread out to the edges as much as possible.
  • Bake for 10-15 minutes, until the the bottom is becoming golden brown (less time for thin crust).
  • Remove from oven and top with your favorite toppings. Return to oven and bake until the cheese is golden brown, approximately 8 minutes.
Keyword pizza, sourdough
Tried this recipe?Let us know how it was!

Sourdough Inspiration!

Cranberry Jalapeño Dip

Last Updated on February 16, 2021 by Jess

Headed to a get together or hosting a get together and need a dish to share? Have I got one for you! This one comes together in less than 10 minutes and is so fresh with really intriguing flavors. The tartness of the cranberries. A hint of sweet from the onion and sugar. A bit of kick from the jalapeño. And it’s flexible too! Serve this Cranberry Jalapeño Dip with scoop tortilla chips or spread it on top of some cream cheese with a side of Wheat Thins. Or…you can even do it as a relish on its own. Possibilities are always endless! This quick little blog post leaves you with the recipe next:

Your ingredients

  • 12 ounces whole cranberries, rinsed, drained, and then chopped in a food processor (I dig this one from Kitchen Aid)
  • 1 jalapeño, diced finely (about 1/3 of a cup)
  • 1/4 cup diced onion (I like red for the hint of color, but whatever you have on hand works)
  • 2 tablespoons-1/4 cup chopped fresh cilantro
  • 2 tablespoons white sugar
  • juice from 1/2 of a lime (1-2 tablespoons)
  • pinch of salt

Your quick steps to Cranberry Jalapeño Dip

In a medium sized bowl, mix cranberries, onion, and jalapeño. Top with cilantro, sugar, juice, and salt. Stir. Allow the flavors to mingle for at least 30 minutes before serving (or as long as you can wait…I never listen to those directions 🙂 ). Serve it on its own, with tortilla chips, or perhaps with wheat thin crackers and cream cheese. There are so many options and it’s sure to please anyone you’re entertaining!

Check out some other side dishes and great main dishes by heading over to my cooking page!

Tools of the Trade

I always thought that a small food processor was all I needed. I mean, it’s what my mom had and she did just fine. Then I was gifted a 7 cup Kitchen Aid food processor for Christmas one year and my world was changed! If you don’t have one yet, consider investing!

Cranberry Jalapeño Dip

Sweet, tart, and spice combine in this quick and easy dip that's sure to please all the guests you entertain!
Prep Time 5 minutes
Course Appetizer
Cuisine American
Servings 10

Ingredients
  

  • 12 ounces whole cranberries rinsed, drained, and then chopped in a food processor
  • 1 jalapeño diced finely (about 1/3 of a cup)
  • 1/4 cup diced onion
  • 2 tablespoons-1/4 cup chopped fresh cilantro
  • 2 tablespoons white sugar
  • juice from 1/2 of a lime 1-2 tablespoons
  • pinch of salt

Instructions
 

  • In a medium sized bowl, mix cranberries, onion, and jalapeño.
  • Top with cilantro, sugar, juice, and salt. Stir.
  • Allow the flavors to mingle for at least 30 minutes before serving.
  • Serve it on its own, with tortilla chips, or perhaps with wheat thin crackers and cream cheese.
Tried this recipe?Let us know how it was!

Maple Syrup Season

Last Updated on September 30, 2021 by Jess

My Story…An Adventure…

Cooking Sap: A new family tradition

(You can totally skip this part if you aren’t into hearing the back story, but I do have some big hints and tips that I learned in my first adventure into maple syrup 🙂 ) Click here to skip my story!

How I roll

I have to begin this post by saying I’m the type of person who gets approximately 75% of the information needed for a grand plan and then I go all in, and my husband has to strap in for a wild ride. This is true with my food blog, fitness activities, you name it. But our favorite example of me doing this is maple syrup. Being from the Northwoods of Wisconsin, we know a number of people who tap trees every spring and cook down their own maple syrup. My new found obsession with foraging and all things homesteading meant I became interested over the last few years.

Gathering

Last March, I was doing some shopping at the local (ish) Fleet Farm and saw the tree tapping supplies. I had done MINIMAL research, but I quickly texted two different friends who tap and got some quick info. Yes, it was late in the season. But I had made my mind up and picked up the materials to tap four (yes, just four) trees. I figured it would be an adventure for my family and worst case scenario, we were out a few hours of work and about $35.

I brought it home, read a little more about gathering maple syrup online, and we began the quick process of hanging the sap bags. Little did I realize just how much sap we would get! After just 48 hours, we had multiple gallons of sap and no real place to store it (again, 75% of the information is all I ever have and then I fake it till I make it).

Cooking

So begins the process of cooking maple sap down, in the middle of the week, after my husband and I had both worked a full day. We got home, ate dinner, and put together a fire outside, setting some 2 inch metal fencing from our garden on top of a few cinder blocks for the old kettles we had to sit on top. The sap got poured into the kettles and we boiled away, keeping the fire stoked.

Because we were using an old canning kettle (something taller than it was wide, so less surface area for the heat to reach), it took longer to boil down than either of us anticipated (75% of the information…maybe more like 50% 🙂 ), and we were so tired. The first time we cooked, we went to bed at 10:30-11 pm, but set an alarm for every 30 minutes so we could stoke the fire. I can’t help but laugh now as I remember that. I think I blocked that from my memory!

By 1 am, the sap had cooked down to about 1-1 1/2 quarts of maple syrup and we were able to bring it inside to finish it on the stove. From here, we boiled away until we had a hard boil, checking the temperature every few minutes. You have maple syrup once the temperature reaches 7 degrees above the boiling point of water (which varies based on your elevation). We hit that point, filtered it through cheese cloth twice, tasted the delicious syrup we had just made and worked SO hard to finish, and immediately collapsed back in our bed.

A sane person may quit after that experience 🙂 It wasn’t hard by any means, but it sure took a lot out of us. However, I got more excited (so did our kids), and although he would never admit it, my husband loved it. He got to spend hours around a fire with a beverage of his choice, watching the sap boil. It’s calming and healing, believe me. We learned crazy amounts after that first experience.

A few hints Before you start

  • Start the fire AS SOON AS YOU GET HOME.
  • Try to use wider pans to cook in to increase the surface area.
  • It’s best if you cook on the weekends so you can cook in the daylight.
  • Don’t chop your wood too close to the fire or hitting the kettle and losing all your sap may occur. Super sad!
  • You don’t need to fill the kettle to the top with sap to begin. Get a boil going and slowly add the rest of your sap.
  • Anyone can do this! It is rewarding and fun to learn.
A perk for the littles: tasting the sap right out of the tree!

Now It’s your Turn!

This year, we tapped just two trees with four taps at my in-laws after our spring break trip fell apart. We figured we would be around and my husband’s family had never experienced it before. It wasn’t the plan, so we began by picking up a kit (simply because then we knew we had everything we needed. You will need:

  • Taps (four is plenty for your first go!)
  • Sap collecting bags (one bag per tap)
  • Hangers for the bags
  • A drill and drill bit to match the size of the tap as well as a hammer
  • Large cooking vessels that you are okay getting covered in carbon as they sit over the fire (think, the soup kettle you never liked anyway)
  • Lots of dry wood, cut smaller
  • Cinder blocks and some form of metal to set the cooking vessel on (wire, an old grill grate, metal posts, etc)
  • Cheese cloth to filter syrup when your finished cooking it down
  • Cooking thermometer, preferably digital

Tapping happens in the spring, when the nights are still below freezing but the days are warmer. The sap should run clear out of the tree. If it is cloudy, it is time to be done collecting. One trick sappers use is to watch for the tree leaves to bud out.  Once the leaves bud out you know that sapping season has come to a close. You can tap any maple tree, but sugar maple are going to be the highest sugar content. You will want to have the bags facing the south to keep them warmest during the day. I am going to write these directions assuming you have the same quantity sap we did with about 4 taps. I want the directions short and sweet so feel free to read around the Internet for more information!

1. Drill a hole into the tree at about chest height, initially going straight in but angling up just slightly to encourage sap flow. The depth of your hole should be about 2 – 2 1/2 inches. (How many taps can a tree hold? Check the diameter: 10-20 inches = 1 tap, 20-25 inches = 2 taps, over 25 inches = 3 taps)

2. Insert the tap into the tree and gently use a hammer to get it inserted the rest of the way. Depending on the temperature outside, the tree may begin dripping sap immediately (if it is warmer). It dripped immediately at my in-laws, but took a while to drip at our own home. Don’t fret.

3. Wrap your bags around the metal ring and insert back into the hanger. Hang bags on the tap, making sure that the spout is dripping inside the bag.

4. Walk around and check on them because you’re just so happy you tapped your first trees.

5. As your bags fill, know that you can truly cook at any time, but be mindful of the size of your cooking vessel. The ratio of sap to syrup is approximately 40:1, that is for every 40 gallons (cups, whatever) of sap you collect, you will get 1 gallon (cup, whatever) of syrup. Whenever you are ready, pour the sap into a kettle and place the bags back on the hangers to continue to collect.

6. We like to build a fire, but protect it with cinder blocks on each side. The first year, we use blocks that had holes in them. This year, we bought solid blocks from Fleet Farm, and they held up to the heat much better. Place the metal grate, wire, etc. on top of the blocks and put the kettle on top.

7. Boil. And boil some more. Keep the fire hot. Sit around with a beverage of your choice (coffee til cocktails, anyone?) and reconnect with nature and your friends. Boil until you’ve reached the point that you have approximately 1-2 quarts left of your sap. That is, once it has begun to turn that glorious syrup color and you have a kettle small enough to finish it off on the stove.

8. CAREFULLY pour your “almost syrup” into the smaller kettle, and bring to a boil on your stove. I told my husband the boil changes when it’s getting closer and he agreed, but I don’t quite know how to describe it. You will notice it too though, I am certain. Stir the “almost syrup” often, and check the temperature every few minutes. It will take longer than you think it should.

9. You have syrup once the temperature reaches 7 degrees above the boiling point of water at your elevation. If you are under 1000 ft above sea level, that will be 219 degrees, but you may want to do an Internet search on the boiling point for your own town. (There are other ways to check for syrup beyond temperature…fancy: hydrometer that measures sugar content, not fancy: spoon test and seeing how it falls off a metal spoon. I recommend just using a digital thermometer)

10. Once you reach the right temperature, you will want to filter the syrup through cheese cloth. We like to put the cheese cloth over a small mesh colander and pour it into a larger measuring cup (see picture). Then we filter it once more from the measuring cup into a mason jar (or whatever you want to store your syrup in). Allow to cool, and then store in your refrigerator.

That’s it! In just 10 steps, you have made your very own maple syrup. It’s great with all of your breakfast goodies like waffles (I have a great recipe here!), as a refined sugar replacement (check out the energy balls here!), or even as your sweetener in your coffee. I hope you enjoyed it as much as we do and start a family tradition like we have 💗

Looking to find more treats that the Earth has to offer? Check out some of the links below:

Forget the Meat Italian Vegetarian Pasta Bake

Last Updated on February 4, 2023 by Jess

I love me a good Italian dish. Then you put it in bake form and I am essentially in heaven. I hope you enjoy this Italian vegetarian pasta bake as much as my family did!

True confession: This recipe wasn’t supposed to be vegetarian. I browned this fantastic ground Italian venison that my family makes and had it all set on the table. It smelled amazing and I was excited. You see, I had this delightful combination of vegetables simmering and well…I think I got too excited. After I finished layering the vegetables, pasta, and cheese, sprinkling some last bit of mozzarella and some basil and oregano. I marveled at the layers and their beauty. Then I saw it. The bowl of browned venison! How could I forget?! Oh, I forget a lot, so I don’t know why I am so surprised 😀 I looked at my husband and he said, “I don’t need a protein with my Italian and you don’t want to take that apart!” So in the oven it went, and by golly, it was amazing, meatless and all.

It oozes with cheese and has tons of fresh vegetables. My son doesn’t love zucchini, so I knew if I did zoodles or shaved them to replace lasagna noodles, I would have a complainer on my hands. He would eat it, but it wouldn’t be a fun dinner at our house, and I am not a short order cook (no special meals for kids around these parts!). However, I thought I could sneak them in by dicing them up, and he didn’t say a word as he gobbled it up! Give it a try!

Your ingredients for your Italian Pasta Bake

  • 12 ounces tri-color rotini (or other noodle of your choice!)
  • 1/2 cup chopped green pepper
  • 1 cup chopped green zucchini
  • 1 cup chopped yellow zucchini
  • 1/2 cup chopped onion
  • 1 cup chopped mushrooms
  • 1 tablespoon olive oil
  • 3 teaspoons minced garlic
  • 1/2 tablespoon dried basil
  • 1 teaspoon dried oregano
  • 1/2 teaspoon salt
  • 1/4 teaspoon red pepper flakes
  • 2 15 ounce cans of diced tomatoes, salt free
  • 1 15 ounce can of tomato sauce
  • 15 ounces ricotta
  • 3 cups mozzarella, divided
  • 3/4 cup shredded parmesan, divided
  • 1 egg
  • 1 teaspoon minced garlic
  • 1/4 teaspoon black pepper

Your Steps

Preheat oven to 375 degrees. Bring a kettle of water to boil and cook rotini to al dentè. Drain and set aside. Cook Heat olive oil in a large sauce pan (I actually just used my pasta kettle!) over medium heat. Add 1 tablespoon minced garlic, green pepper, and onion. Sauté for 4-5 minutes, until just tender. Add salt, red pepper flakes, basil, oregano, zucchini, and mushrooms. Cook for an additional 5 minutes. Stir in diced tomatoes and tomato sauce, allowing to simmer while you mix the cheese mixture.

Speaking of the cheese mixture, is it even Italian if it doesn’t have cheese?! This recipe is creamy and cheesy in all the right ways, but if cheese doesn’t speak to your soul like it does to a Wisconsinite, feel free to cut this down just a touch. In a separate bowl, mix ricotta, 1 cup of the mozzarella, 1/2 cup of shredded parmesan, egg, 1 teaspoon of minced garlic and pepper.

Now to build your Italian Vegetarian Pasta bake!

Layer approximately 2 cups of the vegetable mixture on the bottom of a pyrex pan. Add approximately 1/3 of the noodles and then 1/3 of the cheese mixture. Continue layering until two more times, but end with the vegetable mixture. Sprinkle with remaining mozzarella and parmesan. Add a little basil and oregano if you’re feeling fancy. Bake for 30 minutes, or until the cheese is melted and the mixture is heated through. I love my cheese browned on top, so I turn on the broiler at 500 degrees and cook for 1-3 minutes more, watching VERY closely. The broiler is AMAZING, but you can go from perfection to burned in a snap!

I loved that this bake stays saucy. Sometimes a pasta bake can become dry over a day or two as the noodles absorb the extra liquid. Serve with some crusty bread and maybe a salad because you know you need ALL the vegetables 😉 A perfect prep on the weekend to enjoy on those crazy weekday nights! Enjoy! —Jess

Looking for other great bakes and dishes for dinner prep? Check out my cooking page for more ideas or click one of the links below!

Tools of the trade

Whenever I am creating casseroles and baked dishes in my kitchen, I have a couple go to tools I need: flexible cutting boards, Pyrex dishes, and good parring knives. I don’t know if I really can live without them, what can I say?

Italian Vegetarian Pasta Bake

No ground protein on hand? No problem! Throw this Italian vegetarian pasta bake together for dinner tonight! Bonus leftovers for smaller families!
Prep Time 30 minutes
Cook Time 30 minutes
Course Main Course
Cuisine Italian

Ingredients
  

  • 12 ounces tri-color rotini or other noodle of your choice!
  • 1/2 cup chopped green pepper
  • 1 cup chopped green zucchini
  • 1 cup chopped yellow zucchini
  • 1/2 cup chopped onion
  • 1 cup chopped mushrooms
  • 1 tablespoon olive oil
  • 3 teaspoons minced garlic
  • 1/2 tablespoon dried basil
  • 1 teaspoon dried oregano
  • 1/2 teaspoon salt
  • 1/4 teaspoon red pepper flakes

Instructions
 

  • Preheat oven to 375 degrees. Bring a kettle of water to boil and cook rotini to al dentè. Drain and set aside.
  • Heat olive oil in a large sauce pan over medium heat.
  • Add 1 tablespoon minced garlic, green pepper, and onion. Sauté for 4-5 minutes, until just tender.
  • Add salt, red pepper flakes, basil, oregano, zucchini, and mushrooms. Cook for an additional 5 minutes.
  • Stir in diced tomatoes and tomato sauce, allowing to simmer while you mix the cheese mixture.
  • In a separate bowl, mix ricotta, 1 cup of the mozzarella, 1/2 cup of shredded parmesan, egg, 1 teaspoon of minced garlic and pepper.
  • Layer approximately 2 cups of the vegetable mixture on the bottom of a pyrex pan.
  • Add approximately 1/3 of the noodles and then 1/3 of the cheese mixture.
  • Continue layering until two more times, but end with the vegetable mixture.
  • Sprinkle with remaining mozzarella and parmesan. Add a little basil and oregano if you’re feeling fancy.
  • Bake for 30 minutes, or until the cheese is melted and the mixture is heated through. If you loved browned cheese, urn on the broiler at 500 degrees and cook for 1-3 minutes more, watching VERY closely.
Keyword pasta, pasta bake, vegetarian
Tried this recipe?Let us know how it was!

Looking for other great dinner ideas?

Check out the recipes below or head right to my Cooking page!