I'm an affiliate
I hope you love the products I recommend! Just so you know, I may collect a share of sales or other compensation from the links on this page. If you use the links, thank you for supporting me! I really appreciate it!
Last Updated on November 30, 2024 by Jess
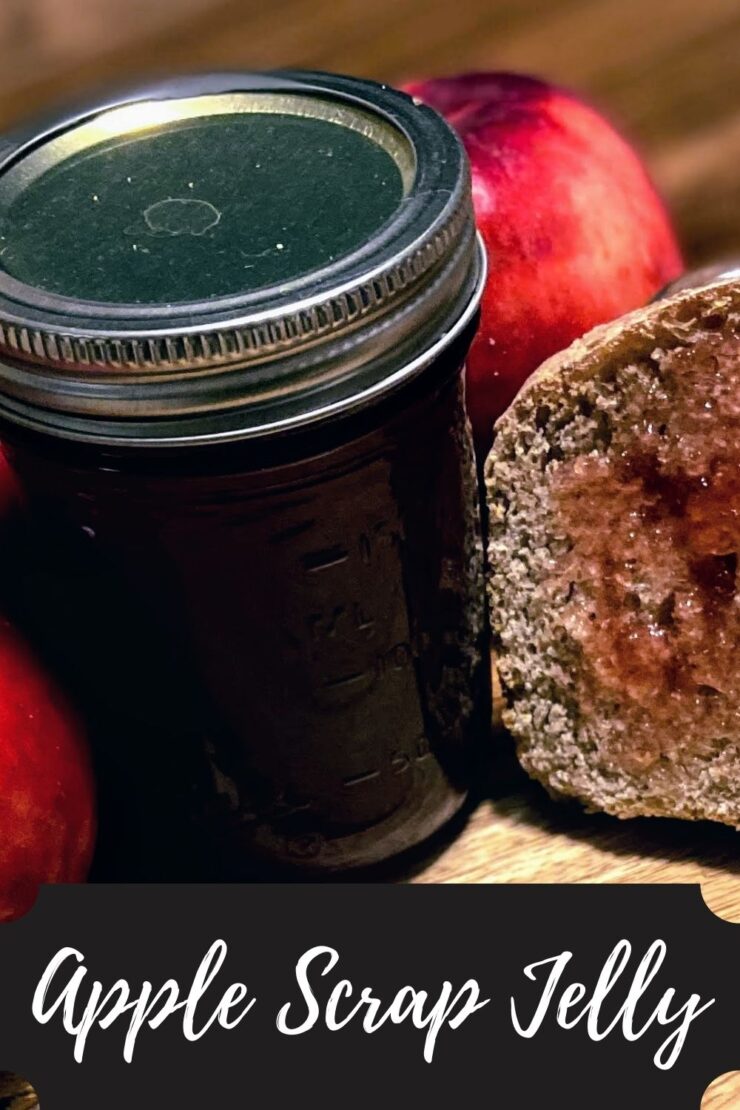
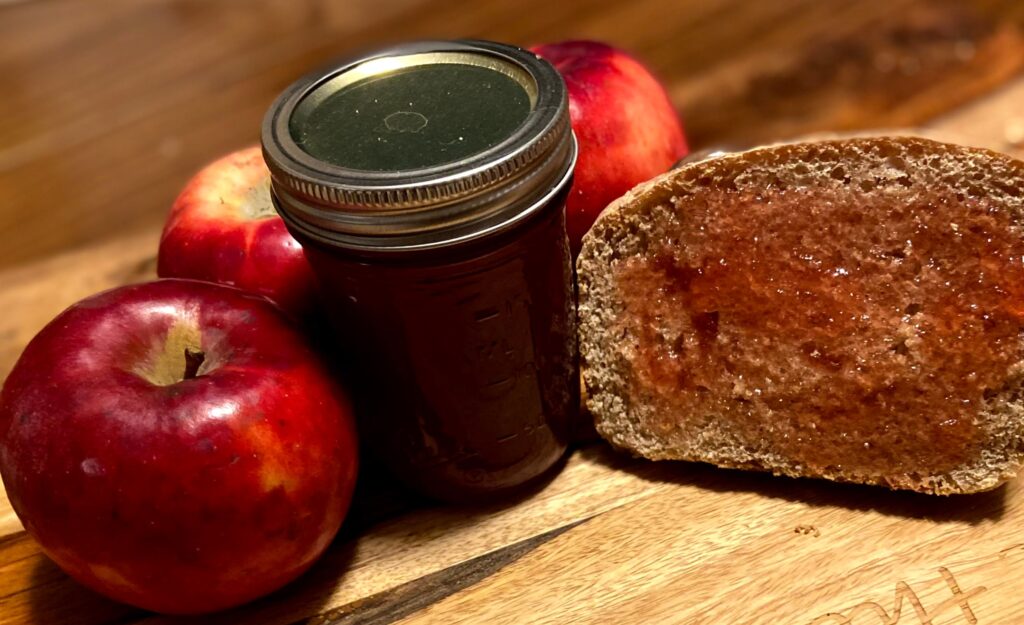
Apple season brings everyone visiting the orchard, making fresh applesauce and maybe even a pie or two. With all the peeling and coring happening, you’ll be happy to know there is something to do with all those scraps that will result in a delicious outcome: Apple Scrap Jelly!
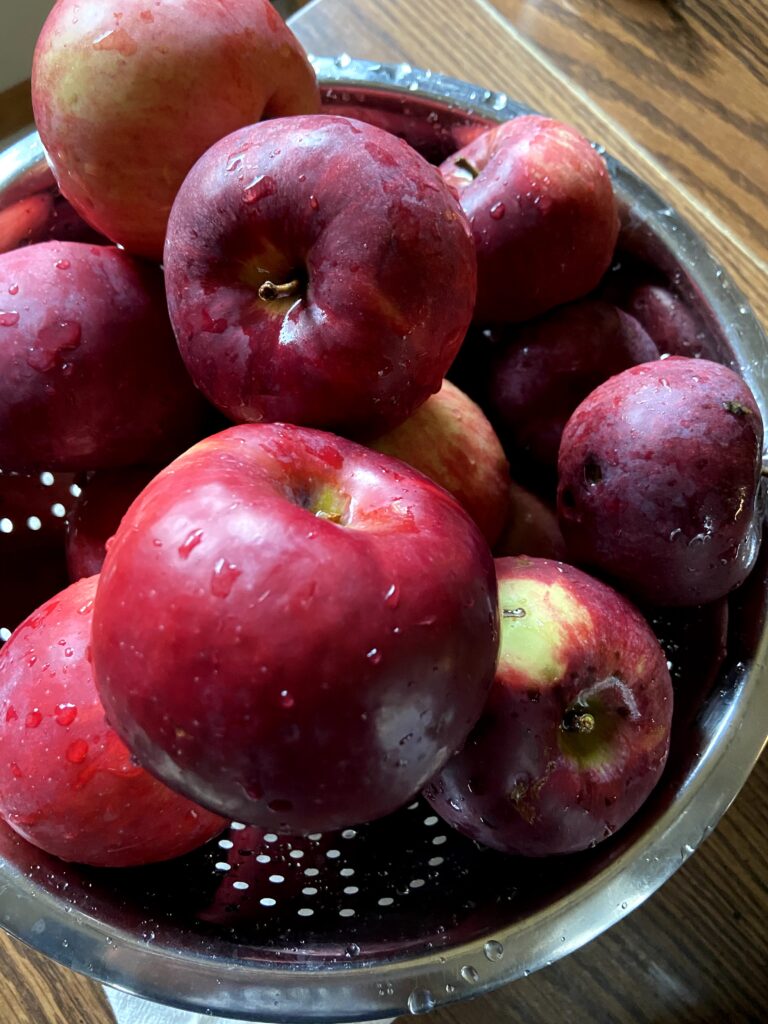
We bought our house about 11 years ago and promptly began to dig up the ground to put in gardens, bushes, and trees. Since then, we have planted a total of 16 fruit trees on our little slice of happiness. Developing trees takes time, and we are finally at the point where we are picking a few bushels of apples. Oh the joy! This means I am preserving the apples into apple pie filling, applesauce, and the like. A few years ago, I saw the piles of peels and cores knew there had to be something I could do with the “waste.” Enter Apple Scrap Jelly. With only four ingredients, you will likely have everything on hand to make it. It doesn’t even need commercial pectin! What a win!
Do you have some apples you’re hoping to peel and core to make fall treats? Get another bowl, save the scraps, and be prepared to create another treat!
Your Ingredients
- a kettle full of apple peels and cores
- water
- sugar (½ cup for every cup of liquid after boiling down)
- lemon juice (½ tablespoon for every cup of liquid after boiling down)
Begin The Boiling
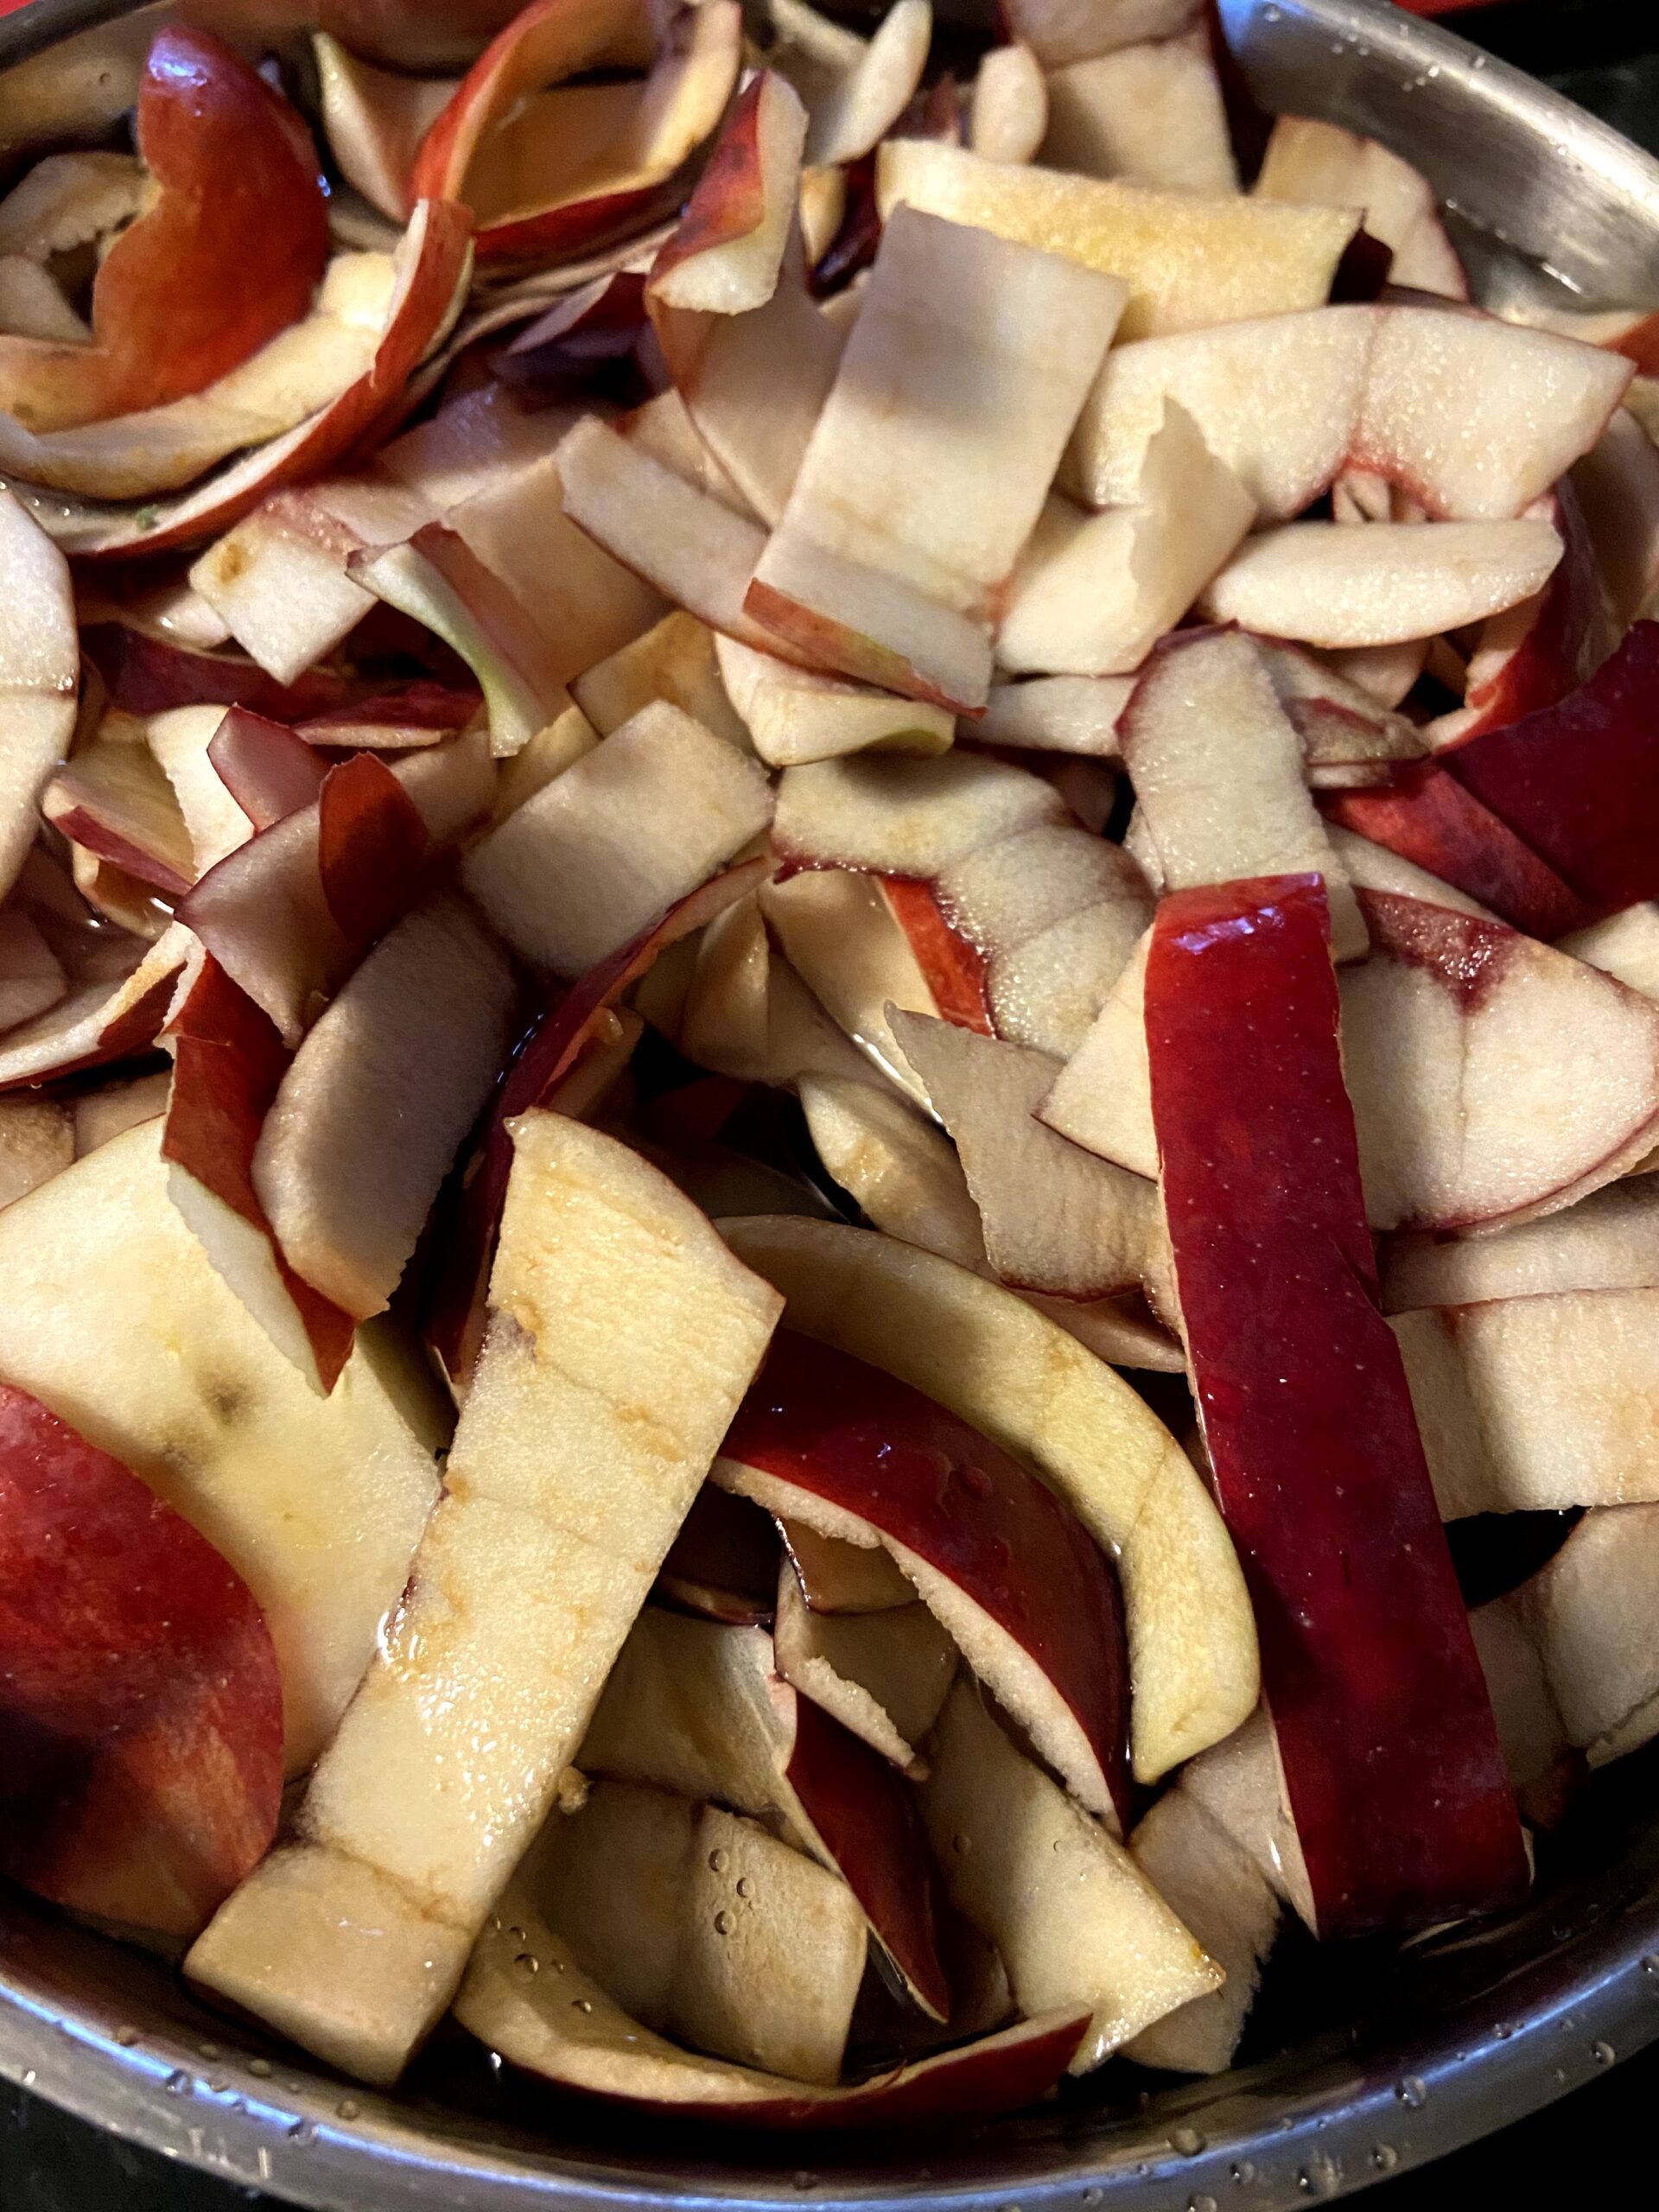
After peeling and coring apples for another recipe, place all scraps into a large kettle. It doesn’t matter how much you have, although the more the better simply because it will result in more jelly. I generally keep two vessels going at the same time: one for my apples for sauce/pie/etc and one for the scraps.
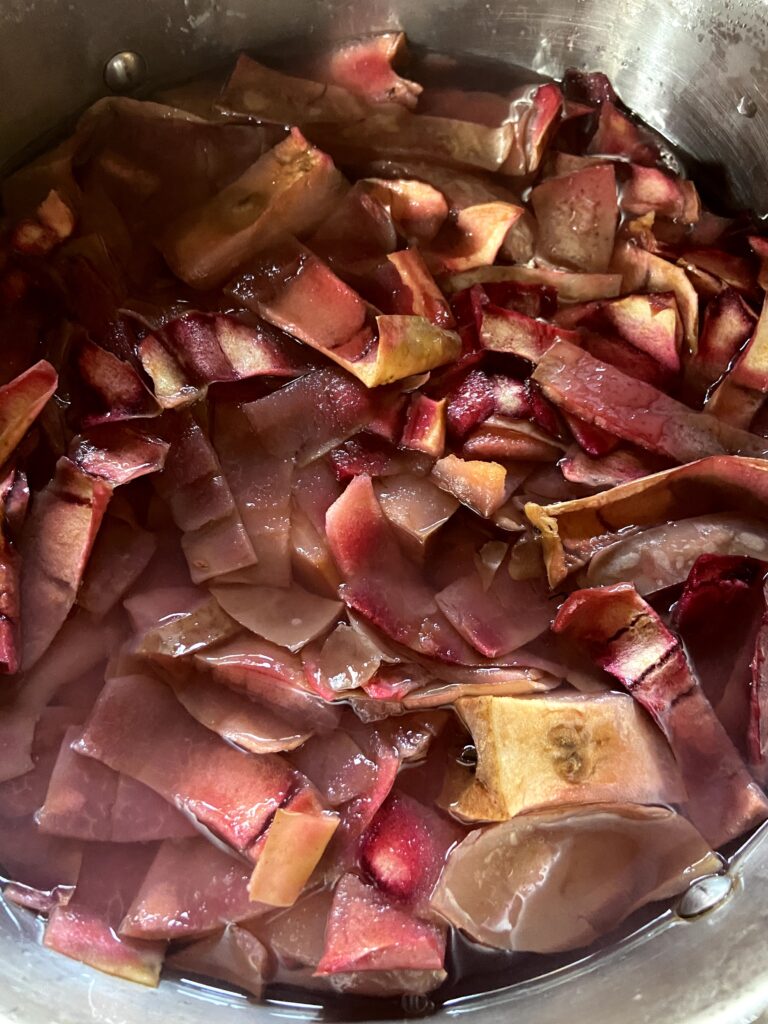
Cover the apple scraps with water, filling until the scraps begin to float. Heat over medium-high heat, bringing to a boil. Boil water and apple scraps until half of the liquid is remaining (this is an estimate, it doesn’t need to be perfect by any means). This will likely take an hour or so.
Now, if I’m being real, I generally let water/apple mixture cool overnight in the refrigerator. Not because you have to, but because I don’t want to finish that day.
Time for Jelly!
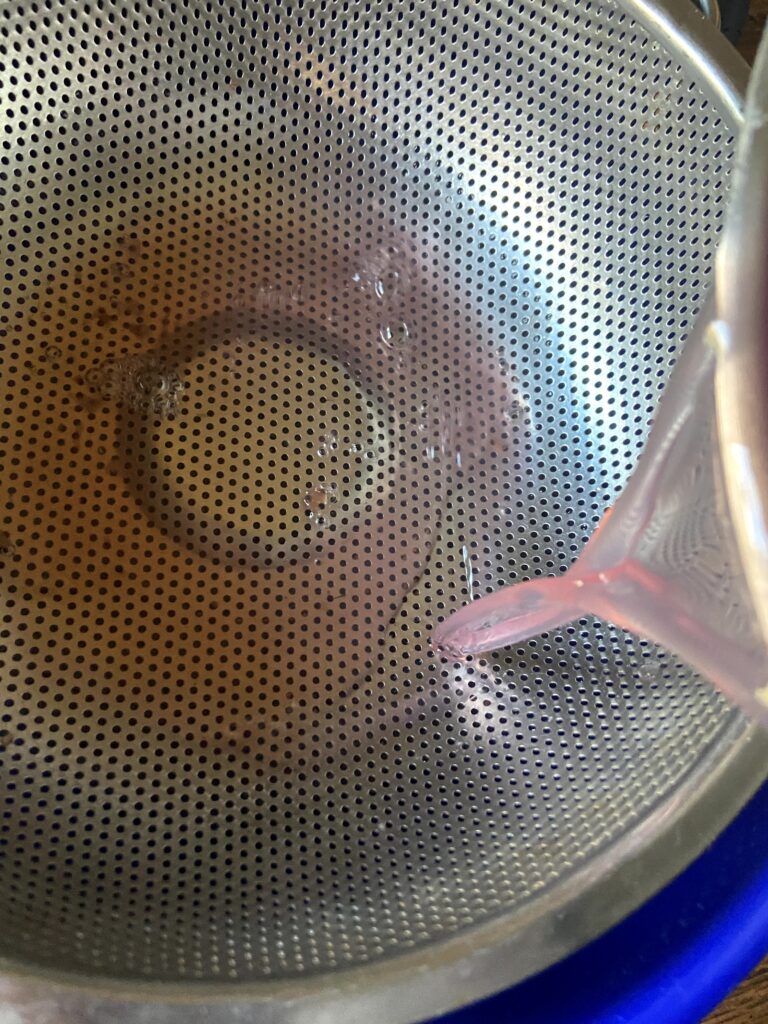
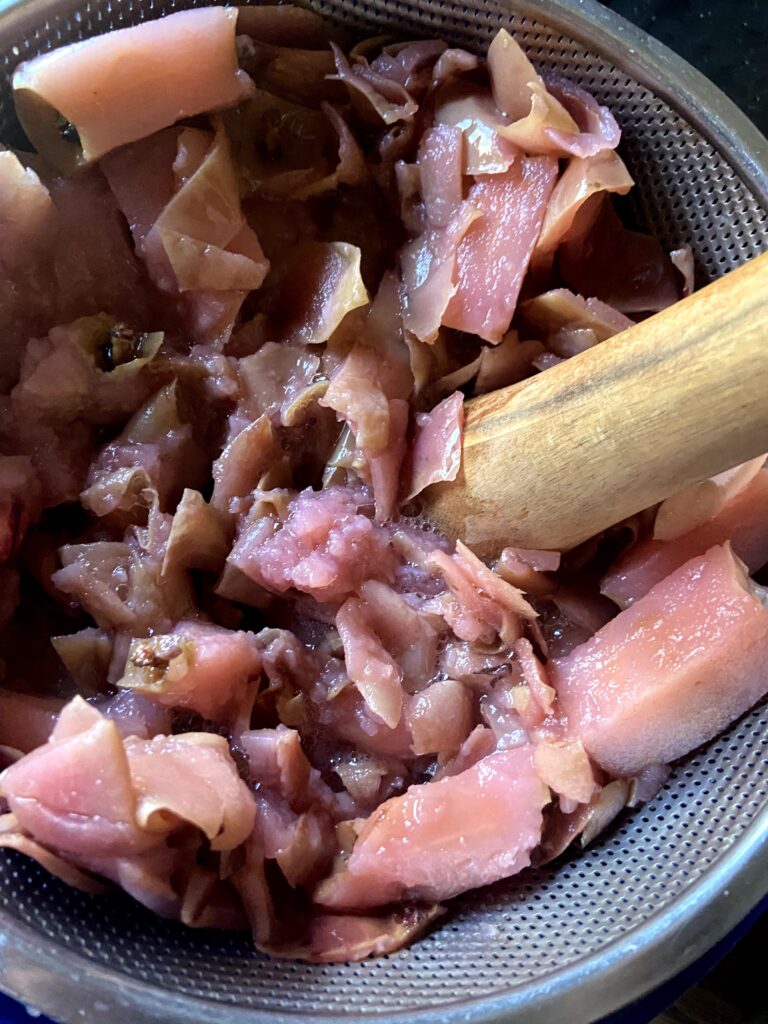
Either way, your next step is to separate the water from the scraps. I generally place a finer colander over a bowl with a pour spout. Press into the apple to extract all the apple-goodness. From here, pour the water into a liquid measuring cup to determine the amount of sugar and lemon juice you should add.
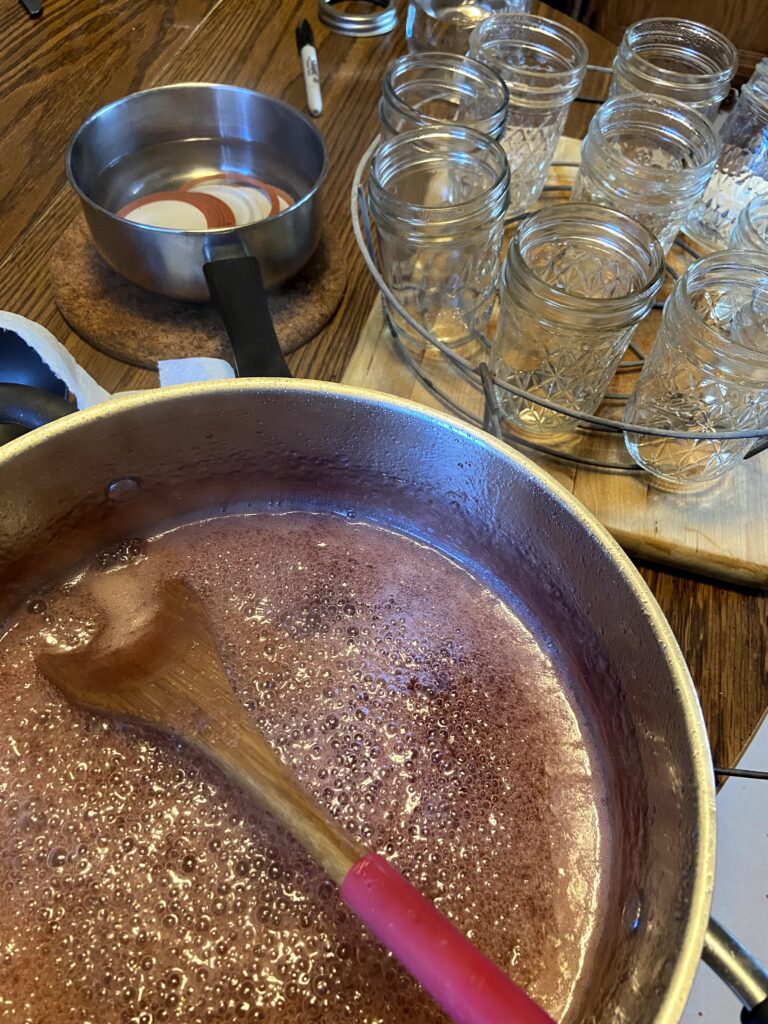
Place the liquid in a large kettle. For every cup of liquid, stir in ½ cup sugar and a ½ tablespoon lemon juice. Begin to heat over medium-high heat, stirring often. Your end goal is to reach the gelling point. There are lots of tests for this, but I prefer the temperature test. If you are at sea level, the gelling point is at 220 degrees. For every 1000 feet of elevation, you subtract 2 degrees. For me, the gelling point is 218 degrees. Don’t have a decent food thermometer? Check out the National Center for Home Preservation website for other ways of testing for the gelling point.
It takes longer to reach the gelling point than I think it should. It also goes from needing 3 degrees to reaching the gelling point fast. You can get complacent while you are waiting and suddenly hit the temperature, so I am trying to warn you 🙂
While the jelly is boiling, begin to prepare your water bath canner and jars if you plan on processing them. (If you want to simply place the jelly in the fridge after it hits the gelling point, that’s 100% okay. You don’t need to process it. However, if you want it self-stable, you should process in a waterbath canner.)
Canning Time!
Wash and sanitize jars, rings, and lids. Keep warm. Fill the canner with enough water to cover the jars by at least 2 inches of water. Cover and heat on high. Watch the temperature, you want a simmer but not a boil when you place the jars in the water.
Once the apple jelly has reached the gelling point, remove from heat. Ladle into prepared jars, leaving ½ inch head space. Wipe rims of the jars with a damp cloth, add lids and rings, tightening to fingertip tight. Place in the canner, increasing the heat to high. Once the canner reaches a boil, process for 10 minutes. Remove from heat and allow jars to cool in the canner over 5 minutes. Remove from canner, placing on the counter. Listen for the ping of the lids over the next 12 hours. Sealed jars are self stable. If any jar doesn’t seal, simply place it right in the refrigerator.
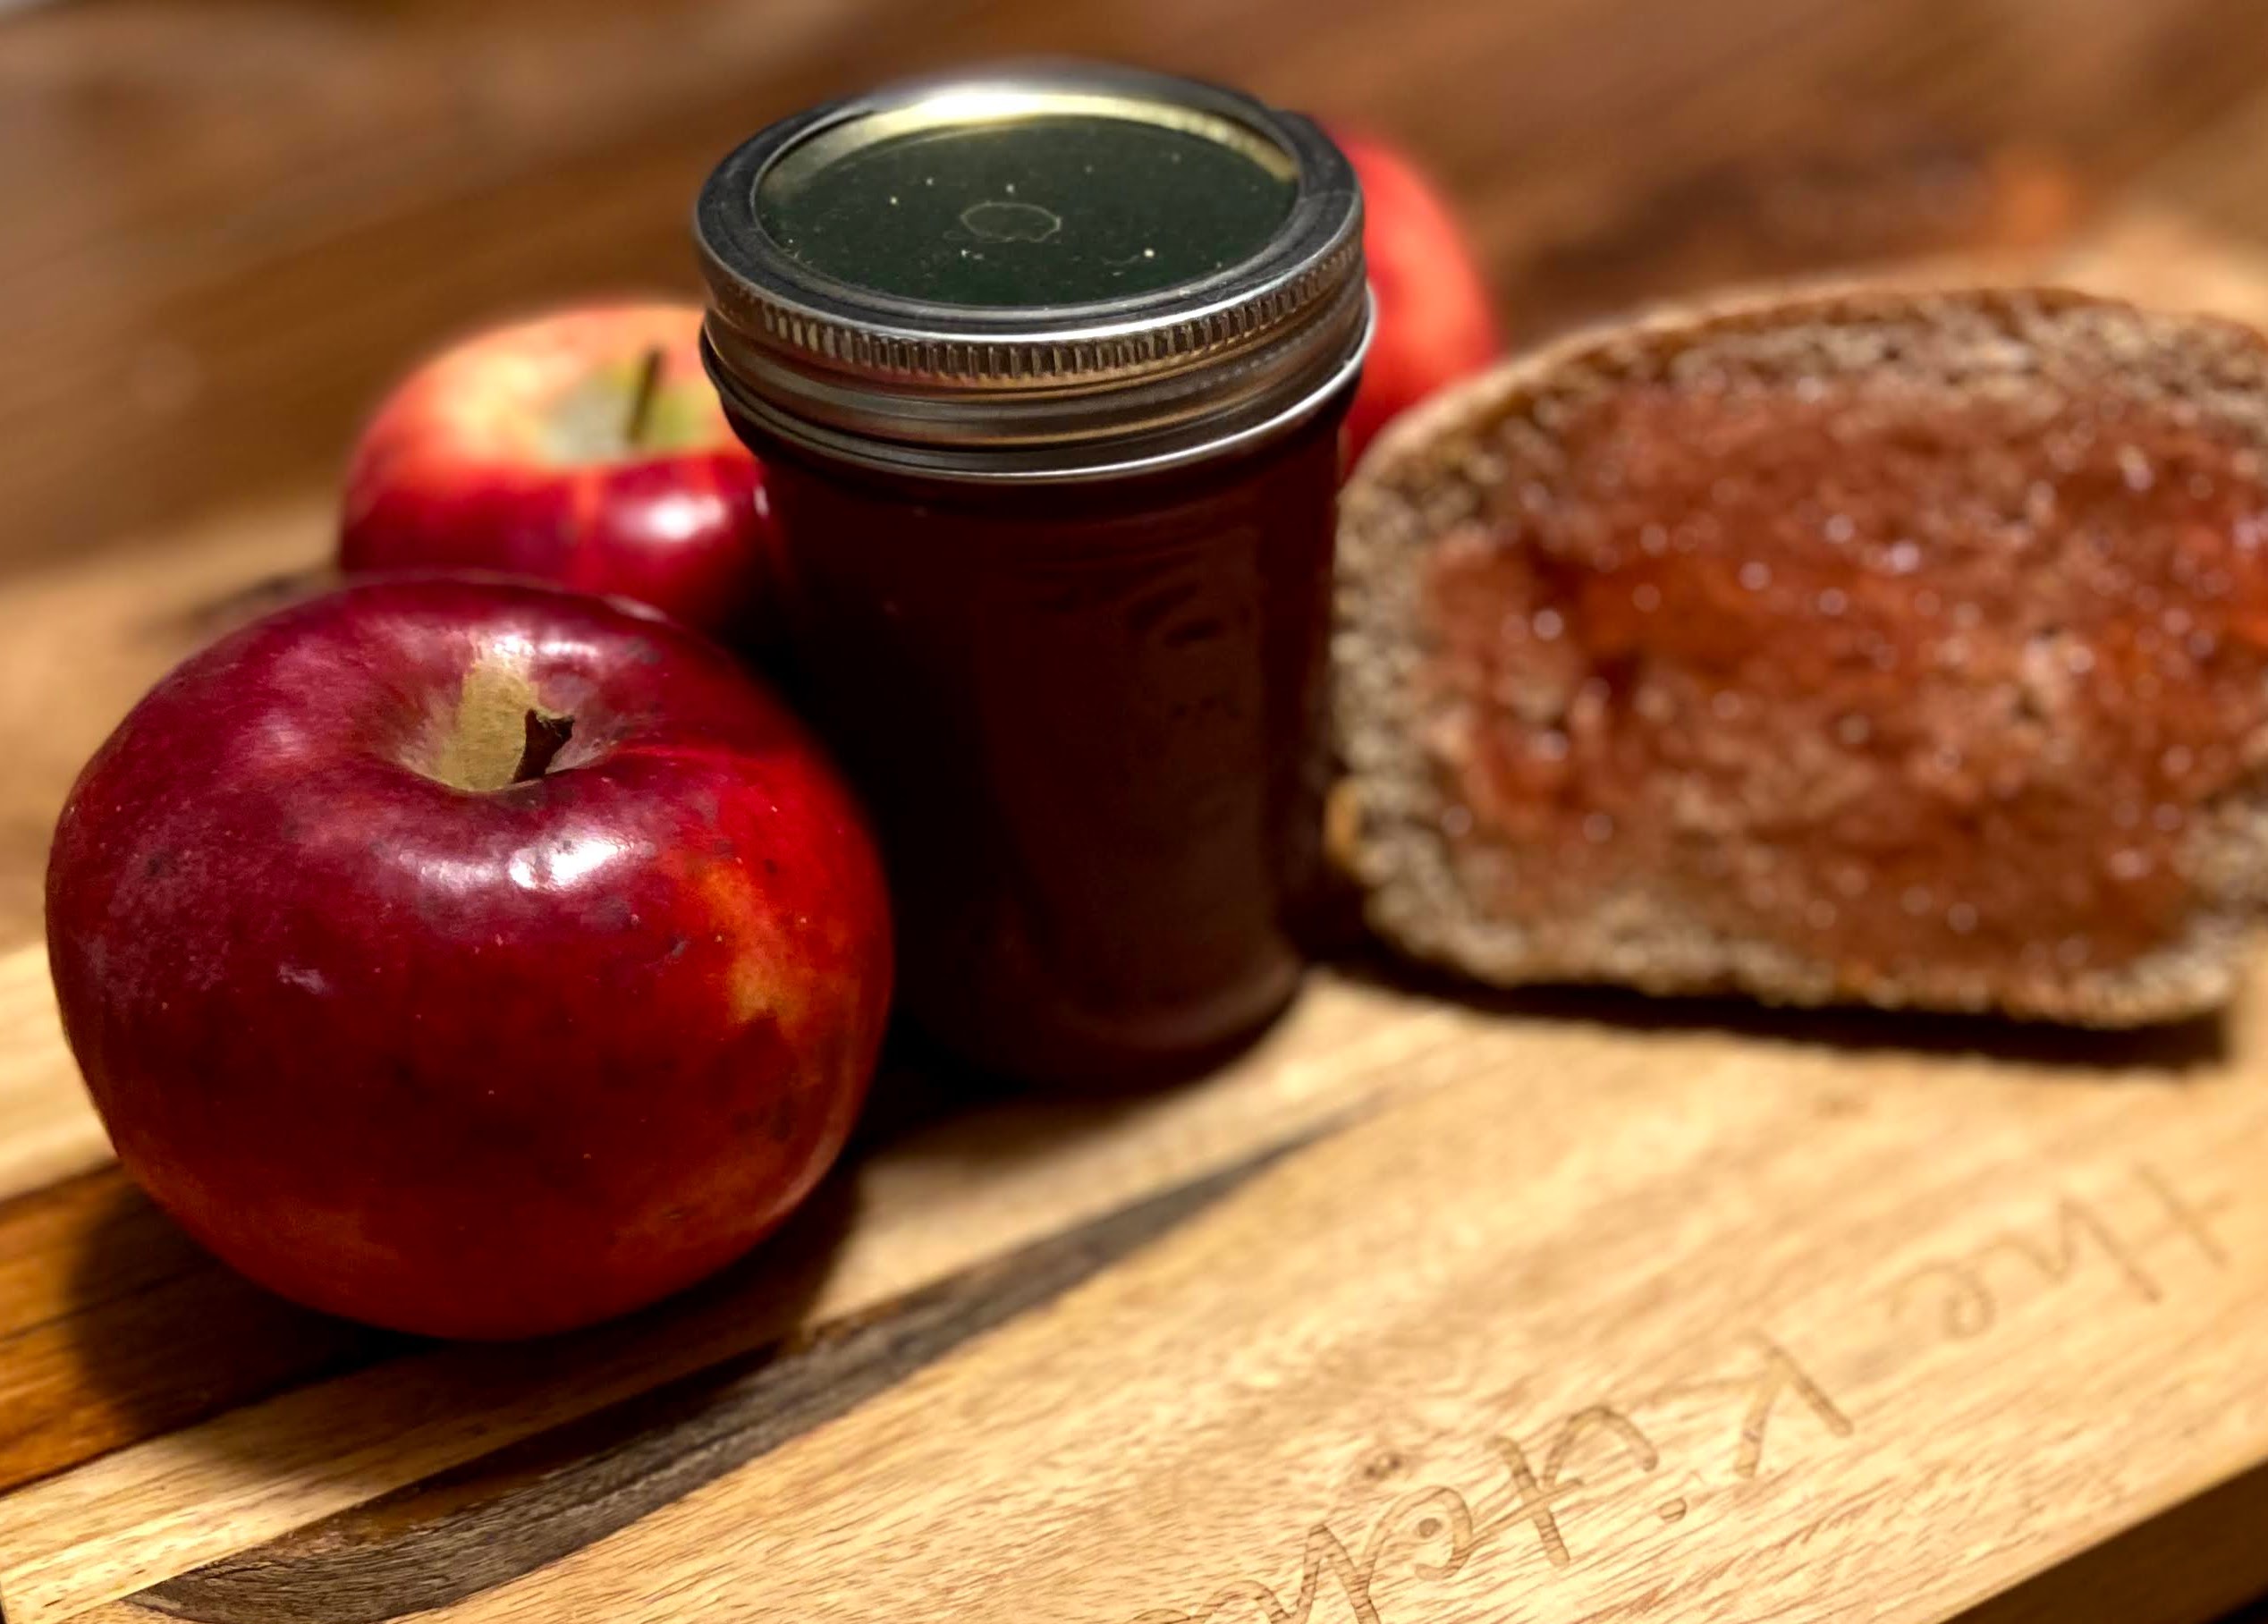
PS…To be especially awesome, have some fresh baked bread on hand to spread the left over warm apple scrap jelly in the kettle on a slice. Enjoy while the rest of the jelly is in the water bath. I promise, you’ll thank me.
Tools of the Trade
A nice strainer is a must in a stocked kitchen!
I love my waterbath canner.
The shallowness of this stock pot makes boiling down go so much quicker. My go to kettle for jelly.
Apple Scrap Jelly
Equipment
Ingredients
- a kettle full of apple peels and cores
- water
- sugar ½ cup for every cup of liquid after boiling down
- lemon juice ½ tablespoon for every cup of liquid after boiling down
Instructions
- After peeling and coring apples for another recipe, place all scraps into a large kettle. It doesn’t matter how much you have, although the more the better simply because it will result in more jelly.
- Cover the apple scraps with water, filling until the scraps begin to float. Heat over medium-high heat, bringing to a boil. Boil water and apple scraps until half of the liquid is remaining.
- Separate the water from the scraps. I generally place a finer colander over a bowl with a pour spout. Press into the apple to extract all the apple-goodness. From here, pour the water into a liquid measuring cup to determine the amount of sugar and lemon juice you should add.
- Place the liquid in a large kettle. For every cup of liquid, stir in ½ cup sugar and a ½ tablespoon lemon juice. Begin to heat over medium-high heat, stirring often. Heat to 8 degrees above the boiling point of water. If you are at sea level, the gelling point is at 220 degrees. For every 1000 feet of elevation, you subtract 2 degrees.
- While the jelly is boiling, begin to prepare your water bath canner and jars if you plan on processing them rather than storing in the refrigerator.
- Wash and sanitize jars, rings, and lids. Keep warm. Fill the canner with enough water to cover the jars by at least 2 inches of water. Cover and heat on high. Watch the temperature, you want a simmer but not a boil when you place the jars in the water.
- Once the apple jelly has reached the gelling point, remove from heat. Ladle into prepared jars, leaving ½ inch head space. Wipe rims of the jars with a damp cloth, add lids and rings, tightening to fingertip tight. Place in the canner, increasing the heat to high. Once the canner reaches a boil, process for 10 minutes. Remove from heat and allow jars to cool in the canner over 5 minutes. Remove from canner and allow to rest for 12 hours before storing.
Notes
Looking for other canning recipes? Check out my canning and preserving page below!
When you get to the stage where you have strained and measured your liquid, what amount of liquid would make a good sized batch of jelly? I had a huge kettle of scraps, and it made 21 cups of liquid! It’s taking hours and hours to reach gel stage, and I now realize that it’s going to make more jars than my canner can hold. I should have only used part of the liquid. Would 8 cups have been better? 10? 4? I am new to this and made a huge rookie mistake.
Oh my goodness, what I good problem to have! You can do a couple batches. I would measure out perhaps 9-10 cups of liquid at a time and cook from there. Yes, it will take a while to cook down, but get a good book and stir away! Then do a second batch. I definitely will have the liquid in my fridge for a few days because life happens. I hope that helps!
Thank you! I’m trying it again with 4 cups liquid this time.
I tried this recipe as written and even after reducing to a mere 14oz of liquid, it NEVER GELLED. I even added 1tbsp pectin, bc I know apples don’t usually have quite enough pectin naturally. I ended up with apple scrap syrup, which isn’t what I wanted. What did I do wrong? I followed all instructions exactly minus adding pectin
Hi Tans!
Bummer! Even with the extra liquid pectin it didn’t set huh?
I wonder if you did too big of a batch? I have been most successful when I do smaller batches (when I result in about four jars). There are times or two that I my jelly doesn’t set, and then I either reprocess reducing more OR I am happy to have apple syrup (Can we talk about how good that would be on pancakes?!). Do you think maybe you didn’t reduce it enough?
[…] we eat ours and preserve gifted apples). I became interested in making homemade applesauce. Then apple jelly and apple pie […]
I had a 12 quart pot of scraps and simmered for almost an hour, but with a lid. I have 8 cups of liquid but didn’t boil the apple scraps and liquid until reduced by half. The strained juice is in the refrigerator now and I’m going to make the low-sugar jelly in a day or two.
Since I didn’t reduce the liquid, will the flavor be weak? Should I boil the juice to reduce it by 1/3 or 1/2 to enhance the flavor, and then proceed with adding my low-sugar pectin and sugar?
Hi Christine! I hope I am getting back to you in time. I would definitely reduce it down to enhance the flavor. Without the scraps as a base, it is hard to tell how far you should go, but I would recommend 1/3. The flavor gets infused when you have the scraps boiling with the water. I have never pulled them early. Let me know how it goes!
How do you great a liquid above its boiling point? I’m stumped.
I feel that Susan! It takes forever! But you just keep going. Eventually it will get beyond it. I try to keep my burner on high to make sure I am getting enough heat.
Heat
Can I still make this if I’m not going to can it? Just get into some jars and in the fridge? Will it still set up into a nice jelly that way?
It totally should. Just be mindful of the amount you make 🙂 I would stick with 6 cups of liquid or less.
Help!
What went wrong? I started with 6 cups of juice (liquid). I added 3cups of sugar and 3tbs lemon juice. It took forever to come to a boil. By the time I got 100celsius I had lost 2 1/2 cups.
What did I do wrong?
You didn’t do anything wrong. In the boiling process, you lose some liquid. You did great!
I use my apple scraps to make vinegar usually, but I stocked up a bit to much from all my fall baking and decided to give Jelly a go. I ended up with about 8 cups of liquid after boiling the scraps. Because I freeze my scraps they tend be very brown from oxidation when I thaw them out so I added a little bit of cinnamon and vanilla during the final boil and called it “cider” flavored lol.
I love this!
Can you do this with a
liquid sucrose sweetener? I cant
find anything about sugar free apple
scrap jam
You know, I have never tried it. I wish I had an answer!
Wow this tastes so good! I have wanted to make apple jelly for such a long time, so happy to find your recipe. Only made a small amount but man the stuff in the pan after filling jars is amazing. Thank you for sharing!
Oh Maureen! I am so happy you enjoyed it! I hope it becomes a staple in your house!
Used frozen scraps from last fall. Got 11 c of liquid, used a little pectin to speed up the gelling process bc even at 220 degrees, it still didn’t seem thick enough. Turned out beautifully. Got 3 pints of jelly. Delicious and easy. I would prob cut back a little on the sugar next time but that’s just me. Thank you.
I am so happy you were able to use up scraps and make something delicious! Yes, using too much liquid will lead to it not setting. I learned that the hard way. Best to do small batches of 8 cups or less.
Can I make this with less sugar?
If so, what should I cut back to?
I don’t use alternative sweeteners, but I really am not a huge fan of super sweet foods.
I hear you. It can be a lot. However, without the sugar it won’t set. I wish I had a better answer for you!
I would use sure jel to thicken it if you use less sugar or an alternative.
That’s a great idea! You could add pectin. The joy of apples is that they have their own pectin, so I just assumed you wanted to avoid that! Silly me 🙂
My jelly did’t set up. I made the juice, boiled it down by half, cooked the juice with sugar and lemon juice until it was 220 degrees and water bathed the jars for 5 minutes. What did I do wrong? When I took it out of the bath it was still very watery.
Couple things: 1. Give it a day or two. Sometimes it takes a couple days to set.
2. Last year was the first year that I had issues. I am thinking it might have been because of a drought?
3. Try doing smaller batches. It sets better if you do under 8 cups of liquid (if you did a lot!)
I hope it helps!
I am trying this. Can I add cinnamon sticks to the peels and cores while boiling?
Sure can!
Kris, I added cinnamon sticks and whole cloves for a spiced apple peel jelly. Just made it, but confident it will taste yummy!
OOOhhh, whole cloves. What a delightful addition!
I just finished my 1st ever batch and am really impressed with the flavor. I ended up with 10 Cups of liquid so used the 5Cups of sugar and 5 Tablespoons of lemon juice. It took FOREVER to get to 220F and I was getting pretty impatient, but kept the heat at med-high as instructed.
I ended up with 3 pints which I canned and had a cup left over which will go in the fridge. (1 failed seal due to not screwing ring on tight enough.)
The jelly didn’t set though, so I have this syrup instead of the jelly. Not sure what I did wrong.
I am so happy you loved the flavor!
Couple things: 1. I have found that smaller batches work better (I thought I edited it to add, but maybe not. I will check today!).
2. But that being said, I have had a batch or two fail to set as well the last two years. I had great success for YEARS so I am not sure what the story is yet (obviously not enough pectin, but why?)
I added a cinnamon stick and a few whole cloves to the scraps while simmering…. House smelled amazing and the jelly is more like apple cider or apple butter flavor… Awesome.
Thank you for NOT suggesting Food Coloring in your recipe.
Oh Kim! I am so happy you enjoyed it! It’s so so tasty, isn’t it? A favorite at our house for sure!
I made this today. It turned out great. Just wondering if you can reduce the sugar as it was pretty sweet. It also took mine forever to get to temperature, but in the end, turned out very well! Thank you!
I wish you could! But if you don’t use commercial pectin, you have to keep the sugar. An option would be to use low sugar pectin, but I am not sure what the ratio would be off the top of my head.
I Love this recipe!
I was wondering if in this recipe you can add red hots and if so at what point should they be added?
I have never done red hots, but if I was going to, I would simmer them with the scraps to pull the flavor. Then I would discard them with apple scraps when you have reduced the liquid.
I gave this a try, but my jelly never set. I used the cores of lots of small lunch apples and some peels from making pie. I didn’t measure the number of apples because this recipe lets you calculate the amount of sugar needed by just volume of water after boiling. I used a candy thermometer to make sure I reached the right temperature. The only thing I did was add some ground cinnamon and cloves. Could this be the reason it didn’t work? And is there a way to salvage the jelly and make it set? It has been refrigerated, if that matters.
Hi Maria! I am so sorry! I had that happen a time or two to in my time.
Here are some things I have done that worked:
Reprocess in smaller batches.
I have had my thermometer be off by a degree or to so make sure that it is accurate or maybe go a degree higher.
If you wanted, you could add liquid pectin to give it some omph! (But I have not tried this)
Or…Yay! You have beautiful apple syrup 🙂 How good would that be on pancakes?
Let me know if you reprocess and how it goes!
So, I just tried this for the first time and, despite your warning, I missed the temperature by 3 degrees or so. Now I have a very thick spread. I’m wondering if there’s a way to make it less thick – maybe reheating it and adding some water? If you have any suggestions, I’d love to hear them! Thanks for the recipe!
It’s wild how quickly it goes from not being anywhere near temperature for forever to suddenly oh no it is there! The good news is that as you do it more often, you get a feel for what the jelly “looks like” as it boils so you know when it will get close.
I just checked out the National Center for Home Preservation and they have some suggestions that might work! https://nchfp.uga.edu/how/make-jam-jelly/jams-jellies-general-information/stiff-jams-or-jellies
Report back and let us know what you try! Good luck!
Started with 5 c of liquid, followed the recipe but have no candy thermometer. I’ve ended up with candy!
Haha! That’s okay, my grandsons will like it.
Maybe I’ll try again next year.
Bummer! I NEED my thermometer, BUT I do successfully use a regular meat thermometer if you have one of those on hand!
Would I be able to use pear scraps? Or have you tried any other fruit?
I haven’t tried pears, but that sounds so interesting! I know apples have natural pectin so that’s what allows them to jell without additional pectin. I am not sure on this for pears. I have to do some research because that’s such a great idea! Edit to add: I just did a quick Google search and it looks like they are high in pectin so I bet it would work! Now you have me excited to give this a try!
I tried this recipe, I followed it to the t but all 9 half pints never gelled. I don’t understand what went wrong but I completely wasted half my day doing this
Ugh! I am so sorry to hear that! Are you sure you went to the right temp? I have been making sure to sit and wait about 20 seconds to make sure it is at the gelling point (218 for me as I am over 1,000 feet above sea level). Last year, I think I got so tired of waiting that I went the moment my thermometer dinged and I had that problem once or twice.
They will make GREAT syrup!
love this recipe. how long does the jelly last after it has been opened? i don’t know how to water bath, so i just keep mine in the fridge and want to be sure to use it in time.
i am also testing out a jar stored in the freezer, to see what the quality is like after thawing.
Hi Kylie, I would say that you can keep in the fridge for at least three months. I am confident it can go much longer (jelly and jam gets lost in my fridge often), but I would feel very safe with three months.
Watch the top for mold.
I haven’t kept it in the freezer, so I am excited to see what happens! Keep me updated!
I live at 3600 ft. I’ve never made jelly or water bath canned. My jelly didn’t gel. I did a small batch (4 pints made). Things I am wondering:
1 . Should have I boiled the jelly at a rapid boil that won’t stop when stirring? My boil wasn’t that fast. I did get to 215 (it was supposed to be 214).
2. When I boiled the fruit, it was a high boil. I had a taller pot for that, so it was a rapid boil. Will that destroy the natural pectin?
3. I really need jelly. Can I redo the batch? If so, do I add ingredients or just boil longer?
Hi Laura!
I am so sorry it didn’t set the first time! Yes, you should boil so hard it won’t stop when stirring. That’s a hard thing to wait for! I usually try to be at a lower boil for the simmering of the fruit, so I am not sure if ruined the pectin. You can DEFINITELY redo it. It is recommended to not use the same lids but I have totally been guilty of doing that) I would add just a little more sugar to the reprocess. Perhaps 2 tablespoons per cup of liquid?
I hope it works!