French Dressing From Scratch

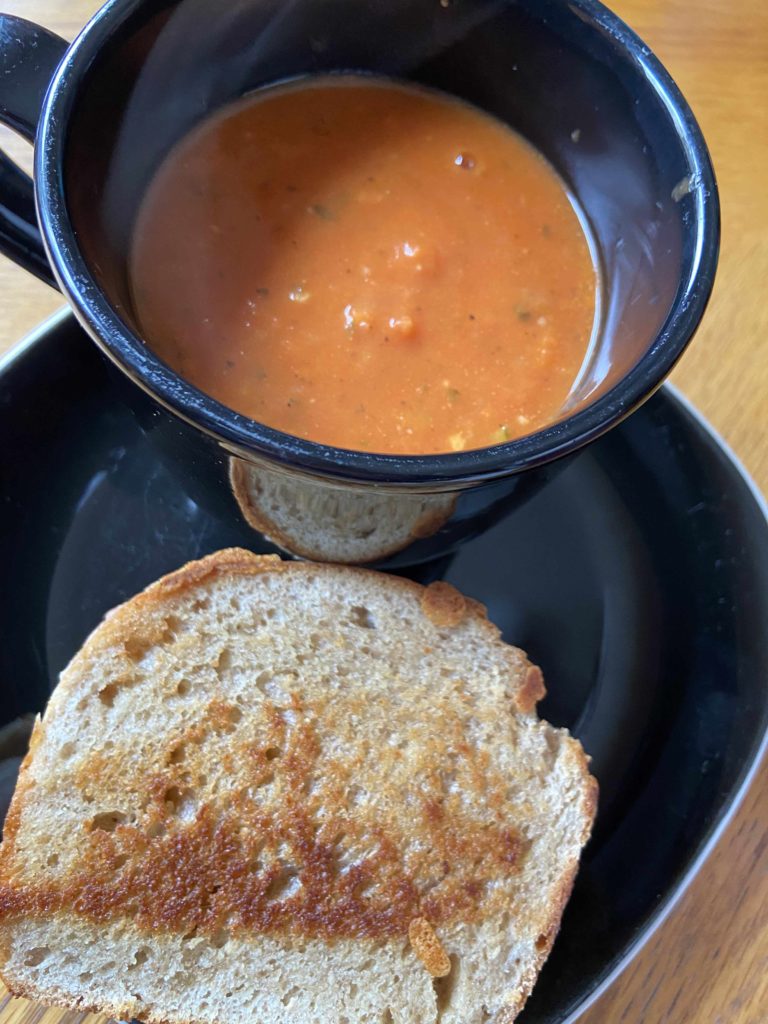
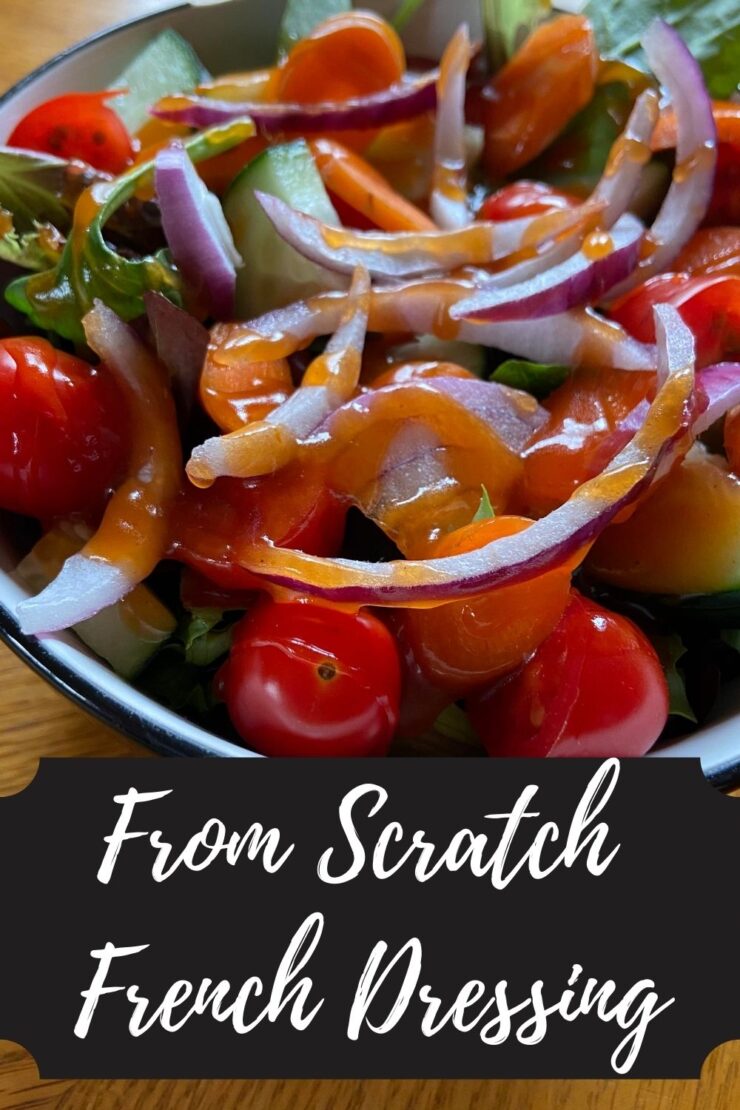
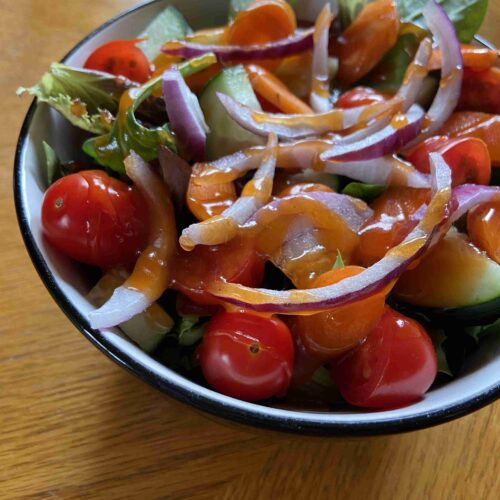
Salads are life. I decide on a restaurant by the quality of the side salad I can get on a regular basis. They don’t have to be anything special: I am always down for some leafy greens, onion, tomato, carrot, and cucumber salad. Add a few black olives, croutons and french dressing and I am happy as a clam. I often get made fun of for this. Our best couple friends quote the Simpsons, “You don’t make friends with salad.” Maybe not , but I’ll be your friend if you have a strong salad game. 

French dressing has been my go to for as long as I can remember. After I made my health a major priority a few years ago, I tried to change over to a vinaigrette. Every change makes a difference, right? Ugh, it was so hard though. Don’t get me wrong, I do love some good vinaigrettes, but in the end my loyalty lies with French dressing. 

The search for a homemade recipe begins

I set out to find a recipe that I could make from scratch to cut out some of the “yuck” that comes with the dressings found in the inner isles of the grocery store. Namely, I wanted to cut the added, refined sugars and maybe the oil. It just feels good to know what is in the food you are eating. At first, I called this recipe “a work in progress” on Instagram. And while all recipes will always be work in process (Isn’t everything? That’s my growth mindset and fitness lover talking), I have been digging on this one more and more. It’s simple to put together with many “on hand” ingredients, which is a constant focus of mine. So here’s my work in progress, delicious, cut the sugar French Dressing. I hope you love it as much as I do!

YOur Ingredients

  • ¼ cup ketchup 
  • ¼ cup olive oil 
  • ¼ cup honey 
  • ½ teaspoon onion powder 
  • ½ teaspoon minced garlic/garlic powder
  • ½ teaspoon Worcestershire sauce
  • 1 tablespoon apple cider vinegar

Your steps

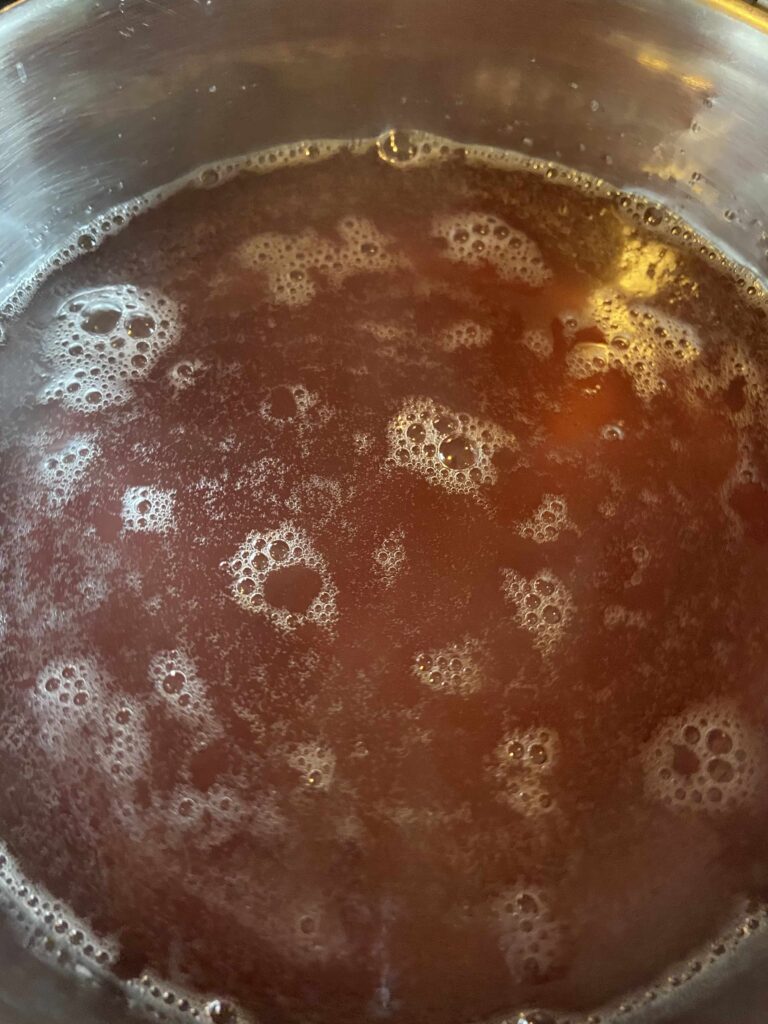
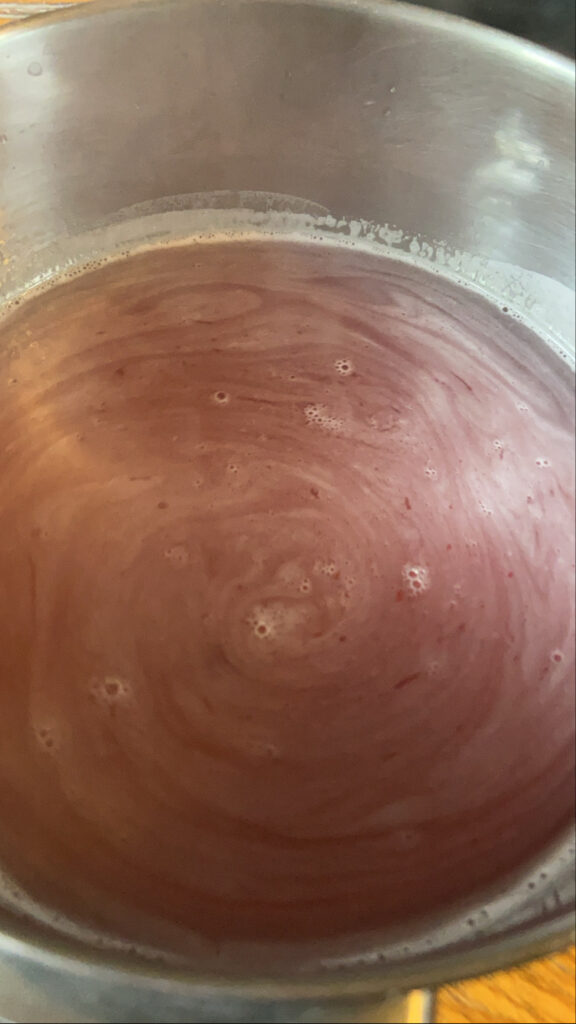
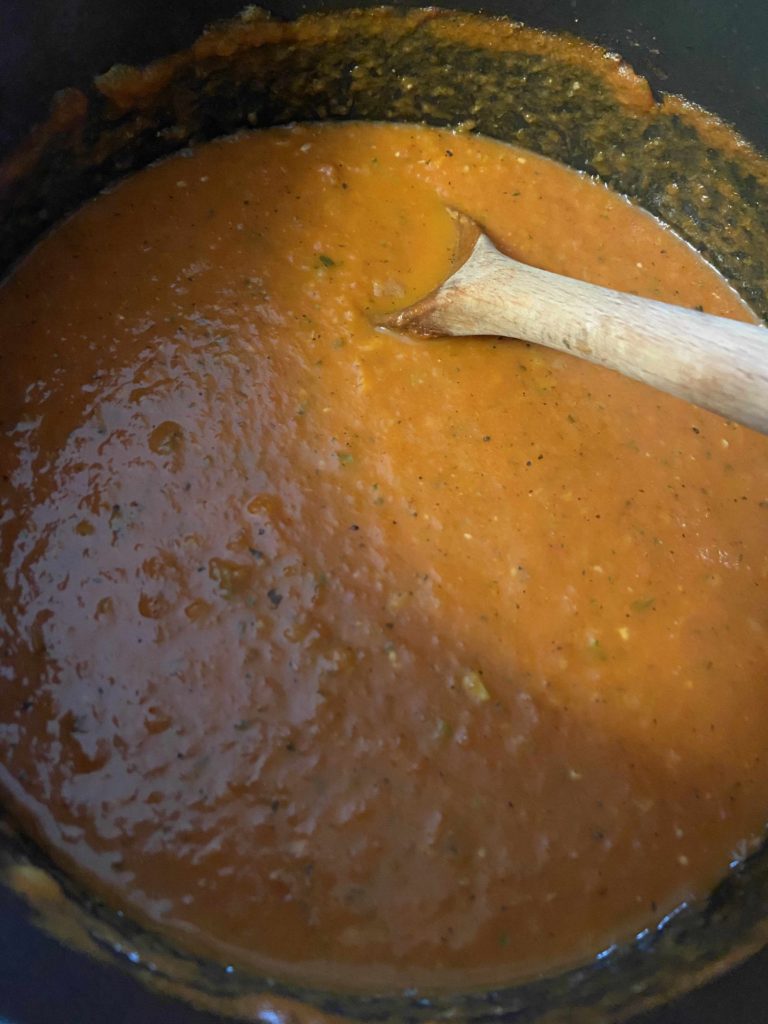
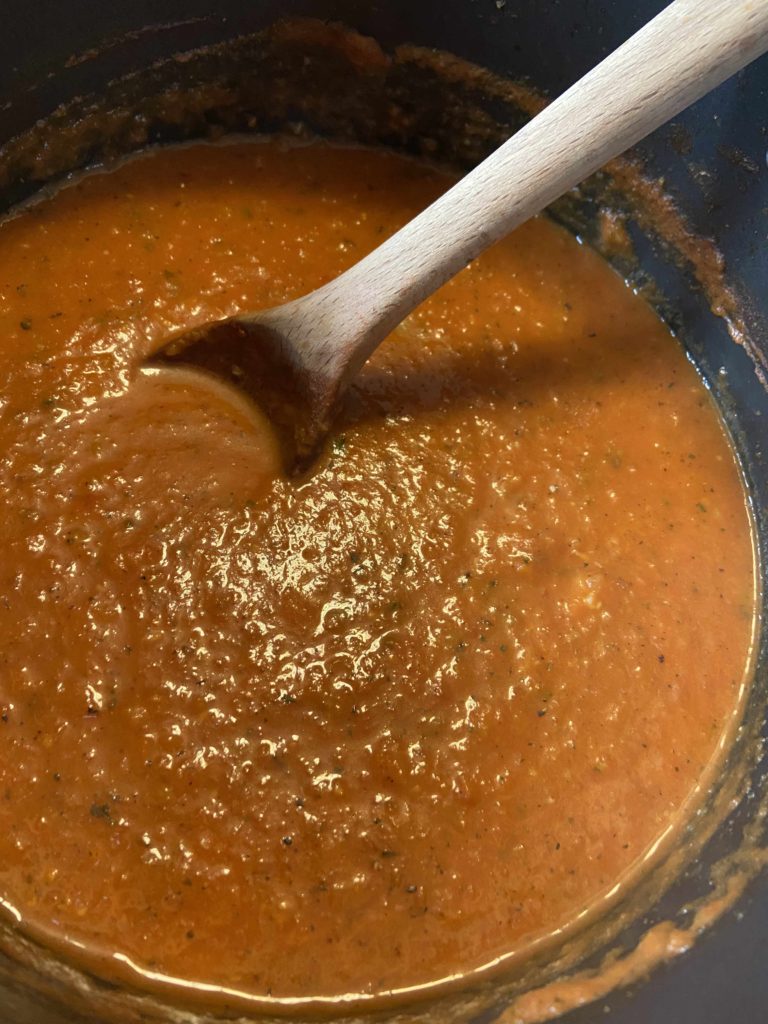
Using a 1 cup liquid measuring cup, measure out the ketchup, olive oil, and honey. (I am all about the least amount of dishes possible, so I like to do ketchup to the ¼ cup, olive oil to the ½ cup line, and then the honey to the ¾ cup line). Add onion powder, garlic, Worcestershire sauce, and vinegar. Whisk together until well blended. It might take a little longer than you think it should because of the honey and ketchup. Once well mixed, pour into a container with a lid to be stored in the refrigerator. For best results, remove from the refrigerator 5-10 minutes prior to using and shake well just before pouring.

A few notes…

The flavors get better the longer you let them mingle, so if you have enough forethought, mix this up the night before. But if you’re anything like me, you’ll be mixing this 5 minutes before you put your salad together. Oh well, live and learn 😉 


Also, you may have noticed that I have a sweet mixer bottle for my dressings. I actually have two and they are almost always full of my own homemade dressings. They are the Kolder Salad Dressing Mixing Bottles and you can get them for yourself by clicking here or the picture below.

They clean up easily and are great for an even pour of your dressings. Notice, they also have recipes on them. Some I love, some I don’t. As a person who loves to experiment in the kitchen, I usually use them more for storage, but maybe the recipes will speak to you. Only way to know is to try them out!

Looking for some made dishes to go with your sides? Check out the links below or the cooking page for some inspiration!

French Dressing

French Dressing

A classic French Dressing sweetened with honey
Prep Time 5 minutes
Course Salad
Cuisine American
Servings 6

Ingredients
  

  • ¼ cup ketchup
  • ¼ cup olive oil
  • ¼ cup honey
  • ½ teaspoon onion powder
  • ½ teaspoon minced garlic/garlic powder
  • ½ teaspoon Worcestershire sauce
  • 1 tablespoon apple cider vinegar

Instructions
 

  • Using a 1 cup liquid measuring cup, measure out the ketchup, olive oil, and honey.
  • Add onion powder, garlic, Worcestershire sauce, and vinegar.
  • Whisk together until well blended.
  • Once well mixed, pour into a container with a lid to be stored in the refrigerator. Shake well before pouring.

Notes

This recipe gets better with age, so mix a few hours before you plan on using it. It will pour easier if you take it out of the refrigerator 5-10 minutes prior to using. 
Keyword Dressings, French Dressing, Salad
Tried this recipe?Let us know how it was!

Wild Violet Jelly

Jump to Recipe

Most of my foraging adventures begin with me learning of a recipe and saying, “You can do that?!”  after reading online, and immediately heading out to forage for whatever it is that you need. Wild Violet Jelly is one of those adventures. I had just finished baking up dandelion cookies and had more dandelions in the fridge ready to be cleaned when a friend sent me a wild violet recipe. 

Oh my goodness! I have those ALL OVER my yard and along the edge of our woods. Time to switch gears and try something different before they disappear. Also, if you don’t know me personally, you may not know that I have a 5 year old spitfire of a daughter who’s name is, you guessed it, Violet. Imagine the joy on her face when I shared the idea for Violet to harvest violets to make Violet Jelly. So fun! 

Wild Violets, freshly harvested.

Of course, we needed to use mason jars to do our harvesting. I grabbed a quart jar and gave her a pint jar without lids. We set out on a walkabout around our yard and within an hour or so, we had found a pint jar’s worth of violets. As with anyexperience with a 5 year old, it wasn’t without tears. The silly girl got so excited she started skipping, tripped over a root, and immediately lost all her violets. I share as a lesson for all you. I know you’ll be excited, but please refrain from getting so excited you skip and lose your jar! 

Although the harvesting took about an hour, this was the most labor intensive part of the recipe. In all the foraging and cooking I’ve done so far, I would say this is a great toe dipper. It didn’t require too much work and you’ll end up with about six beautiful jars of lavender colored jam. 

Get ready so if you’re ready, grab your jars and start foraging! 

Your Ingredients: 
  • 1 pint (2 cups) wild violet flowers
  • 4 cups boiling water
  • 3 tablespoons bottled lemon juice
  • 4 ½ cups sugar
  • 1 package powdered pectin 
Your equipment: 
  • 1 pint jar and 1 quart jar 
  • Cheese cloth or mesh strainer 
  • 6 half pint jelly jars with rings and lids
  • Water bath canner with lid 

If this is your first go at canning, you can totally use a deep kettle with a dish towel rather than purchasing a water bath canner.  The dish towel on the bottom is to keep the jars off the bottom of the kettle. This will be a little messier with the water, but it works. When I first started canning, I did my first four batches of pickles and jellies this way. I wasn’t sure I was going to love it and didn’t want to invest. Silly me 🙂 

Harvest the Flowers

After spending days harvesting dandelions, this was surprisingly easy. Be sure that you’ve identified the right flower, and pick away. It’s best to look at the leaves to make sure you are picking the right one. Once you start, be sure to be a responsible forager, leaving some flowers in each bunch. Try to be mindful that you just get the flower. This was easy for me, but I had to pull stems from my daughter’s harvest since she’s five. Pick enough flowers to fill a pint jar, or just over two cups. 

Create a Violet Tea

Once you have harvested the violets, transfer them into a quart jar. Pour boiling water over the flowers and cover. If you don’t have a quart jar, any container that you can cover and refrigerate will be fine. After the jar has come to room temperature, place in the refrigerator for at least 4 hours but up to 24 hours. I was amazed at the color that came from the flowers. It went from purple flowers to teal water to a much more muted green as the time pasted in the refrigerator. I let it sit overnight.

Time for Jelly

The following day, start heating your water bath canner with enough water to cover your jelly jars with at least 2 inches of water. Strain the flowers from the tea. To do this, I used a fine mesh strainer with a natural coffee filter in it. I poured from the quart jar into a measuring cup (see picture). Straining through cheesecloth would also be a great option. End game: You need them separated. You do you 🙂 

Once separated, measure out 3 cups of violet tea. You may add additional water to reach 3 cups if necessary. Pour this into a larger non-reactive kettle. Add powdered pectin and lemon juice, whisking to incorporate. This will be THE coolest thing you do. The violet tea is a muted green when made, but just be ready when you add the lemon juice. It will instantly go from green to a beautiful lavender color. I knew it was going to happen and I still got so excited I knocked over my bottle of lemon juice, spilling it all over my kitchen floor. Oh well…making memories, right? Back to the recipe…

Bring the tea, pectin, and lemon juice mixture to a boil. Once you have achieved a rolling boil, add sugar. Return to a rolling boil, stirring quite often, if not always. Once you have reached a rolling boil, time for 1 minute, stirring the whole time. Ladle jelly into prepared jelly jars, leaving 1/2 inch head space. Wipe the edges with a damp cloth, add lids, and tighten rings to fingertip tight. Put into the water bath canner and process for 5-10 minutes. I did 10 minutes because my altitude is greater than 1000 feet. (Always read the pectin directions and follow those for your altitude).

Once the jelly is done processing, remove the canner from heat and let jars rest in the water for an additional 5 minutes. Finally, remove jars from the canner and allow to cool for 12-24 hours before moving. Listen for the ping of the lids (best part of canning…apart from the eating of the beautiful food you create) and marvel at the beautiful spring jelly; the other best part of canning 🙂 

A few notes: 

  • Make sure you are using powdered pectin rather than liquid pectin. They do not set the same. Early in my canning career I didn’t know the difference and had a few batches of jelly never set. 
  • If you have never canned, you can reference the instructions within the pectin box for additional, more detailed directions. While you aren’t using fruit, the directions will still be very similar. 
  • I adore this book and using it as my canning bible. If you are at all interested in all you can can, check out Ball’s Blue Book Guide to Preserving. 
  • If foraging is your jam and you’re in the midwest, Midwest Foraging by Lisa M. Rose is a great resource. 
  • Sealed jars are shelf-stable, meaning they can be stored on a shelf unrefrigerated. If your jars don’t ping (a sign that they have sealed), they are still good. You will just need to store them in the refrigerator. 
  • Most sources recommend removing the rings from jars for storage so that you will know if they unseal for any reason. I generally just loosen them as much as I can without removing them. 

Looking for more canning recipes? Click here!

Looking to forage and then create? Click here!

Wild Violet Jelly

A beautiful lavender colored jelly created from wild violet tea
Prep Time 1 hour
Cook Time 30 minutes
Tea Resting Time 1 day
Course Snack
Cuisine Canning
Servings 16

Equipment

  • Cheese Cloth or Mesh Strainer
  • Quart Canning Jar
  • 6 Half Pint Jelly Jars with Rings and Lids
  • Pint Canning Jar (optional)

Ingredients
  

  • 1 pint (2 cups) wild violet flowers
  • 4 cups boiling water
  • 3 tbsp bottled lemon juice
  • 4 1/2 cups sugar
  • 1 package powdered pectin

Instructions
 

  • Harvest 1 pint (2 cups) of wild violet flowers. Be sure they are clean and rid of debris. Place inside a clean quart jar with lid and ring.
  • Pour boiling water over violets, filling the jar. Cover. Allow to cool to room temperature. Place in fridge to steep for 4-24 hours.
  • Prepare water bath canner by filling with water so that the jars will have at least 2 inches of water over them when placed inside. Begin to heat. Clean and prep canning jars, rings, and lids. Set aside.
  • Strain flowers from tea using cheese cloth and mesh strainer. Remove any flower debris and discard. Measure 3 cups of tea, adding water if necessary. Pour into a non-reactive kettle.
  • Measure sugar in a separate bowl. Set aside. Add pectin and lemon juice to tea. Heat over medium high heat. Bring to a rolling boil, stirring often.
  • Once rolling boil has been reached, stir in sugar. Continue to stir until rolling boil is reached again. Time for exactly one minute, stirring constantly.
  • Remove from heat. Pour into prepared jelly jars, leaving 1/2 inch head space. Wipe rims of jars, put on lids and rings, tightening to finger tip tightness.
  • Process in water bath canner for 10 minutes. Remove from heat. Allow to sit in canner 5 additional minutes. Remove from canner, place on counter, and let sit for at least 24 hours.

Notes

More in depth directions regarding canning jelly can be found with the directions with powdered pectin. Be sure to read through those directions as well. 
Keyword Canning, Foraging, Jelly, Violet, Violet Jelly, Waterbath Canning
Tried this recipe?Let us know how it was!

Dandelion and Honey Shortbread Cookies

Jump to Recipe

I recently read that most people begin their descent into the foraging world by harvesting dandelions or mushrooms. For me, it was acorns, but dandelions were a very close second. As soon as I had read the things you could make with them, I was determined to try them all. Pesto. Jelly (I have a great recipe for that here). Wine. And now, these delightful melt in your mouth morsels. You’ve got to try these so easy to put together Dandelion and Honey Shortbread Cookies.

However, I must give ample warning. After you try these, you just might become hooked on the idea of foraging too. You see, a few years ago my classroom looked out over a large field; I am not joking when I tell you I would look longingly at the yellow balls of sunshine that are dandelions. I dreaded that they were going to get mowed over. There was so much potential in those little guys. Just think how many of these dandelion cookies we could get! And the wine. Don’t get me started. I mean, you should definitely get started. You’ll feel a sense of connectedness to the Earth as you create and bake. I promise (Okay, maybe promise is a strong word, but I really bet you will!). Here’s your toe dipping recipe into the world of foraging: Dandelion and Honey Shortbread Cookies.

Your ingredients:

  • 1/2 cup dandelion petals
  • 1/2 cup butter, softened
  • 1/2 cup powdered sugar
  • 1 tablespoon honey
  • 1 cup all purpose flour
  • 1/4 teaspoon salt

Harvesting the Dandelions:

First, the harvesting of the dandelions. I won’t lie, it’s a bit of a tedious step for most dandelion recipes. However, you don’t need too many for this recipe. I like to harvest earlier in the morning, prior to the flowers opening too much. Pick just the heads. Then I find it easiest if I hold onto the yellow petals and cut the bottom green stem portion with a scissors. Then I pick off the remaining green portions and compost them. Measure the yellow petals to a lightly packed 1/2 cup. Then…

Your Steps:

Preheat the oven to 325 degrees. In a medium bowl, cream sugar and softened butter until light and fluffy. Mix in honey. Next, gently fold in dandelion petals. Combine the flour and salt, adding to the sugar and butter mixture. Mix until just combined. For best results, allow the dough to chill for at least a half hour. Scoop dough by tablespoonfuls and roll each into a ball. Place on ungreased cookie sheet. Finally, use a flat bottomed cup dipped in powdered sugar to flatten the cookies slightly. Bake for 9-11 minutes, until slightly browned on the edges. Revel at the fact that you just baked with a “humble weed” and then give them a try. The flavor deepens a few days after they are baked, so try not to enjoy them all at once!

Looking for more foraging recipes? Click here! Or has your sweet tooth been activated? I have lots of sweet treats to choose from on my baking page 🙂

Dandelion and Honey Shortbread Cookies

Buttery and delicate, these unique shortbread cookies melt in your mouth.
4 from 1 vote
Prep Time 20 minutes
Cook Time 10 minutes
Course Dessert
Cuisine Foraging
Servings 16 cookies

Ingredients
  

  • 1/2 cup dandelion petals
  • 1/2 cup butter softened
  • 1/2 cup powdered sugar
  • 1 tablespoon honey
  • 1 cup all purpose flour
  • 1/4 teaspoon salt

Instructions
 

  • To gather the dandelion petals, I find it easiest to get the heads of the flowers when they are closed. I hold onto the yellow portion and cut off the bottom green stem. Try to remove all green portions.
  • Preheat the oven to 325 degrees.
  • In a medium bowl, cream sugar and softens butter until light and fluffy.
  • Mix in honey and then gently fold in dandelion petals.
  • Add flour and sprinkle salt on top. Mix until just combined. For best results, allow the dough to chill at least a half hour.
  • Scoop dough by tablespoonfuls. Roll each tablespoon of dough into a ball and place on an ungreased cookie sheet. Use a flat bottomed cup dipped in powdered sugar to flatten the cookies slightly.
  • Bake for 9-11 minutes, until slightly browned on the edges. Enjoy!
Keyword Cookies, Dandelion Recipe, Dandelions, Foraging, Honey, Shortbread
Tried this recipe?Let us know how it was!

Homemade Peanut Butter

Do you ever think to yourself, “I know I could easily buy this for much cheaper, BUT can I make it from scratch? I mean, just because I can?” I function in that world quite often; It has rubbed off on my children. Case in point, last night. I rarely eat the Oreos my husband buys, but last night, I thought, “Oooo…a crumbled Oreo on ice cream sounds so good.”

I went to grab an Oreo, and of course my husband and children had JUST finished them hours ago. When I pointed out to my family that of course I decided I wanted one right after they finished them, my 5-year-old daughter quickly responded, “Maybe you can find a recipe to make them homemade?!” I have apparently created monsters (Or not, because how cool is it that both of my children get excited about making things from scratch?! #momwin)

The “what can I make from scratch” itch has been stronger since we started being “safer at home.” My kids’ go to lunch is peanut butter and jelly on a tortilla shell. I like it on sourdough. Because we have a substantial garden and I love canning, we also have enough homemade jelly and jam to feed a small army.

So let’s see, I have a fresh loaf of sourdough bread. I have homegrown and canned black raspberry jam open in the fridge. Wouldn’t it be awesome if I made homemade peanut butter so the whole sandwich was produced by me? (This is another passion of mine…having the whole meal be from scratch and the protein harvested by my husband through hunting. So fun!). I gave it a try and the results were delicious. When my 10-year-old son (the go-to taste tester) gave it a try, he just closed his eyes and smiled. He makes it special.

This process was so much easier than I expected and your kids will be tickled pink to know they took peanuts from the pantry and made peanut butter from them! Give it a try!

Your ingredients

  • 1/2 cup dry roasted peanuts
  • 1 – 1 1/2 teaspoons olive oil (or other oil, I went olive)
  • 1/2 – 1 teaspoon honey (to taste)

(Feel free to double or triple this recipe. I wanted to start small in case we didn’t love it. It was such an easy process that making it in small, fresh batches is a great idea too!)

Your Steps to Homemade Peanut Butter

Place the peanuts in a small food processor and pulse on high. This will take a few minutes. Be patient. As I watched the peanut go from whole to chopped to a large sand texture, I thought there was no way they were going to turn to butter. Keep going.

Once you have obtained a very fine sand texture, drizzle oil into the mixture, 1/2 teaspoon at a time, blending it in as you go. Again, be patient and suddenly you’ll think, “Holy cow! I made peanut butter!” The initial plan was not to put honey in mine, but I gave it a try and thought it would be good to have it be a touch sweeter. I added 1/2 teaspoon, blended it in, and then gave it to my son. He gave it two thumbs up so I stopped there. If you have a sweeter tooth than we do, you may want to add a little more.

What I love about this peanut butter is that you can control the consistency. I like a little texture so I opt for crunchy on my PB and Js. While I didn’t get crunchy per say, I did have texture which was good. I haven’t tried it yet, but you could totally mix in some additional chopped peanuts for true crunchy peanut butter. I hope you enjoy it as much we did at our house. Although I have a hard time sharing…I mean, they get all the Oreos right?

Let me know what you think! —Jess

PS…Ready for a game changer? Put a thin layer of homemade peanut butter on BOTH sides of the bread then put the jelly/jam on one side. My PB and J game has been forever changed because of this small hint!

TOOLS OF THE TRADE

I do love my little food processor for creating small batches. Sometimes bigger isn’t always better, right?

Looking for homemade jam or jelly to pair with your peanut butter? Check out my canning and preserving page to get a recipe! Click the button below! Or click any of the pictures below for the direct link!

Homemade Peanut Butter

From scratch food is almost always better, but sometimes it isn't easy. Not the case with this homemade peanut butter! You are truly five minutes away!
Prep Time 10 minutes
Cook Time 0 minutes
Course Appetizer
Cuisine American
Servings 4

Ingredients
  

  • 1/2 cup dry roasted peanuts
  • 1 – 1 1/2 teaspoons olive oil or other oil, I went olive
  • 1/2 – 1 teaspoon honey to taste
  • dash of salt optional

Instructions
 

  • Place the peanuts in a small food processor and pulse on high. This will take a few minutes. Be patient.
  • Once you have obtained a very fine sand texture, drizzle oil into the mixture, 1/2 teaspoon at a time, blending it in as you go.
  • Drizzle in honey and sprinkle in salt. Blend once more.
Keyword peanut butter, peanuts, sandwiches
Tried this recipe?Let us know how it was!

So Simple Tomato Soup

I’ve always enjoyed a grilled cheese and some tomato soup. It wasn’t on my top list of favorites, but it definitely provides a source of comfort. Then I started baking sourdough bread and let me tell you, homemade sourdough quite possibly makes the best grilled cheese you’ll ever have. It’s been my “easy lunch” on the weekend countless times because it makes me so happy. Wait, you don’t bake sourdough…yet? What are you waiting for? Check it out here!

Okay, I digress. Sourdough grilled cheese is incredible, but tomato soup makes it so much better. And alas, we don’t generally have it on hand anymore since I make my own soups from scratch (I have an entire Pinterest board dedicated to soup…it’s a bit of an obsession). But recently it was chilly out and I just needed tomato soup. I looked around my fridge and pantry and put this together in flash…along with a grilled cheese of course.

A few notes from me: Most tomato soups (and creamy soups in general) call for heavy cream. I never have that on hand, and I like to make soups with things that I have on hand. I find that milk works just fine and makes for a slightly lighter soup without compromising too much. If you dig a creamier soup, feel free to use heavy cream rather than milk. If you haven’t noticed yet, I like to sneak all the veggies I can into a meal. It’s how I roll. This soup isn’t any different. Finally, this soup makes use of an immersion blender/stick blender (click here to see which one I have). If you don’t have one, it’s a pretty sweet kitchen gadget that has tons of uses and doesn’t take up too much space. I recommend it 🙂

Okay, let’s get cooking!

Your ingredients:

  • 1 cup diced carrot
  • 1/3 cup diced onion
  • 1 tablespoon olive oil
  • 1 cup diced zucchini (about 1 small)
  • 1/2 cup tomato paste
  • 2 14.5 ounce cans diced tomatoes (I used one salt free and one garlic seasoned), NOT drained
  • 1/2 teaspoon pepper (or to taste)
  • 1/2 teaspoon salt
  • 1 teaspoon minced garlic
  • 1 teaspoon dried basil
  • 2 cups chicken stock/broth
  • 1 cup milk (I used 1%)
  • 1/2 tablespoon honey (to taste)

Directions:

Heat oil over medium heat in a large kettle. Once hot, add carrot, onion salt, pepper, and basil. Sauté for 8-10 minutes, until soft. Add minced garlic, zucchini, cooking for an addition 5-8 minutes. Stir in tomato paste and allow to just caramelize. (If you are worried about burning it, you can skip the caramelize). Stir in diced tomatoes and chicken stock. Allow to simmer for 10 minutes, making sure your vegetables are nice and soft. Hit all your soup goodness with the immersion blender and blend until smooth (a shorter time if you want texture, a longer time if you want a more commercial tomato soup). Slowly stir in milk and honey. Leave over the heat until warm.

If you want a thicker soup, feel free to allow it to cook down a little bit. But if you’re like me at all, you’ll just be itching to get that warm goodness in your belly and you’ll eat it right away, complete with a grilled cheese. Yum!

So Simple Tomato Soup

A few easy, on hand ingredients combine to make a simple from scratch tomato soup everyone will love!
5 from 1 vote
15 minutes
Total Time 20 minutes
Course Side Dish
Cuisine American
Servings 4

Ingredients
  

  • 1 cup diced carrot
  • 1/3 cup diced onion
  • 1 tablespoon olive oil
  • 1 cup diced zucchini about 1 small
  • 1/2 cup tomato paste
  • 2 14.5 ounce cans diced tomatoes NOT drained
  • 1/2 teaspoon pepper or to taste
  • 1/2 teaspoon salt
  • 1 teaspoon minced garlic
  • 1 teaspoon dried basil
  • 2 cups chicken stock/broth
  • 1 cup milk I used 1%
  • 1/2 tablespoon honey to taste

Instructions
 

  • Heat oil over medium heat in a large kettle. Once hot, add carrot, onion salt, pepper, and basil. Sauté for 8-10 minutes, until soft.
  • Add minced garlic, zucchini, cooking for an addition 5-8 minutes.
  • Stir in tomato paste and allow to just caramelize. (If you are worried about burning it, you can skip the caramelize).
  • Stir in diced tomatoes and chicken stock. Allow to simmer for 10 minutes, making sure your vegetables are nice and soft.
  • Blend until smooth using an immersion blender and blend. (a shorter time if you want texture, a longer time if you want a more commercial tomato soup).
  • Slowly stir in milk and honey. Leave over the heat until warm.
  • If you want a thicker soup, feel free to allow it to cook down a little bit.
Keyword Gluten Free, soup recipe, tomato soup
Tried this recipe?Let us know how it was!

Looking for other soup recipes?

Check out some of the recipes below!

From Scratch Italian Wedding Soup

Soup. It speaks to my soul. If someone said I could only eat one type of food for the rest of my life, I would choose soup in a heartbeat. Here’s the thing: I love all the parts of the prep; the chopping, the cooking of garlic (because you need all the garlic in your life), the long slow cook on the stove in a Dutch Oven, all of it. And this Italian Wedding Soup fits all the bills.

I may not look it, but I have enough Italian in my DNA to call myself an Italian, and ALL Italian food makes my taste buds do a happy dance; so when I saw a recipe for Italian Wedding Soup, I immediately started looking at all sorts of recipes to pull my favorite parts and make it my own. I was happy with how quickly this got pulled together and everyone in our family loved it!

Ready to get cooking? Let’s get started!

Your Ingredients

  • 1 lb of Italian sausage seasoned ground venison (regular ground Italian sausage would work great!)
  • 2 eggs, beaten
  • 4 Tablespoons bread crumbs
  • 2 Tablespoons grated Parmesan
  • 2 cups finely diced carrots
  • 4 cups chopped spinach
  • minced garlic, 2-3 cloves (I like to do a cereal spoon-ful, but do to taste. I have only experienced too much garlic once in my life)
  • 11 cups chicken stock, low sodium
  • 1 cup orzo
  • salt, pepper, and basil to taste

Your steps To Italian Wedding Soup

Preheat the oven to 350 degrees. Line a baking pan with foil. Set aside.

Mix the eggs, bread crumbs, Parmesan, and ground venison together. Shape into 1 inch meatballs and place on the lined baking pan. Bake the meatballs for 10 minutes, until cooked through. (If you haven’t cook meatballs this way yet, you have to give it a try! It saves a lot of stress in terms of making sure they don’t burn in a pan as well as the yuck of clean up. I wouldn’t do it any other way now!)

Meanwhile, sauté the carrots with garlic, salt, and pepper until softened. Add chicken stock, and bring to a boil.

Once the chicken stock is boiling, add orzo and cook to al dente. Two minutes before the pasta is done, add spinach and meatballs. Season with pepper and salt to taste. Easy and delicious.

I’m loving all the uses I’m finding for this seasoned ground venison. It’s still low fat and healthy, a great alternative to Italian sausage, which we love at this house.

From Scratch Italian Wedding Soup

Looking for a simple but so delicious soup to serve? This Italian Wedding Soup has a little of everything: orzo, meatballs, carrots, and spinach. Give it a try!
Prep Time 15 minutes
Cook Time 15 minutes
Course Main Course, Soup
Cuisine American, Italian
Servings 8 people

Ingredients
  

  • 1 lb Italian sausage
  • 2 eggs beaten
  • 4 tablespoons bread crumbs
  • 2 tablespoons grated Parmesan
  • 4 cups chopped spinach
  • 2-3 cloves minced garlic
  • 11 cups chicken stock low sodium
  • 1 cup orzo
  • Salt and pepper to taste
  • Basil to taste

Instructions
 

  • Preheat the oven to 350 degrees. Line a baking sheet with foil. Mix eggs, bread crumbs, Parmesan, and Italian sausage (venison or regular) together. Shape into 1 inch meatballs and place on the lined baking sheet. Bake for 10 minutes, until cooked through.
  • Meanwhile, saute the carrots with garlic, salt and pepper until softened.
  • Add the chicken stock and bring to a boil. Once boiling, add orzo and cook to al dente. Two minutes before the pasta is done, add spinach and meatballs. Season with additional salt and pepper to taste.
Keyword Italian sausage, Italian Wedding Soup, meatballs, soup, soups and stews
Tried this recipe?Let us know how it was!

Looking for other soups and Stews?

You can check out my cooking page here, or let me just tell you a couple of my favorites!