Dehydrated Zucchini

Last Updated on August 30, 2024 by Jess

We’ve all been there. Our mind knows we shouldn’t plant so many zucchini plants, but our heart says, “Dooooo it.” And then we end up with a kitchen counter full of zucchinis that we can’t even give away anymore. We baked with them. Cooked with them. Now what? This is where dehydrated zucchini comes in!

I love to add zucchini as an additional vegetable to countless pasta dishes. However, I am not about to buy it in the winter months when I know how easy it is to grow in the summer. It just kills me to spend money on it. That’s when I started to make dehydrated zucchini as summer started winding down. 

It is beyond simple and is a great way to keep zucchini for future usage. My absolute favorite way to use them is to add them as I am making any kind of veggie-ful soup or pasta dish. Generally speaking, they get thrown in at the beginning of the simmer step so they rehydrate as I cook. 

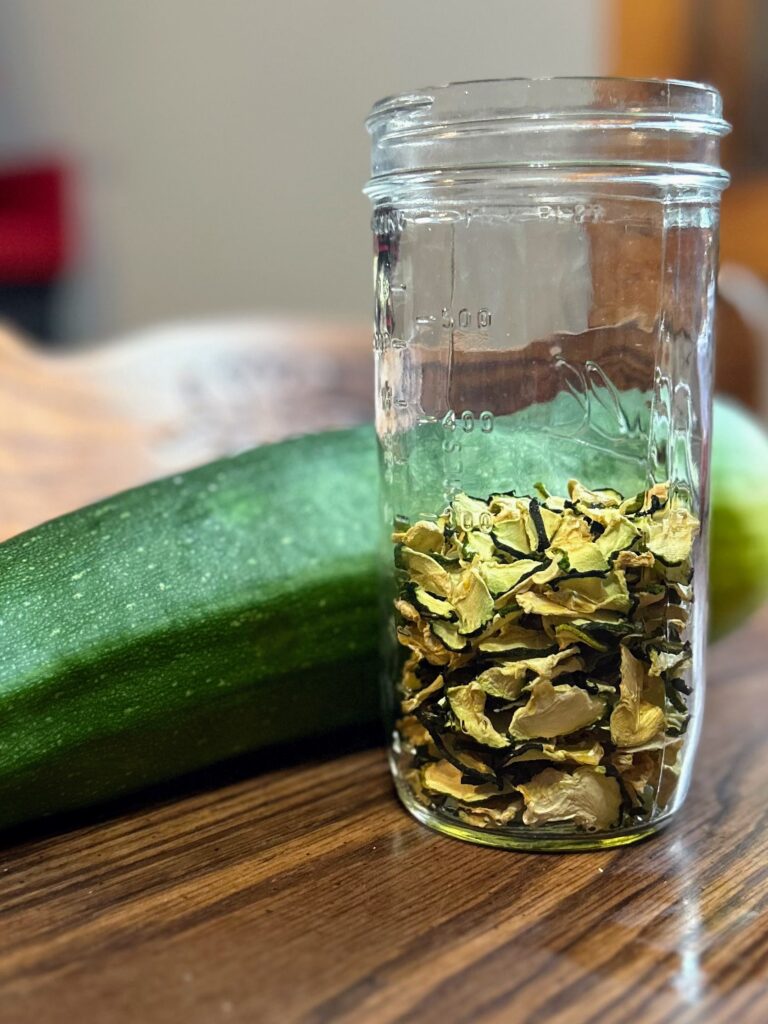
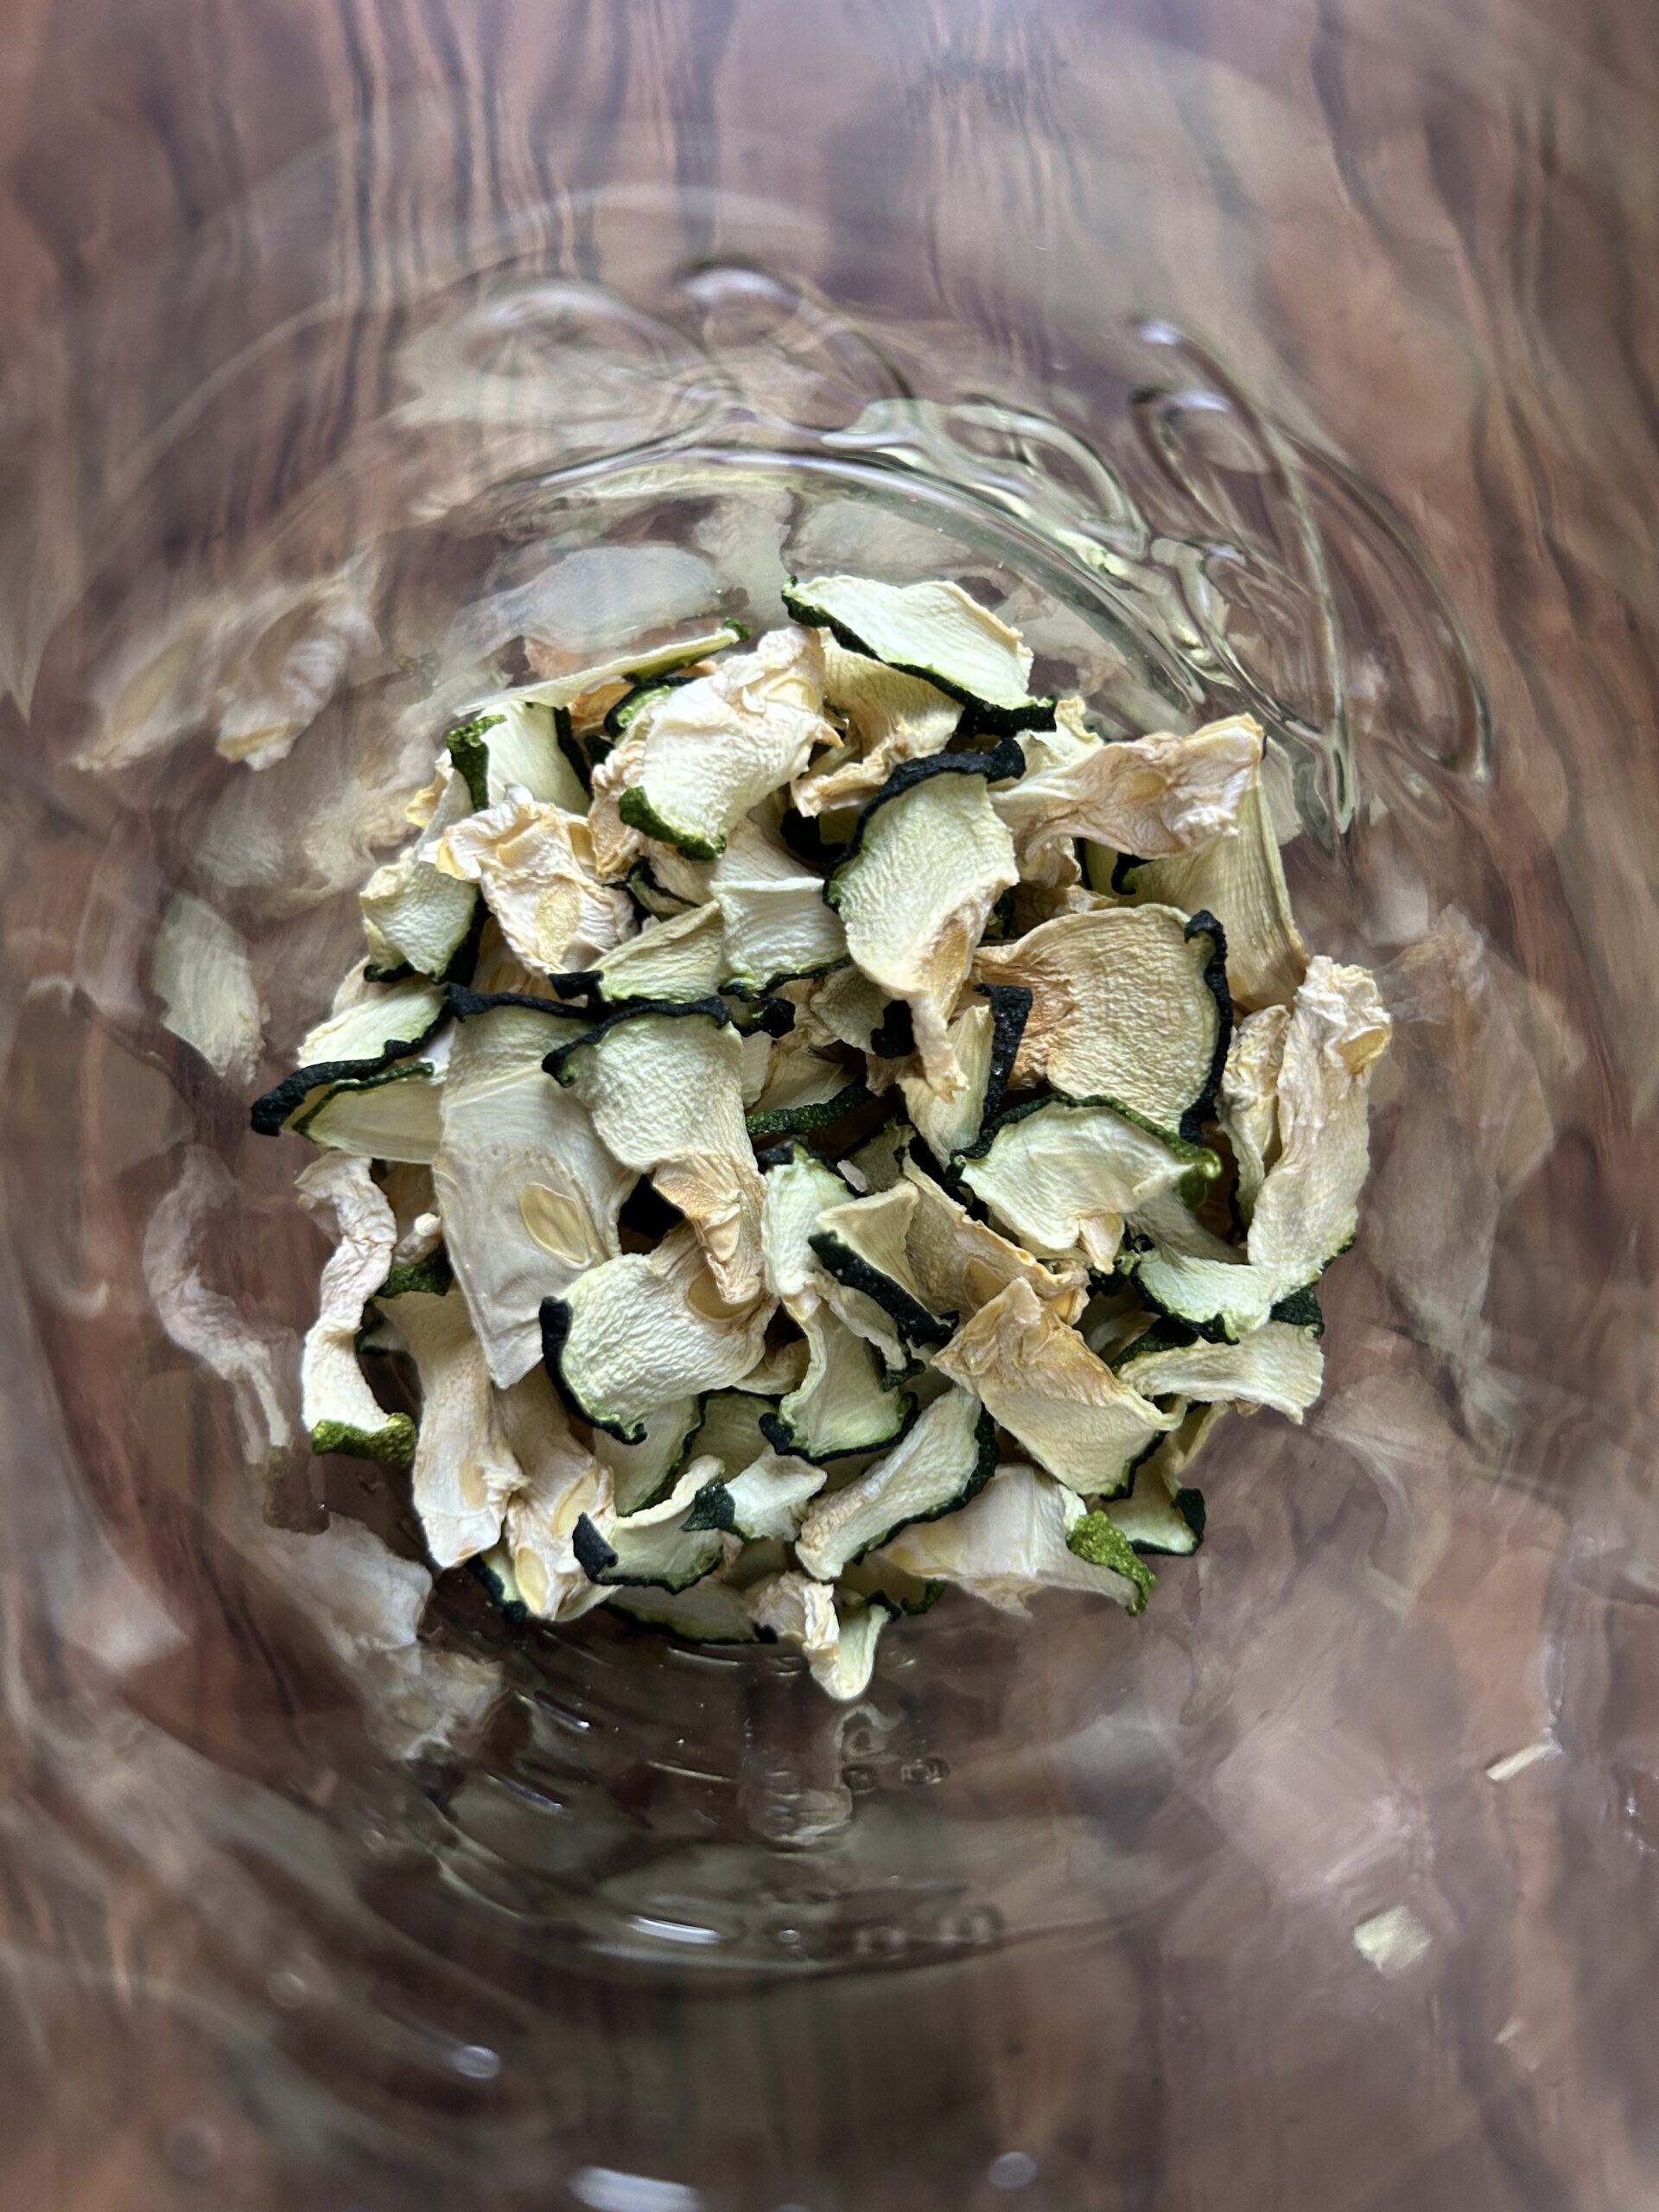
Once dehydrated, I simply store it in a mason jar. You can use a handheld mason jar vacuum sealer, but I have had success keeping the zucchini for over a year in a mason jar that has not been vacuum sealed. 

Ready to get started? Let’s go!

Your Steps to Dehydrated Zucchini 

Wash the zucchini. No need to peel it. I prefer to cut it into about 1- 2 inch pieces, but zucchini chips or half moons are perfect too! Regardless, you’ll want to slice them to about ⅛ inch thickness, being sure to keep them uniform. 

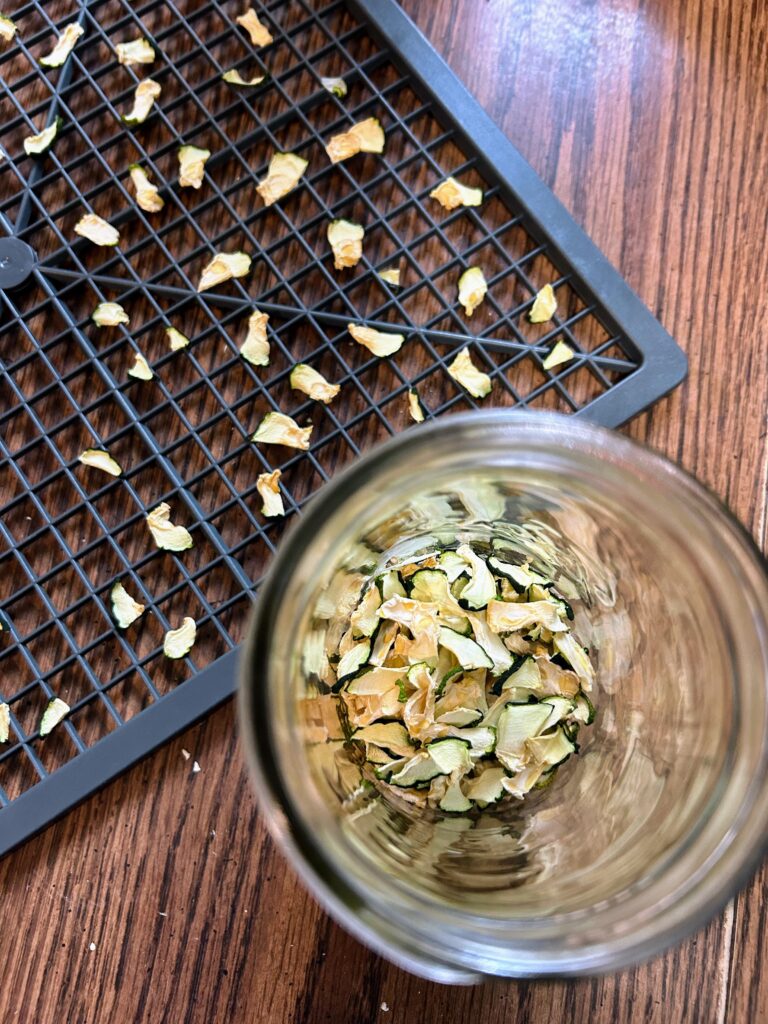
Arrange the zucchini on the dehydrator trays, being sure to leave space for the air to circulate. This is my dehydrator and I LOVE it.

Dehydrate at 120-140 degrees F for 6-10 hours until the zucchini is dry and brittle. You do not want it to be pliable. Allow to cool completely before storing. 

Store the dehydrated zucchini in a clean, airtight container. I am partial to mason jars, but any will do. If you do choose a clear container (like a mason jar), be sure to store it in a dark, cool area. 

Dehydrated Zucchini

Out of ideas for your zucchini crop? When your done baking and cooking, preserve it for later by making dehydrated zucchini!
Prep Time 10 minutes
Drying Time 8 hours
Course Homesteading, Preserving
Cuisine American

Equipment

Ingredients
  

  • Zucchini

Instructions
 

  • Wash the zucchini. No need to peel it. I prefer to cut it into about 1 inch pieces, but zucchini chips or half moons are perfect too! Regardless, you’ll want to slice them to about ⅛ inch thickness, being sure to keep them uniform.
  • Arrange the zucchini on the dehydrator trays, being sure to leave space for the air to circulate.
  • Dehydrate at 120-140 degrees F for 6-10 hours until the zucchini is dry and brittle. You do not want it to be pliable. Allow to cool completely before storing.
  • Store the dehydrated zucchini in a clean, airtight container. I am partial to mason jars, but any will do. If you do choose a clear container (like a mason jar), be sure to store it in a dark, cool area.
Keyword dehydrating, dried zucchini, drying, preserved zucchini, preserving, zucchini
Tried this recipe?Let us know how it was!

Looking for other ideas for your zucchini crop?

Here are a few of my favorites!

Energy D’Lite Balls

Last Updated on August 25, 2024 by Jess

What’s the inspiration behind these Energy D’Lite Balls? During my college career, I spent my summers working at a delightful drive in restaurant called Northern D’Lites in Lakewood, WI. I was hired as a cook, but was trained as an ice cream artist as well. I loved that little place and actually learned a thing or two about food there! 

Did I finally make the connection that “malted milk balls” that I loved had malt powder in them and that I subsequently LOVED malts? Heck yes I did. And so my obsession started. We made this sundae called a Dusty Road: vanilla soft serve, hot fudge, dusted with malt powder and topped with a cherry. It was DIVINE.

I also loved that the nuts we used to top our sundaes were salted. I mean, salty and sweet?! So dang good, right? 

So I set out to make an energy ball that combined those ideas. Pecans and a pinch of salt for the savory aspect. Cocoa powder and malt powder for the Dusty Road sundae. What I know is the Mr quite literally ate the ENTIRE batch in just a few days. I don’t know if anyone else got a single one. I quote, “What can I say? They are addicting!” 

I hope you enjoy them as much as my family did! They would make a great after school snack, post workout fuel, or mid afternoon treat between meals! And hey, if you are looking for another energy ball recipe, I’ve got you covered!

Your Ingredients 

  • 1 cup old fashioned oats
  • 2 tablespoons cocoa powder
  • 2 tablespoons malt powder
  • ¼ cup ground flaxseed
  • Pinch of salt
  • ½ cup creamy peanut butter
  • ¼ cup maple syrup 
  • 1 tablespoon coconut oil, melted
  • ½ cup chocolate chips 
  • ½ cup pecans 

A gathering of ingredients.

Flaxseed, oatmeal, malt powder, cocoa powder, peanut butter, coconut oil, pecans, maple syrup, and chocolate chips.

Also, can we just admire my measuring cups and spoons? They were a gift from the Mr and are personalized for my blog! How sweet!

Your Steps to Energy D’Lite Balls

In a large bowl, combine oats, cocoa powder, malt powder, flaxseed, and salt. Stir to combine. Add the peanut butter, maple syrup, melted coconut oil, chocolate chips, and pecans. Mix well, until all the dry ingredients are incorporated into the wet. 

From here, use a rounded tablespoon to scoop mixture and form into a ball. Place on a baking sheet. Chill for 1-2 hours before moving to an airtight container. Store in the refrigerator.

Energy D’Lite Balls

The flavors of a favorite ice cream sundae come together in these Energy D'Lite Balls with chocolate, peanut butter, pecans, and malt powder!
Prep Time 10 minutes
Cook Time 0 minutes
Chill Time 1 hour
Course Snack
Cuisine American
Servings 2 dozen

Ingredients
  

  • 1 cup old fashioned oats
  • 2 tablespoons cocoa powder
  • 2 tablespoons malt powder
  • ¼ cup ground flaxseed
  • Pinch of salt
  • ½ cup creamy peanut butter
  • ¼ cup maple syrup
  • 1 tablespoon coconut oil melted
  • ½ cup chocolate chips
  • ½ cup pecans

Instructions
 

  • In a large bowl, combine oats, cocoa powder, malt powder, flaxseed, and salt. Stir to combine.
  • Add the peanut butter, maple syrup, melted coconut oil, chocolate chips, and pecans.
  • Mix well, until all the dry ingredients are incorporated into the wet.
  • Use a rounded tablespoon to scoop mixture and form into a ball. Place on a baking sheet.
  • Chill for 1-2 hours before moving to an airtight container. Store in the refrigerator.
Keyword after school snacks, chocolate, energy balls, no bake, no bake snacks, oatmeal, snacks
Tried this recipe?Let us know how it was!

Looking for other delicious snacks?

Give one of my favorites a try!

Maltese Caponata

Last Updated on August 7, 2024 by Jess

Cooking and baking my way around the world. Let’s create some Maltese Caponata!

For nearly three years, I have been involved in a special collaboration on Instagram hosted by my friend Claire. Each month, she spins a random country generator for us to explore and cook their cuisine. There are no other rules. We can create any dish we want, sweet or savory; cooking or baking; For a small town midwestern girl, this has been an eye opening and taste bud awakening. 

However, I haven’t shared this journey on Jess in the Kitchen. For the longest time, I thought that since it wasn’t a recipe created by me, I shouldn’t share it. After this last month, I asked myself, “Why not? Don’t you want to inspire others to experience cuisines from around the world as well?” So here we are! I am excited to share the dish I cooked for Malta: Caponata!

Caponata is a perfect fresh garden or farmer’s market dish. It’s an appetizer with a perfect blend of sweet and sour flavors. It can be served hot or cold; on its own or on top of a toasted baguette. I used the recipe from Yesenia at Apron and Whisk (please check it out!) and it couldn’t be easier! 

This was my take on Caponata. 

Your Ingredients 

  • 1 small eggplant, about 300 g
  • 4 tablespoons olive oil
  • 2 bell peppers (I did two green), diced 
  • 1 medium onion, diced
  • 1 teaspoon of minced garlic
  • 2-3 large tomatoes, cored and diced
  • 3 tablespoons tomato paste 
  • 2 tablespoons red wine vinegar
  • ½ apple, peeled and diced
  • 3 tablespoons capers
  • ⅓ cup olives (half black, half green; both halved)
  • 1 tablespoon fresh mint, chiffonade 
  • 1 tablespoon fresh basil, chiffonade
  • Salt and pepper

I did try to follow the recipe as Yesenia wrote it. It truly was a simple and delightful side dish!

Steps to Maltese Caponata

Start by dicing the eggplant. Sprinkle it with salt and allow the salt to draw out the moisture, about 20 minutes. While the eggplant is resting, dice the peppers, onions, and tomatoes. Halve the olives as well. 

Begin heating a large saucepan. Meanwhile, use a paper towel to dry the moisture from the eggplant. Once hot, add 2 tablespoons of olive oil to the pan and add the eggplant. Cook until tender and browned, about 5 minutes. Remove it from the pan and set aside. If necessary, wash the saucepan before adding remaining oil. 

Add the onions and peppers to the pan, cooking until they are soft, about 5 minutes. Stir in the garlic, cooking an additional 30 seconds, until fragrant. Add in the tomatoes, tomato paste, and apple. Also add a pinch of pepper and salt. Cook for about 10 minutes. 

One the tomatoes have created a sauce, add the eggplant, capers, olives, and red wine vinegar. Cook for just a few minutes. Season with additional salt and pepper, if necessary. 

Top with basil and mint. You can serve it hot or cold, on its own or on top of crusty bread (I have also enjoyed it over leftover rice. It’s so good!). Enjoy your own Maltese Caponata!

A gathering of ingredients.
Cooked down eggplant. Tasty!
Finished dish! Serve it up!

Maltese Caponata

This Maltese Caponata makes a great summer salad from all those beautiful garden vegetables with notes of sweet, salty, and savory flavors!
Prep Time 10 minutes
Cook Time 25 minutes
Course Appetizer, Salad, Side Dish
Cuisine Maltese
Servings 6 servings

Ingredients
  

  • 1 small eggplant about 300 g
  • 4 tablespoons olive oil
  • 2 bell peppers I did two green, diced
  • 1 medium onion diced
  • 1 teaspoon of minced garlic
  • 2-3 large tomatoes cored and diced
  • 3 tablespoons tomato paste
  • 2 tablespoons red wine vinegar
  • ½ apple peeled and diced
  • 3 tablespoons capers
  • cup olives half black, half green; both halved
  • 1 tablespoon fresh mint chiffonade
  • 1 tablespoon fresh basil chiffonade
  • Salt and pepper

Instructions
 

  • Start by dicing the eggplant. Sprinkle it with salt and allow the salt to draw out the moisture, about 20 minutes. While the eggplant is resting, dice the peppers, onions, and tomatoes. Halve the olives as well.
  • Begin heating a large saucepan. Meanwhile, use a paper towel to dry the moisture from the eggplant. Once hot, add 2 tablespoons of olive oil to the pan and add the eggplant. Cook until tender and browned, about 5 minutes. Remove it from the pan and set aside. If necessary, wash the saucepan before adding remaining oil.
  • Add the onions and peppers to the pan, cooking until they are soft, about 5 minutes. Stir in the garlic, cooking an additional 30 seconds, until fragrant. Add in the tomatoes, tomato paste, and apple. Also add a pinch of pepper and salt. Cook for about 10 minutes.
  • One the tomatoes have created a sauce, add the eggplant, capers, olives, and red wine vinegar. Cook for just a few minutes. Season with additional salt and pepper, if necessary.
  • Top with basil and mint. You can serve it hot or cold, on its own or on top of crusty bread.
Keyword Caponata, cold vegetable salad, easy sides, Eggplant, green peppers, Kapunata, Malta, Maltese, side dish, summer salad, summer side dish, tomatoes, vegetables, vegetarian
Tried this recipe?Let us know how it was!

Looking for other Salad Inspiration?

Check out a few of my favorite summer salads below! Or feel free to head to my cooking page to pick your own!

Gooseberry Muffins

Last Updated on August 1, 2024 by Jess

Gooseberries are not a traditional midwestern gardener’s fruit. I stumbled on them when I thought I had tried some at a farmer’s market and loved the fruit so much I wanted to grow my own. Turns out, gooseberries weren’t the correct fruit, but it certainly was a happy mistake. Each year, I make a few batches of delicious gooseberry jam and now these upgraded gooseberry muffins. 

Never had a gooseberry? They are about the size of a large blueberry, but look like a miniature watermelon with the texture of a grape. Typing that just makes me smile. It almost sounds like a description from a Dr. Seuss book, but I think it’s a great description. They can be tart like a green grape or sweeter like a red grape. They grow on bushes with some gnarly thorns. I see that as part of the adventure of having them…can I get away without getting pricked? 

I have an original gooseberry muffin recipe that went light on the sugar, heavy on the whole wheat, and may not be everyone’s cup of tea. This recipe has dropped the whole wheat, added some brown sugar, and has been tested by my family with two thumbs up! I hope you enjoy! 

I have an original gooseberry muffin recipe that went light on the sugar, heavy on the whole wheat, and may not be everyone’s cup of tea. This recipe has dropped the whole wheat, added some brown sugar, and has been tested by my family with two thumbs up! I hope you enjoy! 

Your Ingredients

  • 1 egg 
  • ½ cup Greek yogurt
  • ¼ cup+ 2 tablespoons milk
  • 1 teaspoon vanilla
  • 2 tablespoon oil 
  • ¼ cup brown sugar, packed 
  • ¼ cup white sugar
  • 1 – 1 ½ cups gooseberries, cleaned (1 ½ cups if you dig the tart flavor. 1 cup if you want it a little sweeter) 
  • ½ cup old fashioned oats
  • 1 ½  cups all purpose flour
  • ½ teaspoon salt
  • 1 teaspoon baking powder 

Your steps to Gooseberry Muffins

If you haven’t yet, nip off the ends on the gooseberries. You only want the berry portion in the muffin, Then, preheat the oven to 400 degrees. Prepare your muffin tin with non-stick cooking spray or muffin liners. This recipe will result in approximately 12 muffins. 

In a large bowl, combine the flour, salt, and baking powder. Set aside. 

In a small bowl, whisk egg. Add the yogurt, milk, vanilla, and oil. Whisk well. Stir in the white and brown sugar. Pour into the dry ingredients, stirring until just combined. Fold in oats and cleaned gooseberries. Again, you can use one to one and a half cups, depending on your preference of flavor. My family loves tart (think, rhubarb bread and pie), so I add more berries. 

Divide the batter among the 12 muffin cups. Bake for 20-25 minutes, until cooked through. Allow to cool in the tin a few minutes before removing. I think these are best served warm with a cup of coffee.

Mix up the wet ingredients!
Stir in the berries and oats.
Portion it out!
Yum!
Let’s eat!

Gooseberry Muffins

Little bit of tart and a little bit of sweet make these gooseberry muffins a perfect treat!
Prep Time 15 minutes
Cook Time 25 minutes
Course Breakfast
Cuisine American
Servings 12 muffins

Ingredients
  

  • 1 egg
  • ½ cup Greek yogurt
  • ¼ cup + 2 tablespoons milk
  • 1 teaspoon vanilla
  • 2 tablespoon oil
  • ¼ cup brown sugar packed
  • ¼ cup white sugar
  • 1 – 1 ½ cups gooseberries cleaned (1 ½ cups if you dig the tart flavor. 1 cup if you want it a little sweeter)
  • ½ cup old fashioned oats
  • 1 ½ cups all purpose flour
  • ½ teaspoon salt
  • 1 teaspoon baking powder

Instructions
 

  • If you haven’t yet, nip off the ends on the gooseberries. You only want the berry portion in the muffin, Then, preheat the oven to 400 degrees. Grease or line a muffin tin. This recipe will result in approximately 12 muffins.
  • In a large bowl, combine the flour, salt, and baking powder. Set aside.
  • In a small bowl, whisk egg. Add the yogurt, milk, vanilla, and oil. Whisk well.
  • Stir in the white and brown sugar.
  • Pour into the dry ingredients, stirring until just combined. Fold in oats and cleaned gooseberries.
  • Divide the batter among the 12 muffin cups. Bake for 20-25 minutes, until cooked through. Allow to cool in the tin a few minutes before removing.

Notes

You can use one to one and a half cups, depending on your preference of flavor. My family loves tart (think, rhubarb bread and pie), so I add more berries.
Keyword Breakfast, gooseberries, gooseberry, gooseberry muffins, gooseberry recipes, muffin, muffins
Tried this recipe?Let us know how it was!

Looking for other fun ways to use berries in your kitchen?

Check out my canning and preserving page for more inspiration or perhaps one of my favorites below will become a favorite of yours!