Razzle Dazzle Raspberry Jam

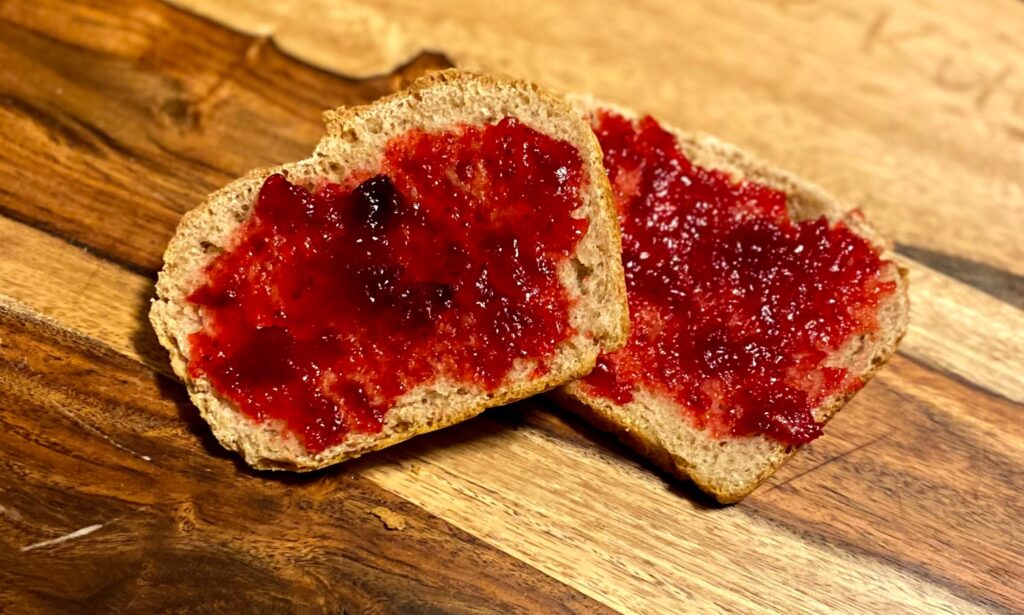
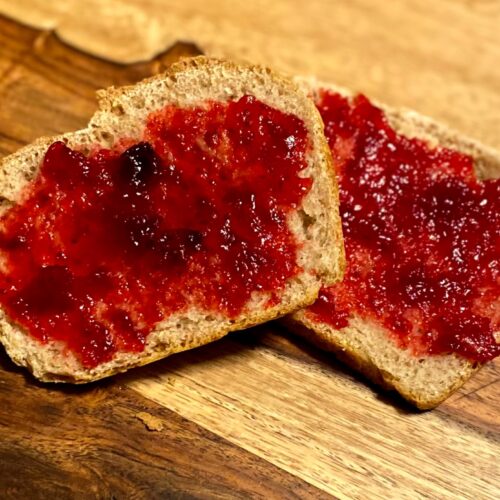
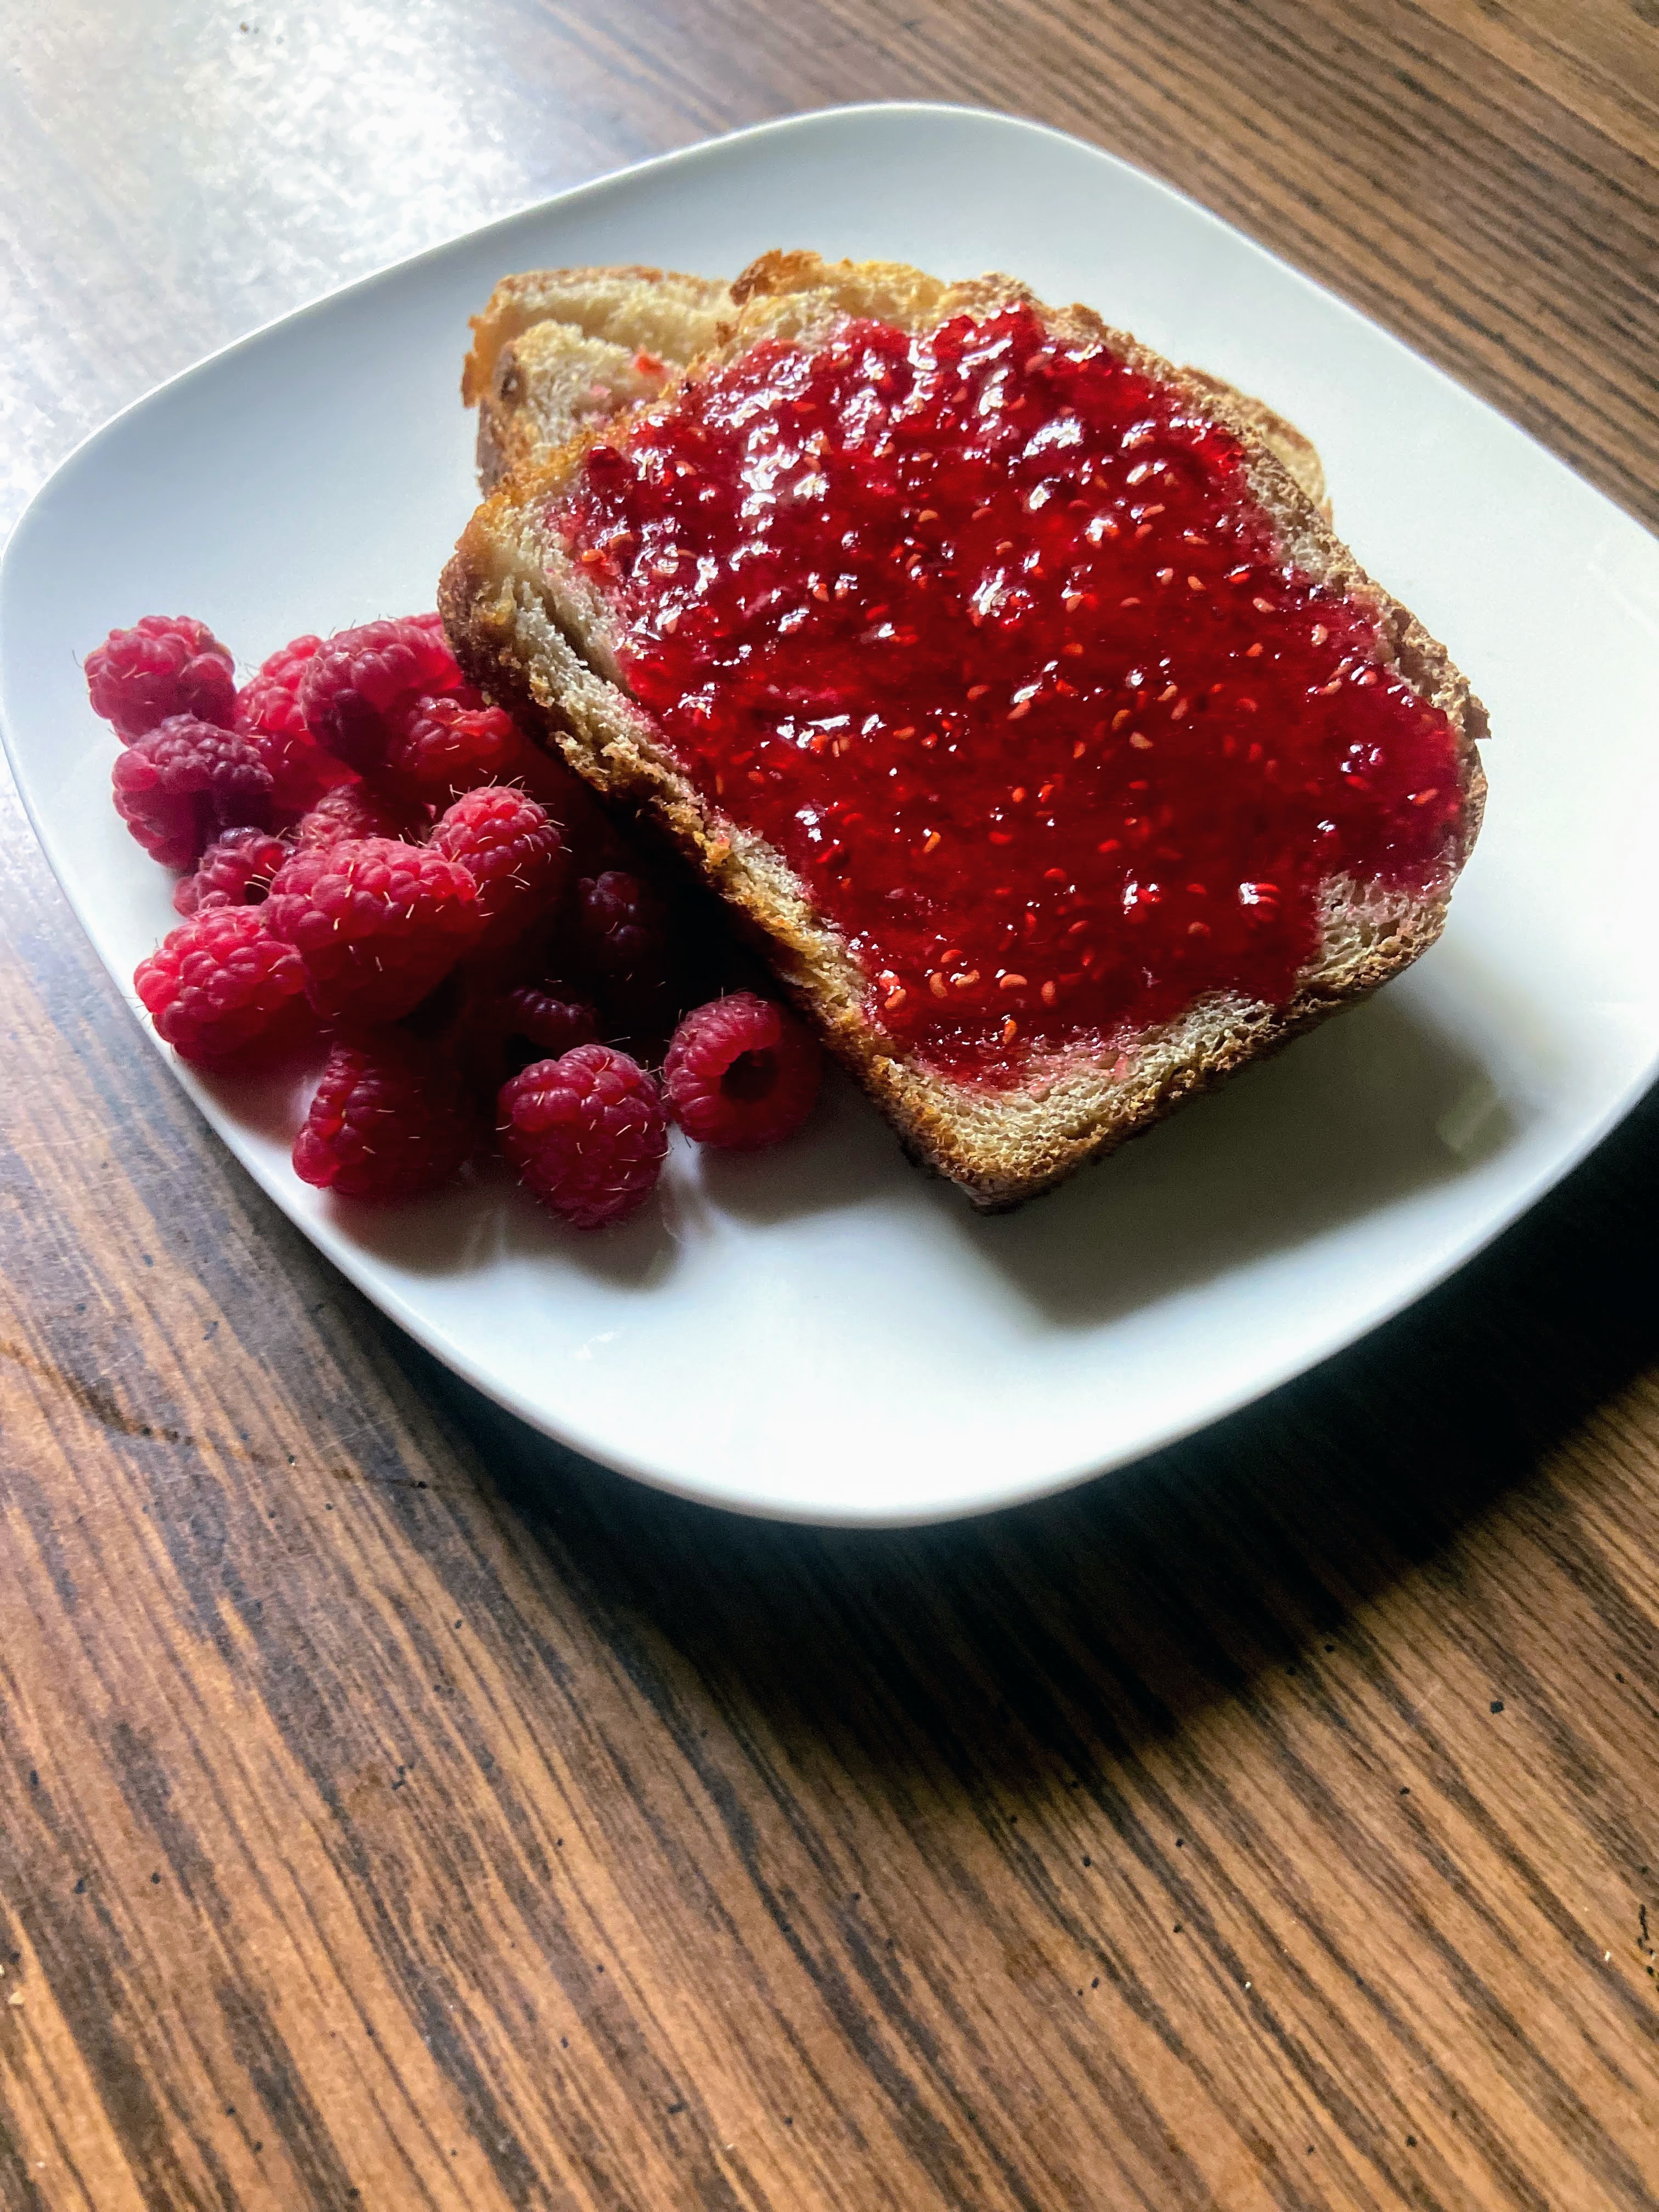
That’s our pet name for “my” raspberries. The red raspberries. I love red raspberries with my entire soul and there isn’t much better than fresh from the kettle razzle dazzle raspberry jam. Put that on freshly baked sourdough bread and guys, my taste buds sing. 

I have a long history with raspberries. Some of my earliest memories are going to scout for deer hunting areas with my dad, containers in tow, harvesting wild raspberries along the hidden dirt road. I always had a rule that I couldn’t try one until I finished harvesting. If I broke that rule, I was sure I would eat ALLL the berries. I still try to follow that silly rule to this day. 

Raspberries are also a favorite fruit of my grandma’s, who is quite possibly my biggest cheerleader and closest relative. For so many holidays, She would bake schaum torte (apparently a specialty in Wisconsin! I never knew! Check it out here!), and we topped it with raspberries. Needless to say, it was the dessert I always chose growing up. 

Now, I have a larger than life patch of raspberries that are my babies. I find it almost meditative to harvest them alone and silently. Weaving and ducking through the leaves to make sure I don’t miss a ripe berry. And that patch? It produces like none other. That means I eat a ton. Freeze a ton. And oh my gosh, the jam! I do both this razzle dazzle raspberry jam. I also do a raspberry jalapeño jam for a little fun. You can find it by clicking here if you need a little kick! 

For now, let’s get canning some beautiful raspberry jam! Oh quick…

New to canning? Check out the Ball’s Book of Canning or The National Center for Home Food Preservation for more detailed information. I will give you the low down, but it will be short and sweet. You will want to read up more, I promise 🙂 

Your Ingredients:

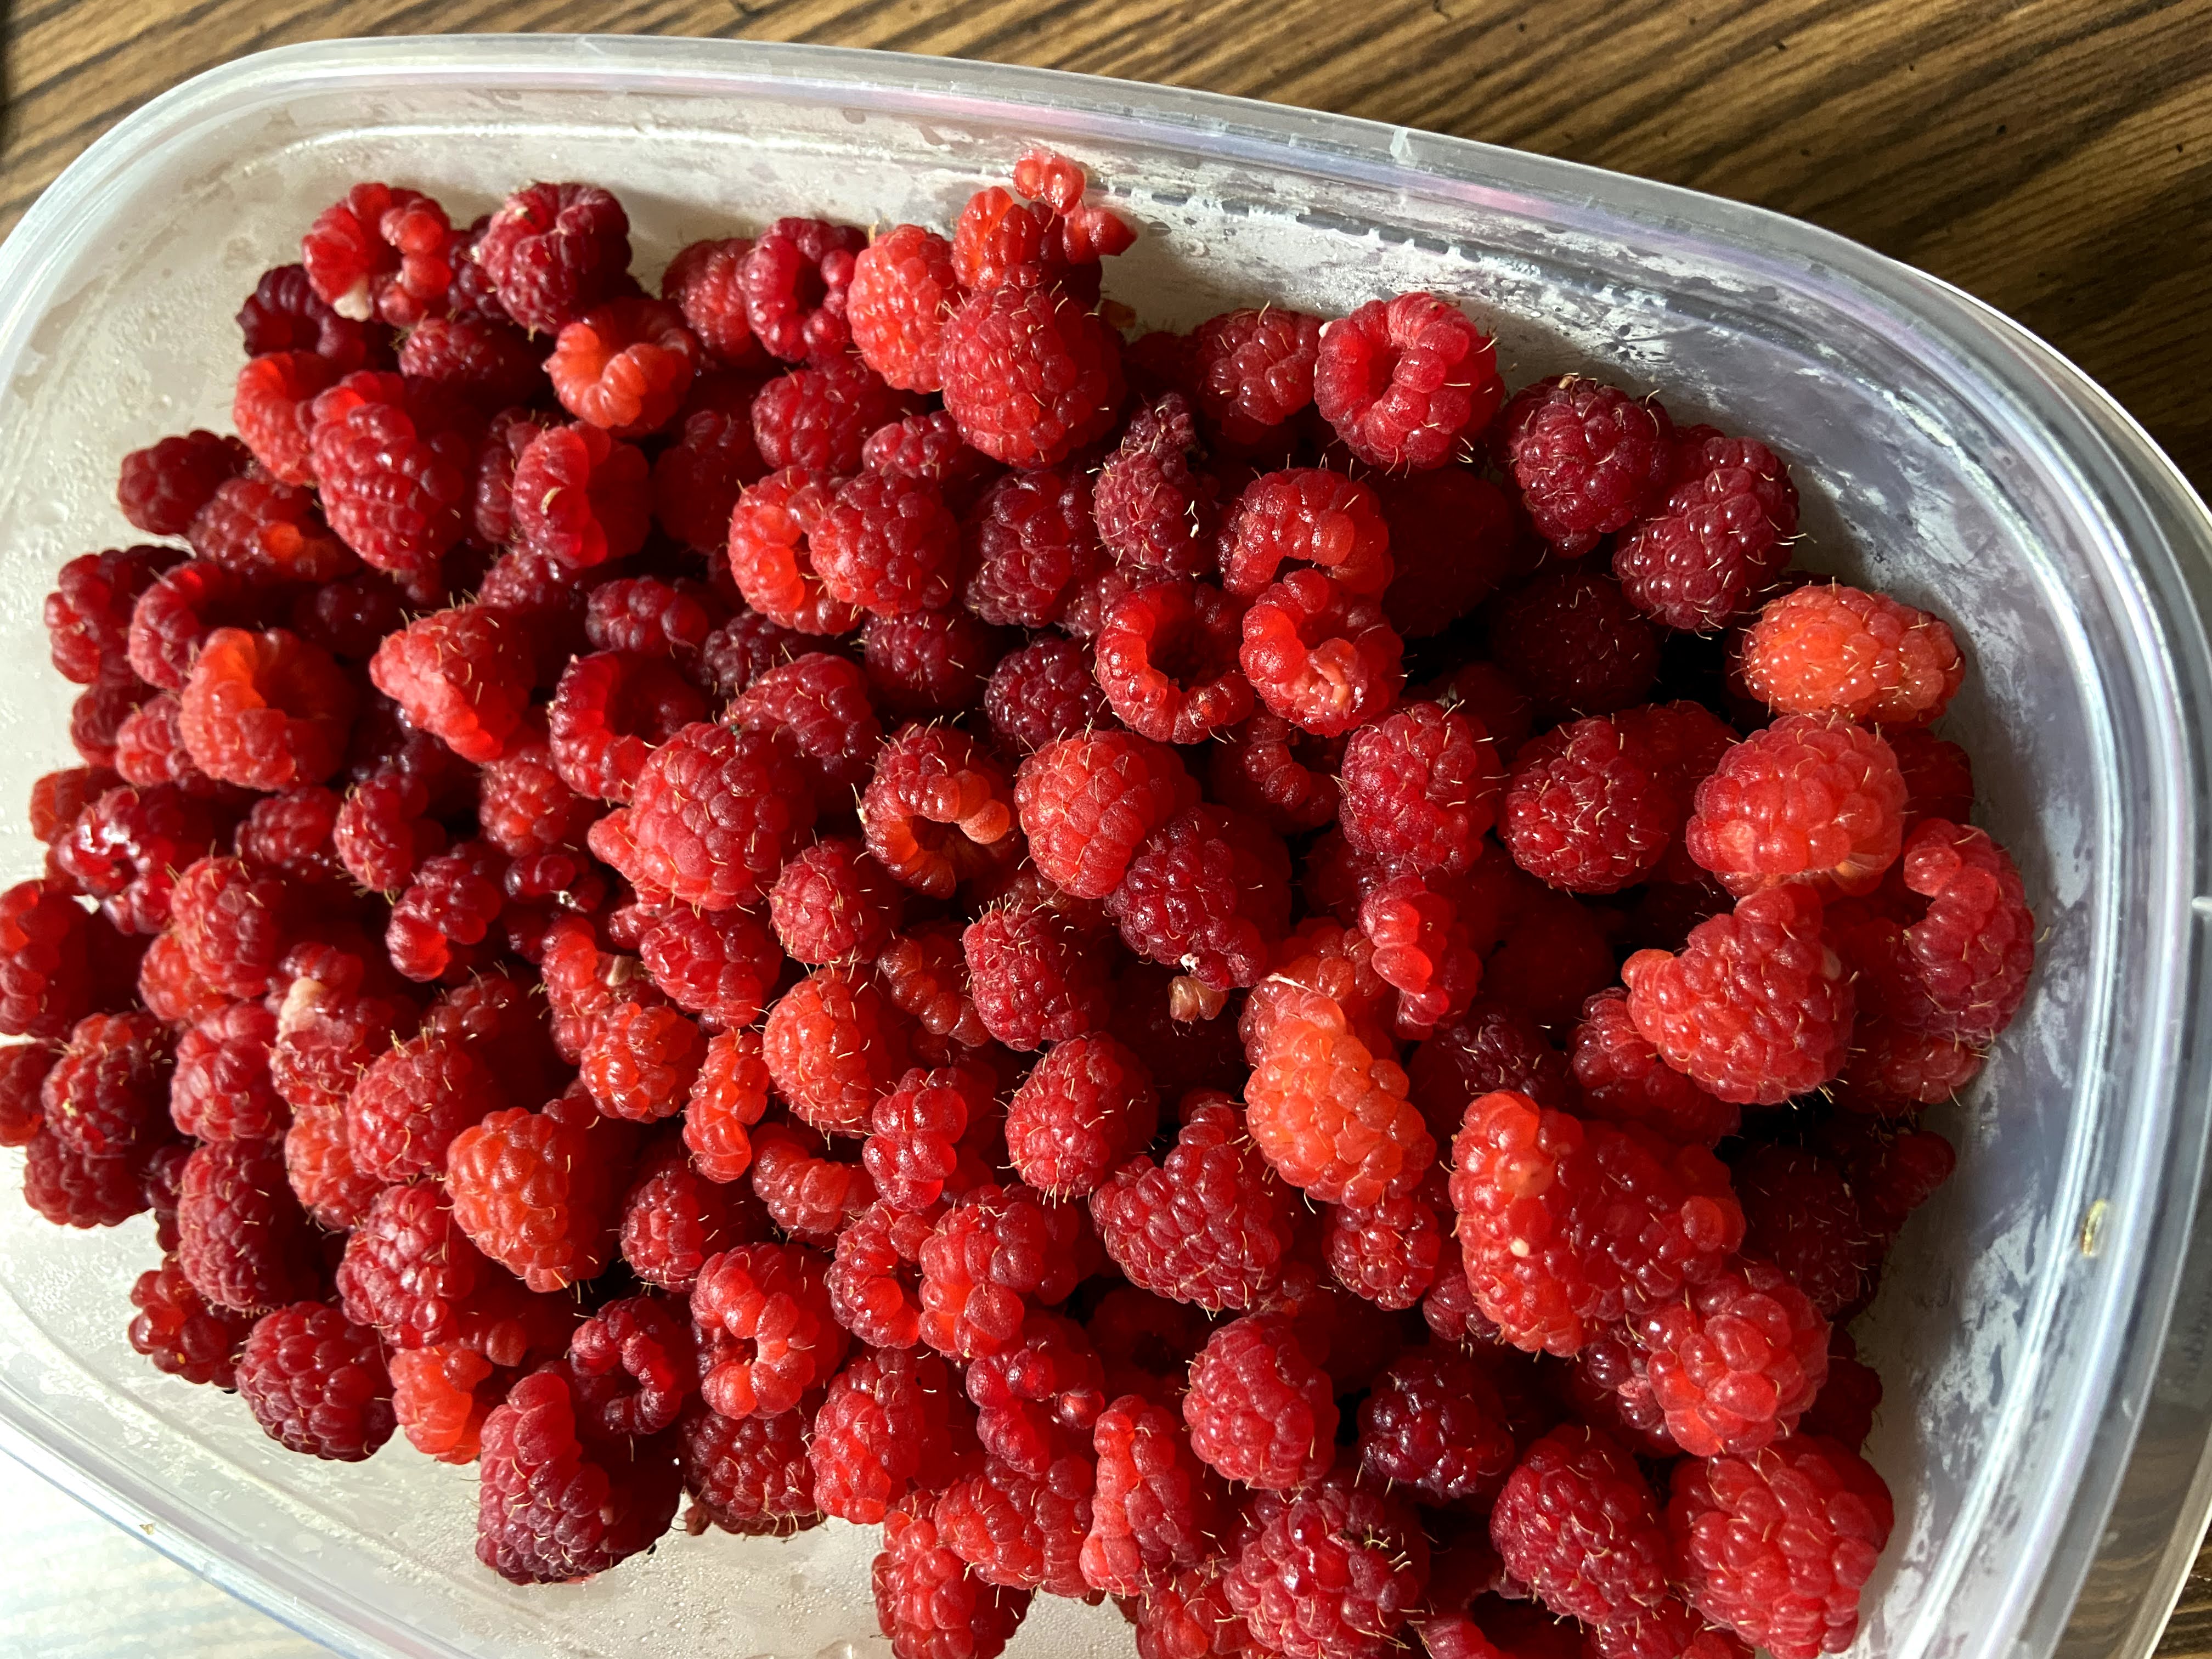
  • 8 cups fresh or frozen raspberries (If frozen, measure first. Then thaw)
  • 7 cups sugar
  • 1 box powder pectin 
  • ¼ teaspoon butter (optional)

Your Supplies

This recipe will result in approximately nine 8 ounce jelly jars. Be sure you have rings and lids for them.

You will need a water bath canner or large stock pot with a lid. The jars need to be off the bottom of the pot. A water bath canner will have a rack to use if you go that route. If you use a stock pot, I would invest in canning racks. You can also put a towel down in a pinch, but it is MESSY in terms of getting water everywhere.  

It is also helpful to have the tools in a canning kit like this, but it isn’t necessary. Canning would be crazy challenging without the jar funnel and jar tongs. The lid lifter is also very handy. 

Your Steps to Razzle Dazzle Raspberry Jam

Begin by measuring out your sugar in a large bowl and set aside. It’s important to have all your ingredients prepared before beginning the canning process so don’t skip this step. 

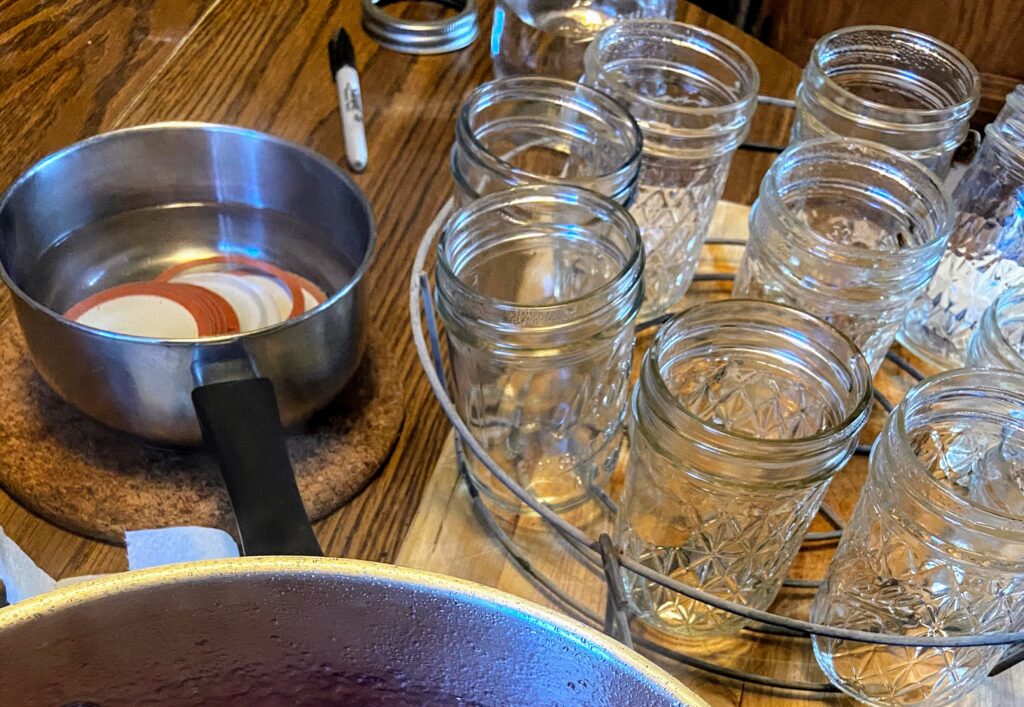
Fill the canning kettle with enough water that the jars will be covered by at least ½” water. More is better in this case so over estimate. Begin to heat over high heat. Place the canning rack so that it is hooked on the side of the canner and put clean jars on it to keep them warm. Note: You don’t have to keep the jars in the rack, although it is helpful to keep them warm. You want the jars warm so that when you fill them to prevent breaking. 

Set the clean rings aside. I like to simmer my lids on low low heat in a small saucepan. Not necessary, but I like to think it helps them seal better. 

Now to create the jam

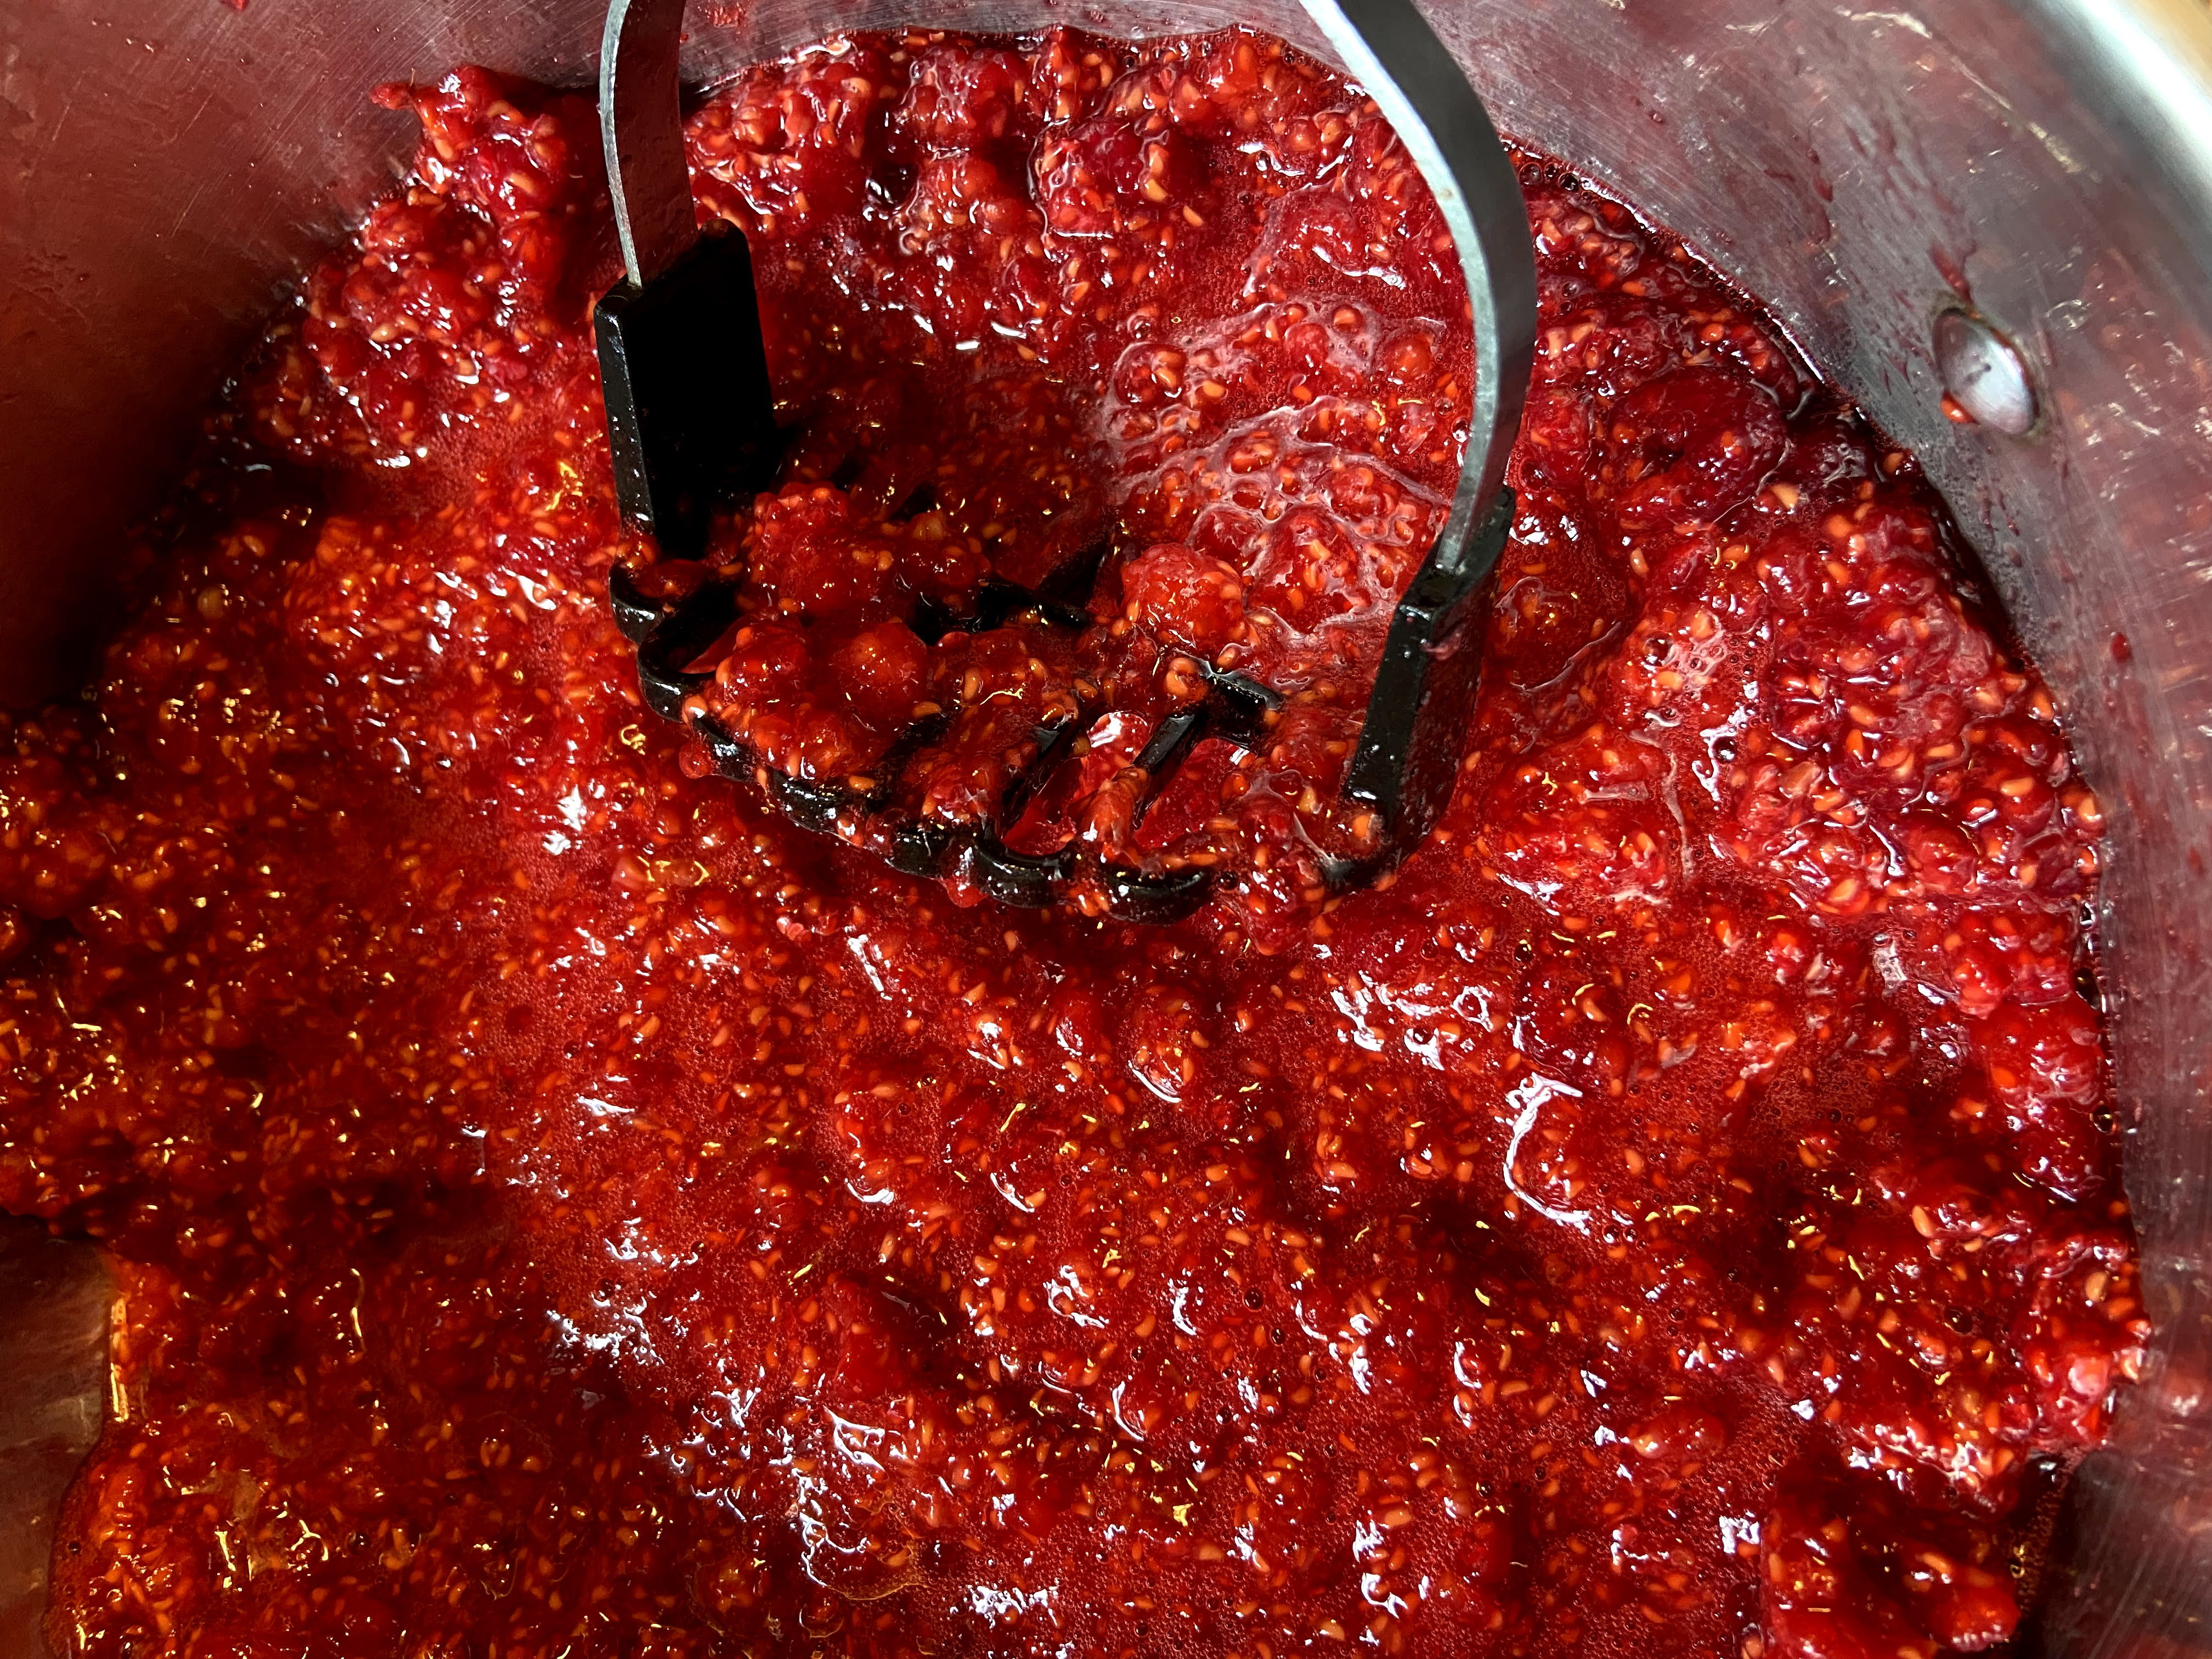
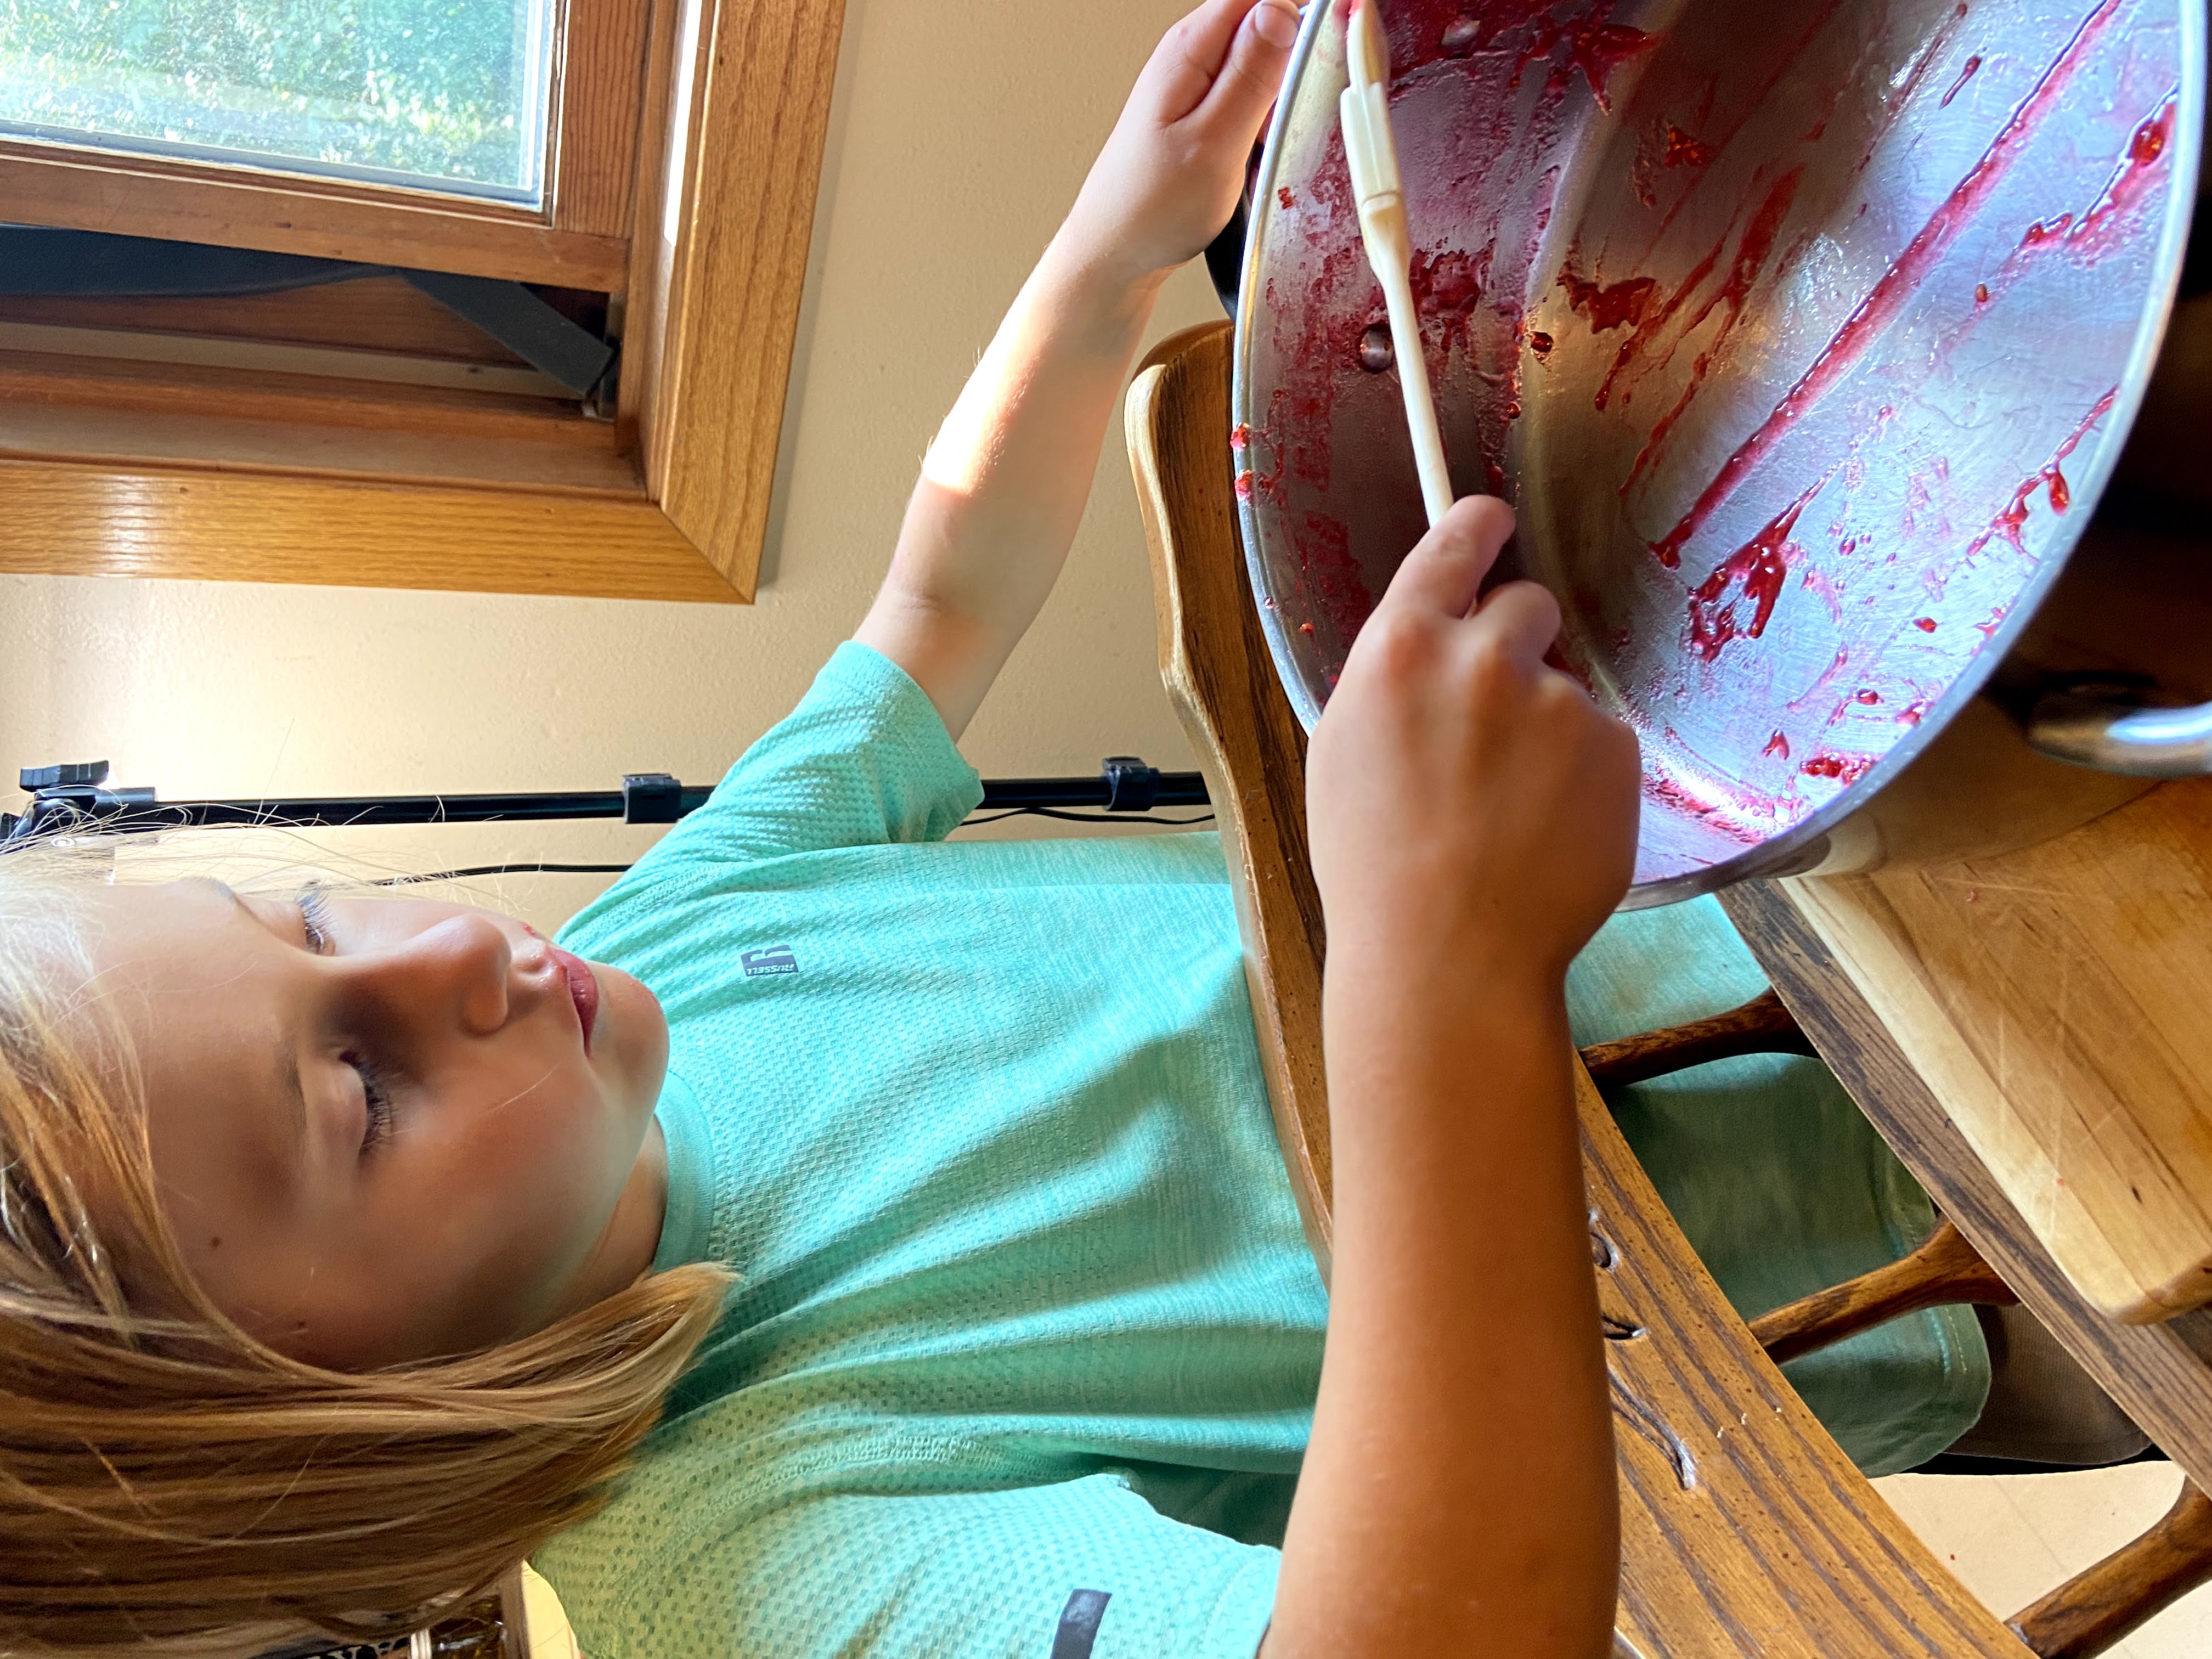
In a large, preferably shallow kettle, smash the raspberries with a potato masher. Stir in powder pectin. Add butter if desired. It will decrease foaming while the jam is cooking, but is not necessary. The foam isn’t bad. It just makes the jam a little less pretty. 

Heat raspberries and pectin over medium high heat, stirring consistently. Once it is close to a boil, stir constantly until you cannot stir down a rolling boil. On more than one occasion, I have thought I reached this point only to go a little longer and see what a “real rolling boil” looked like. 

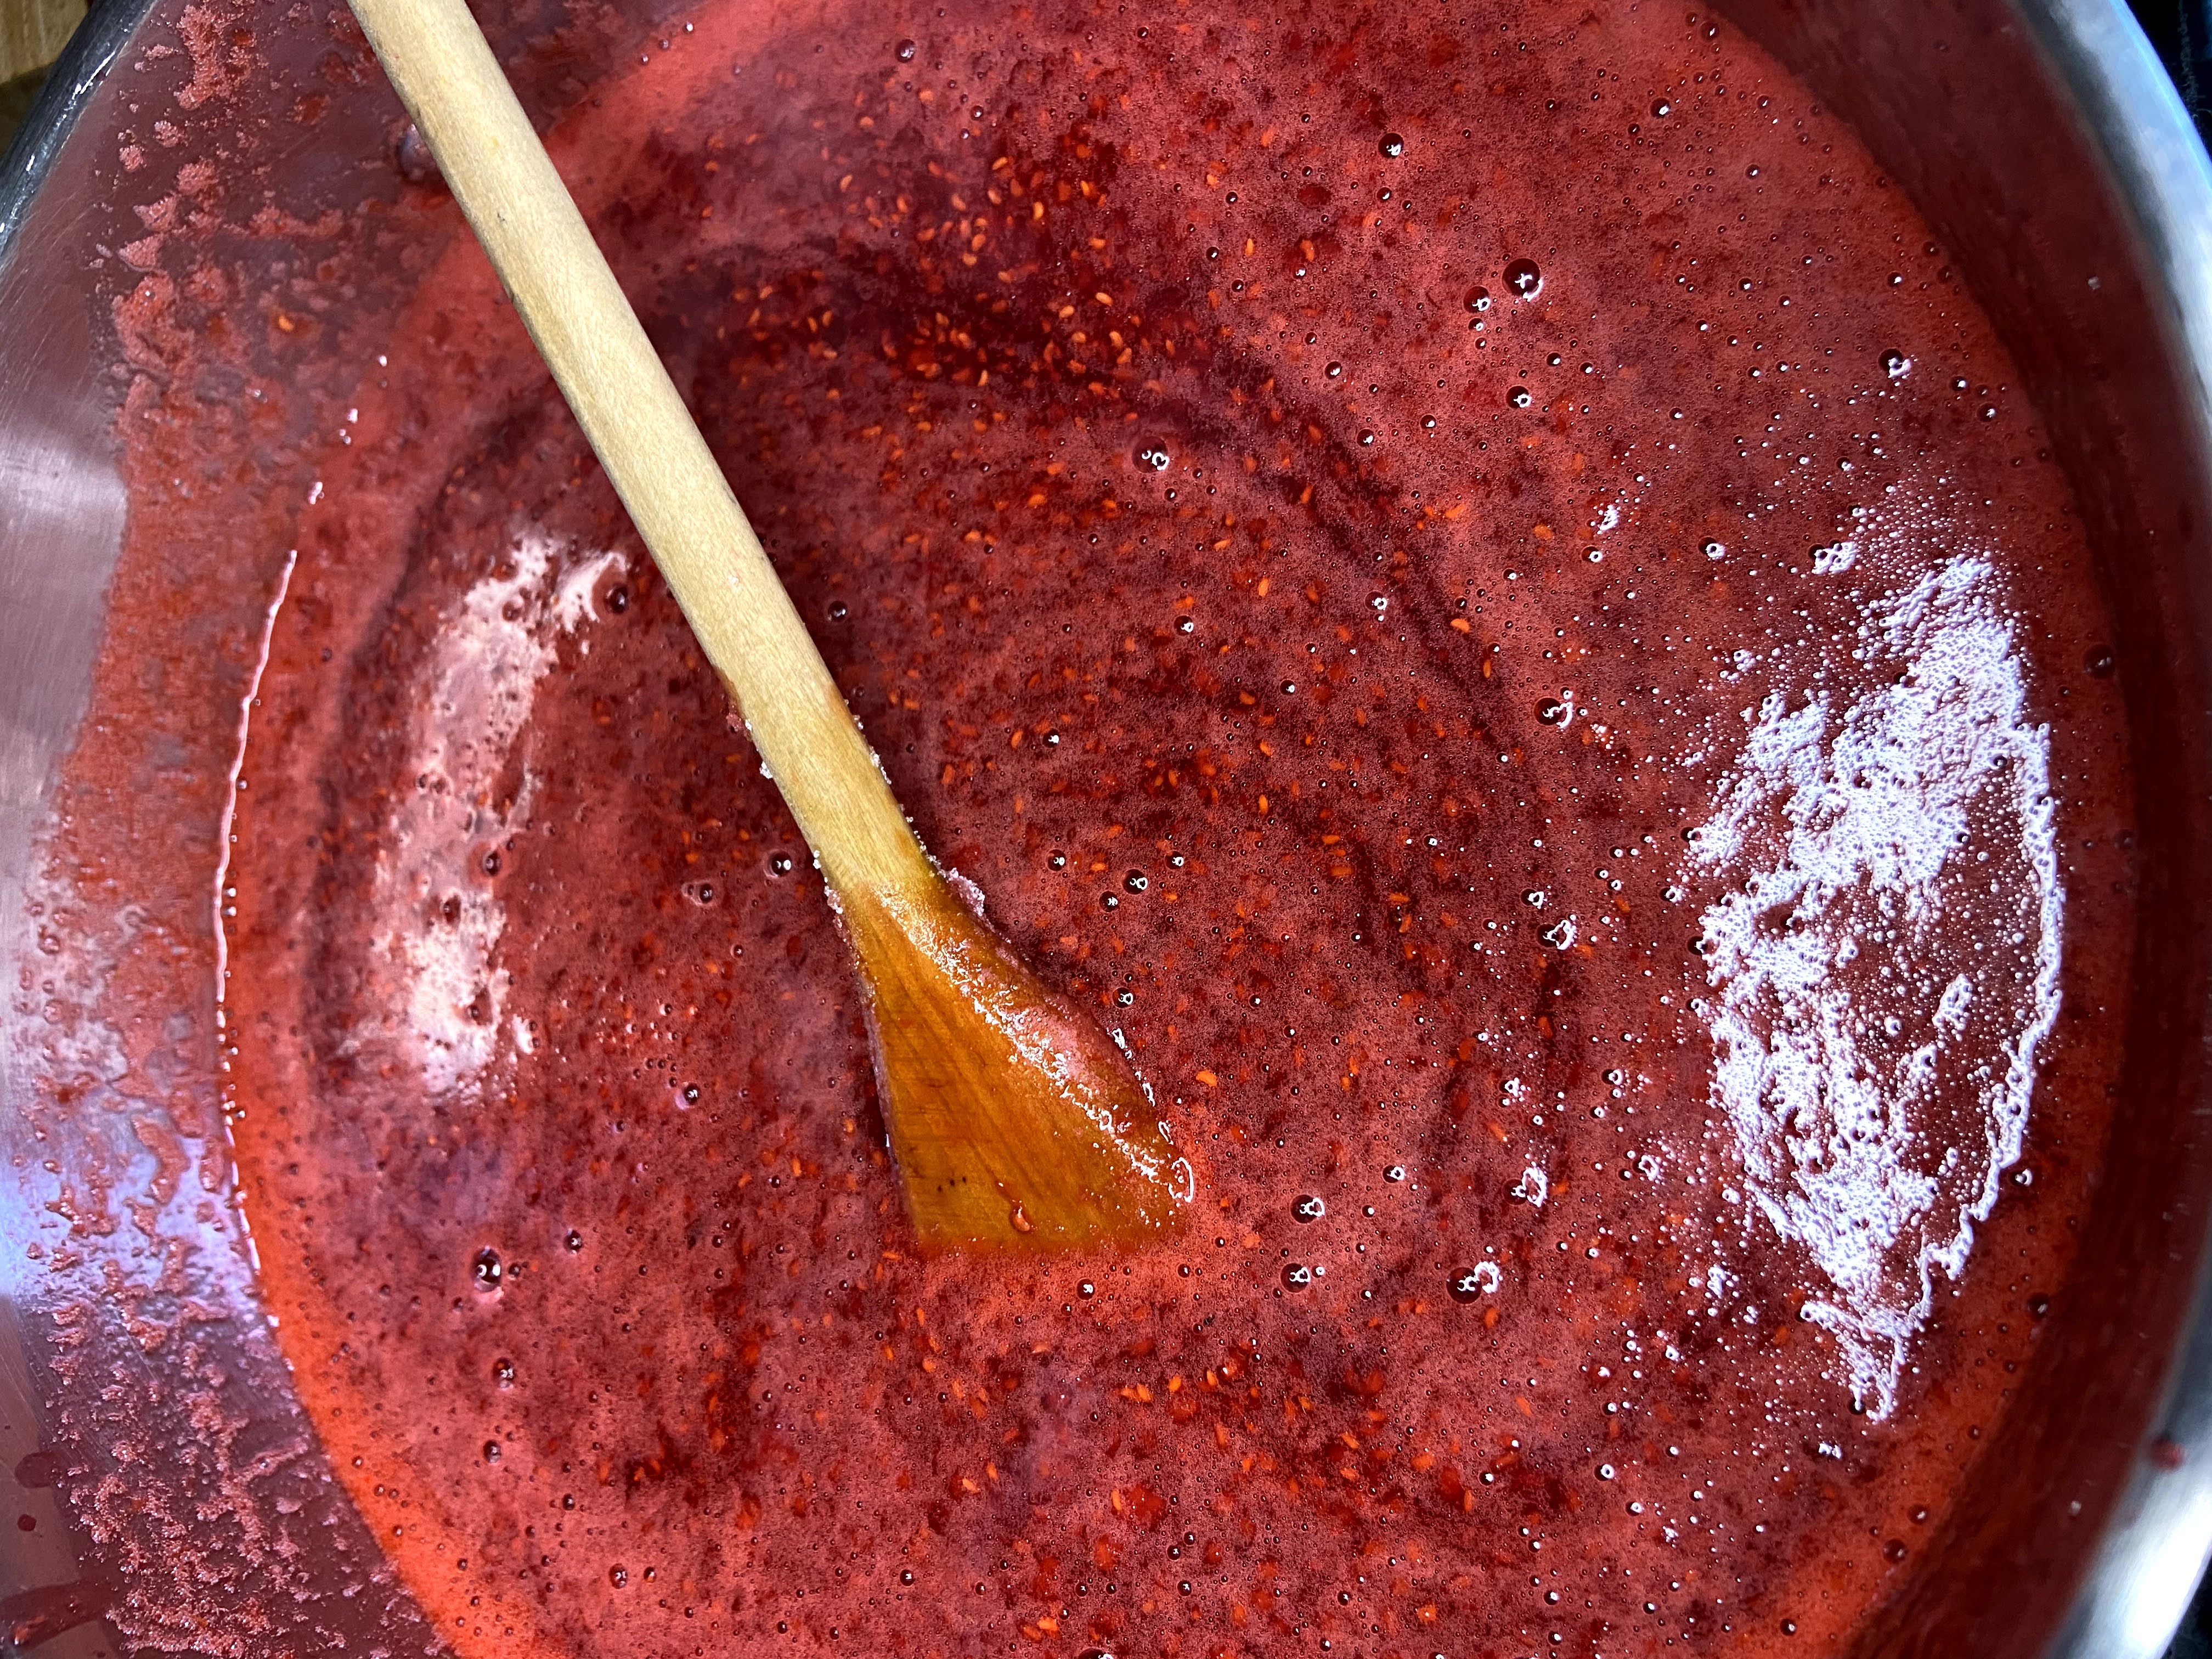
Once a rolling boil has been reached, quickly stir in the sugar. I find a strong whisk is helpful to make sure there are no clumps of sugar in the jam. Continue to heat over medium-high heat until a rolling boil is reached again, stirring constantly. Once the roiling boil is reached, time for EXACTLY one minute. Remove from heat. 

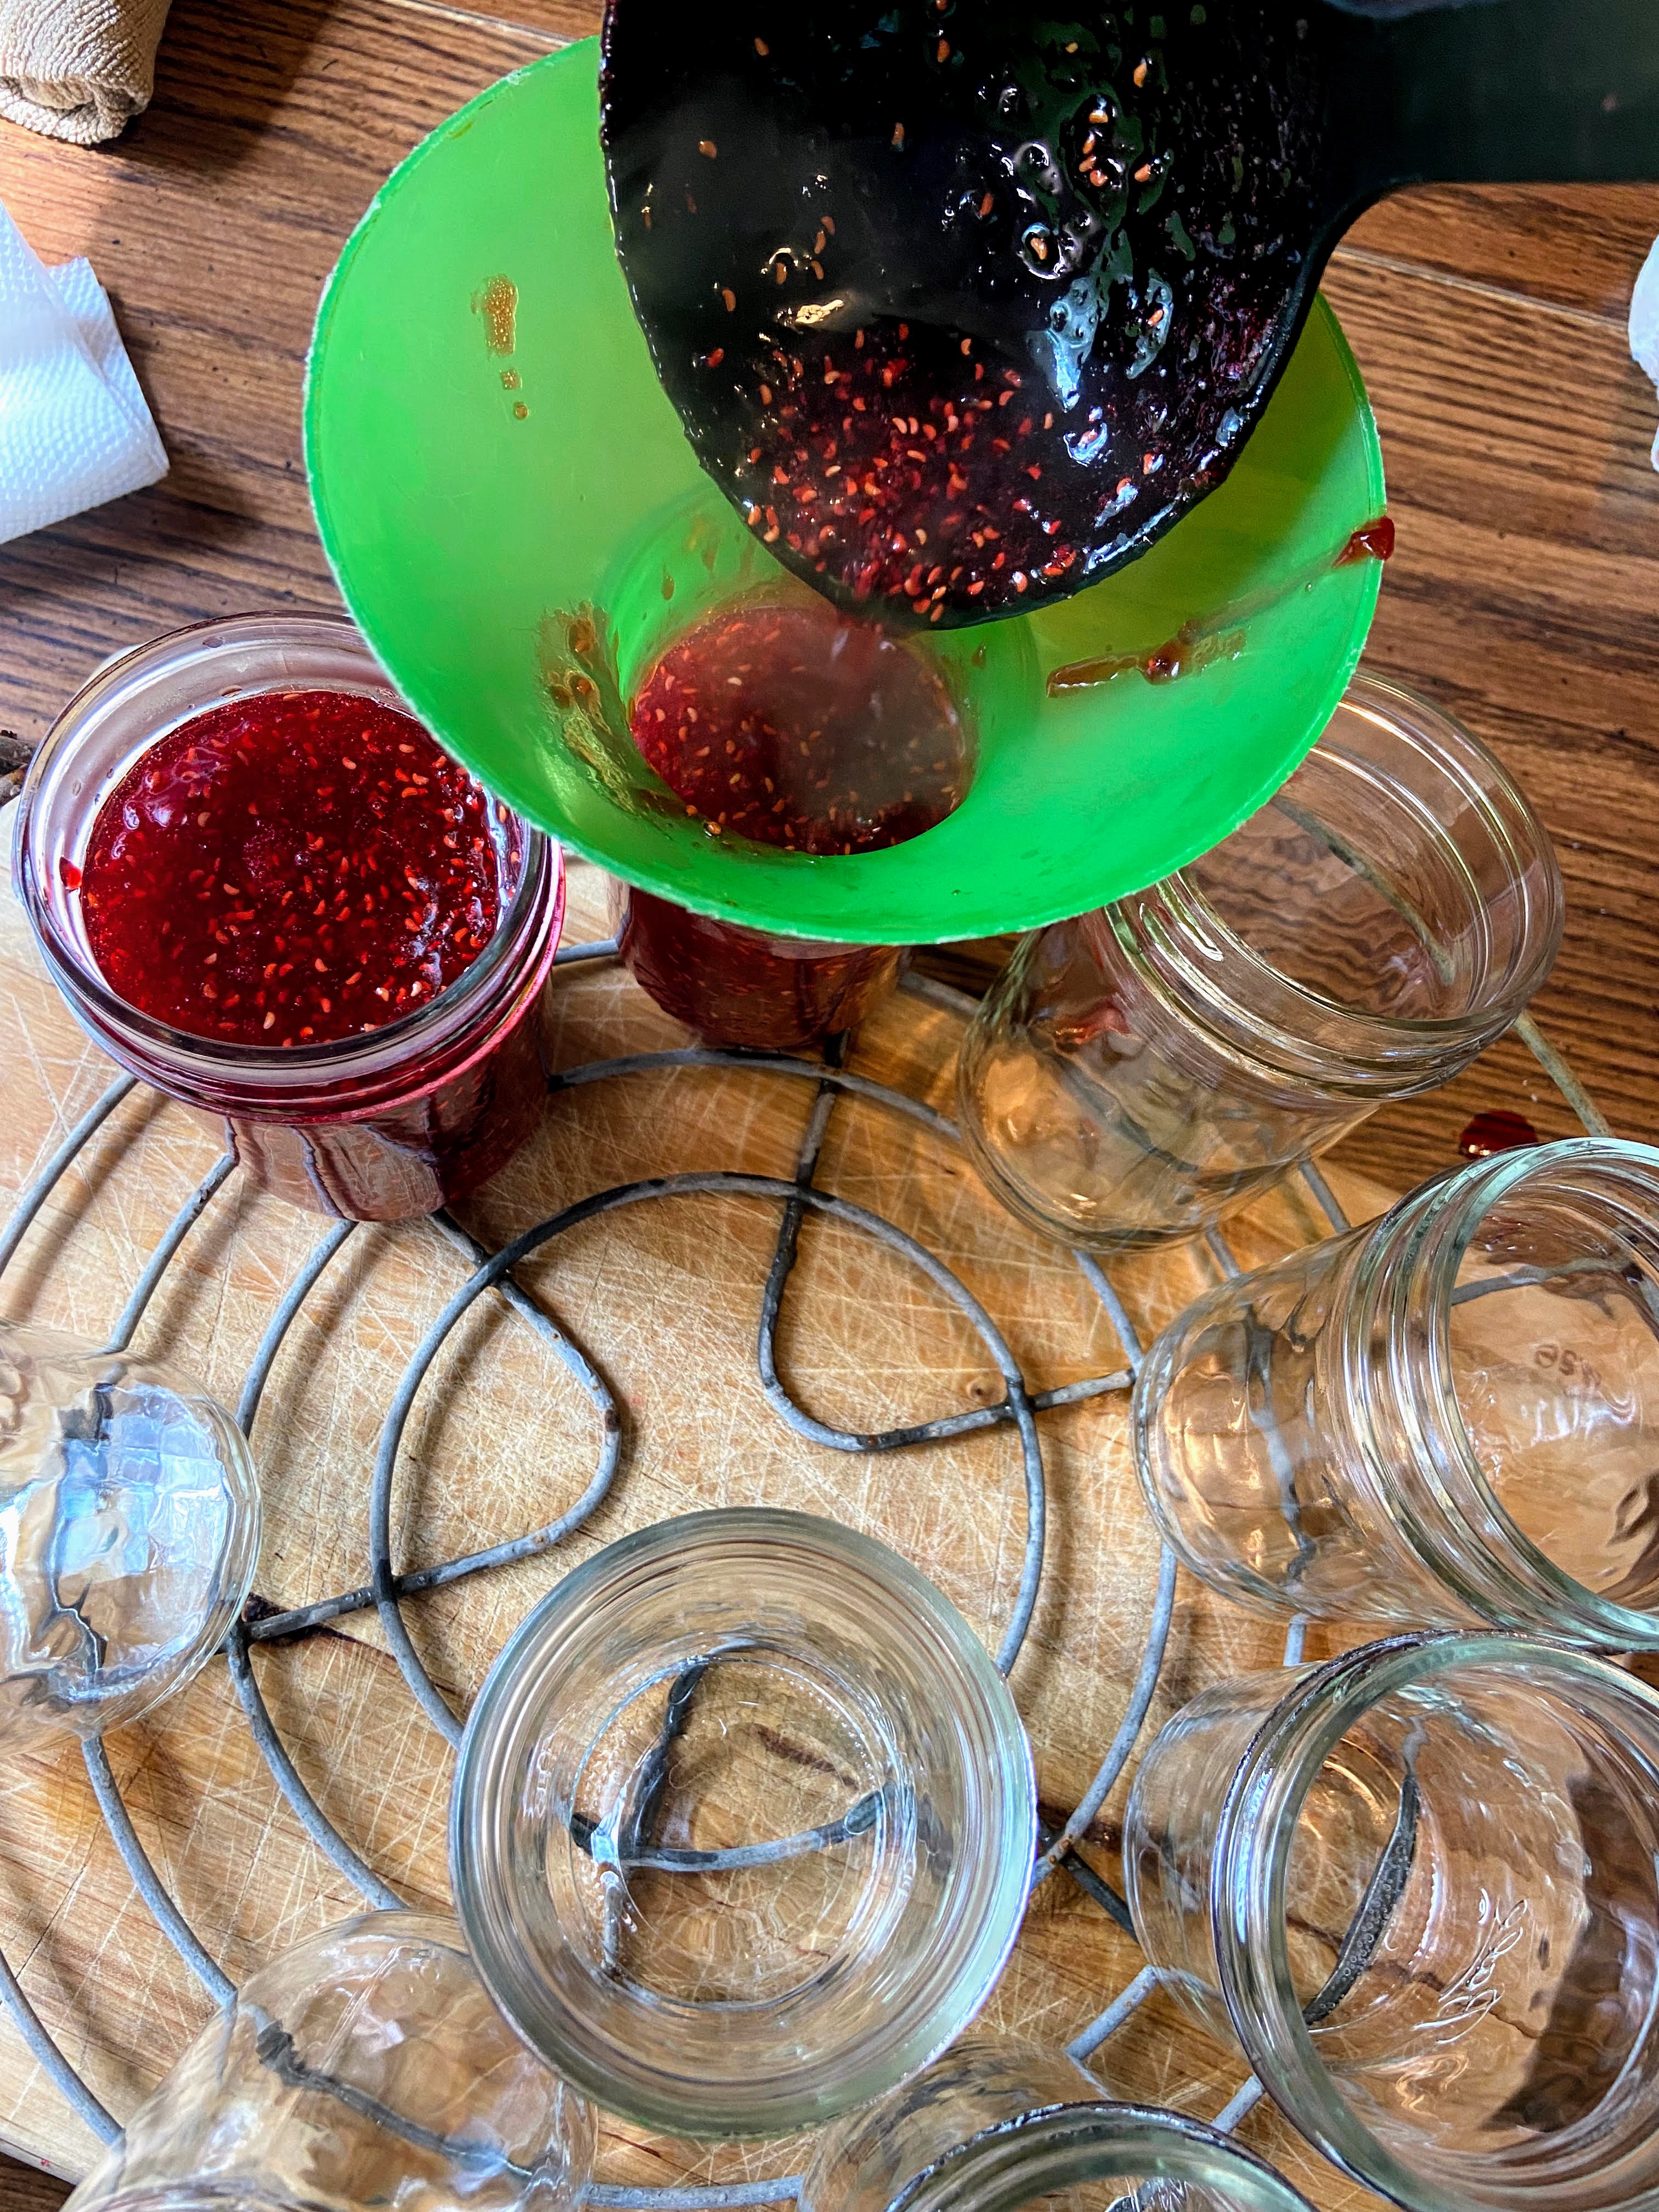
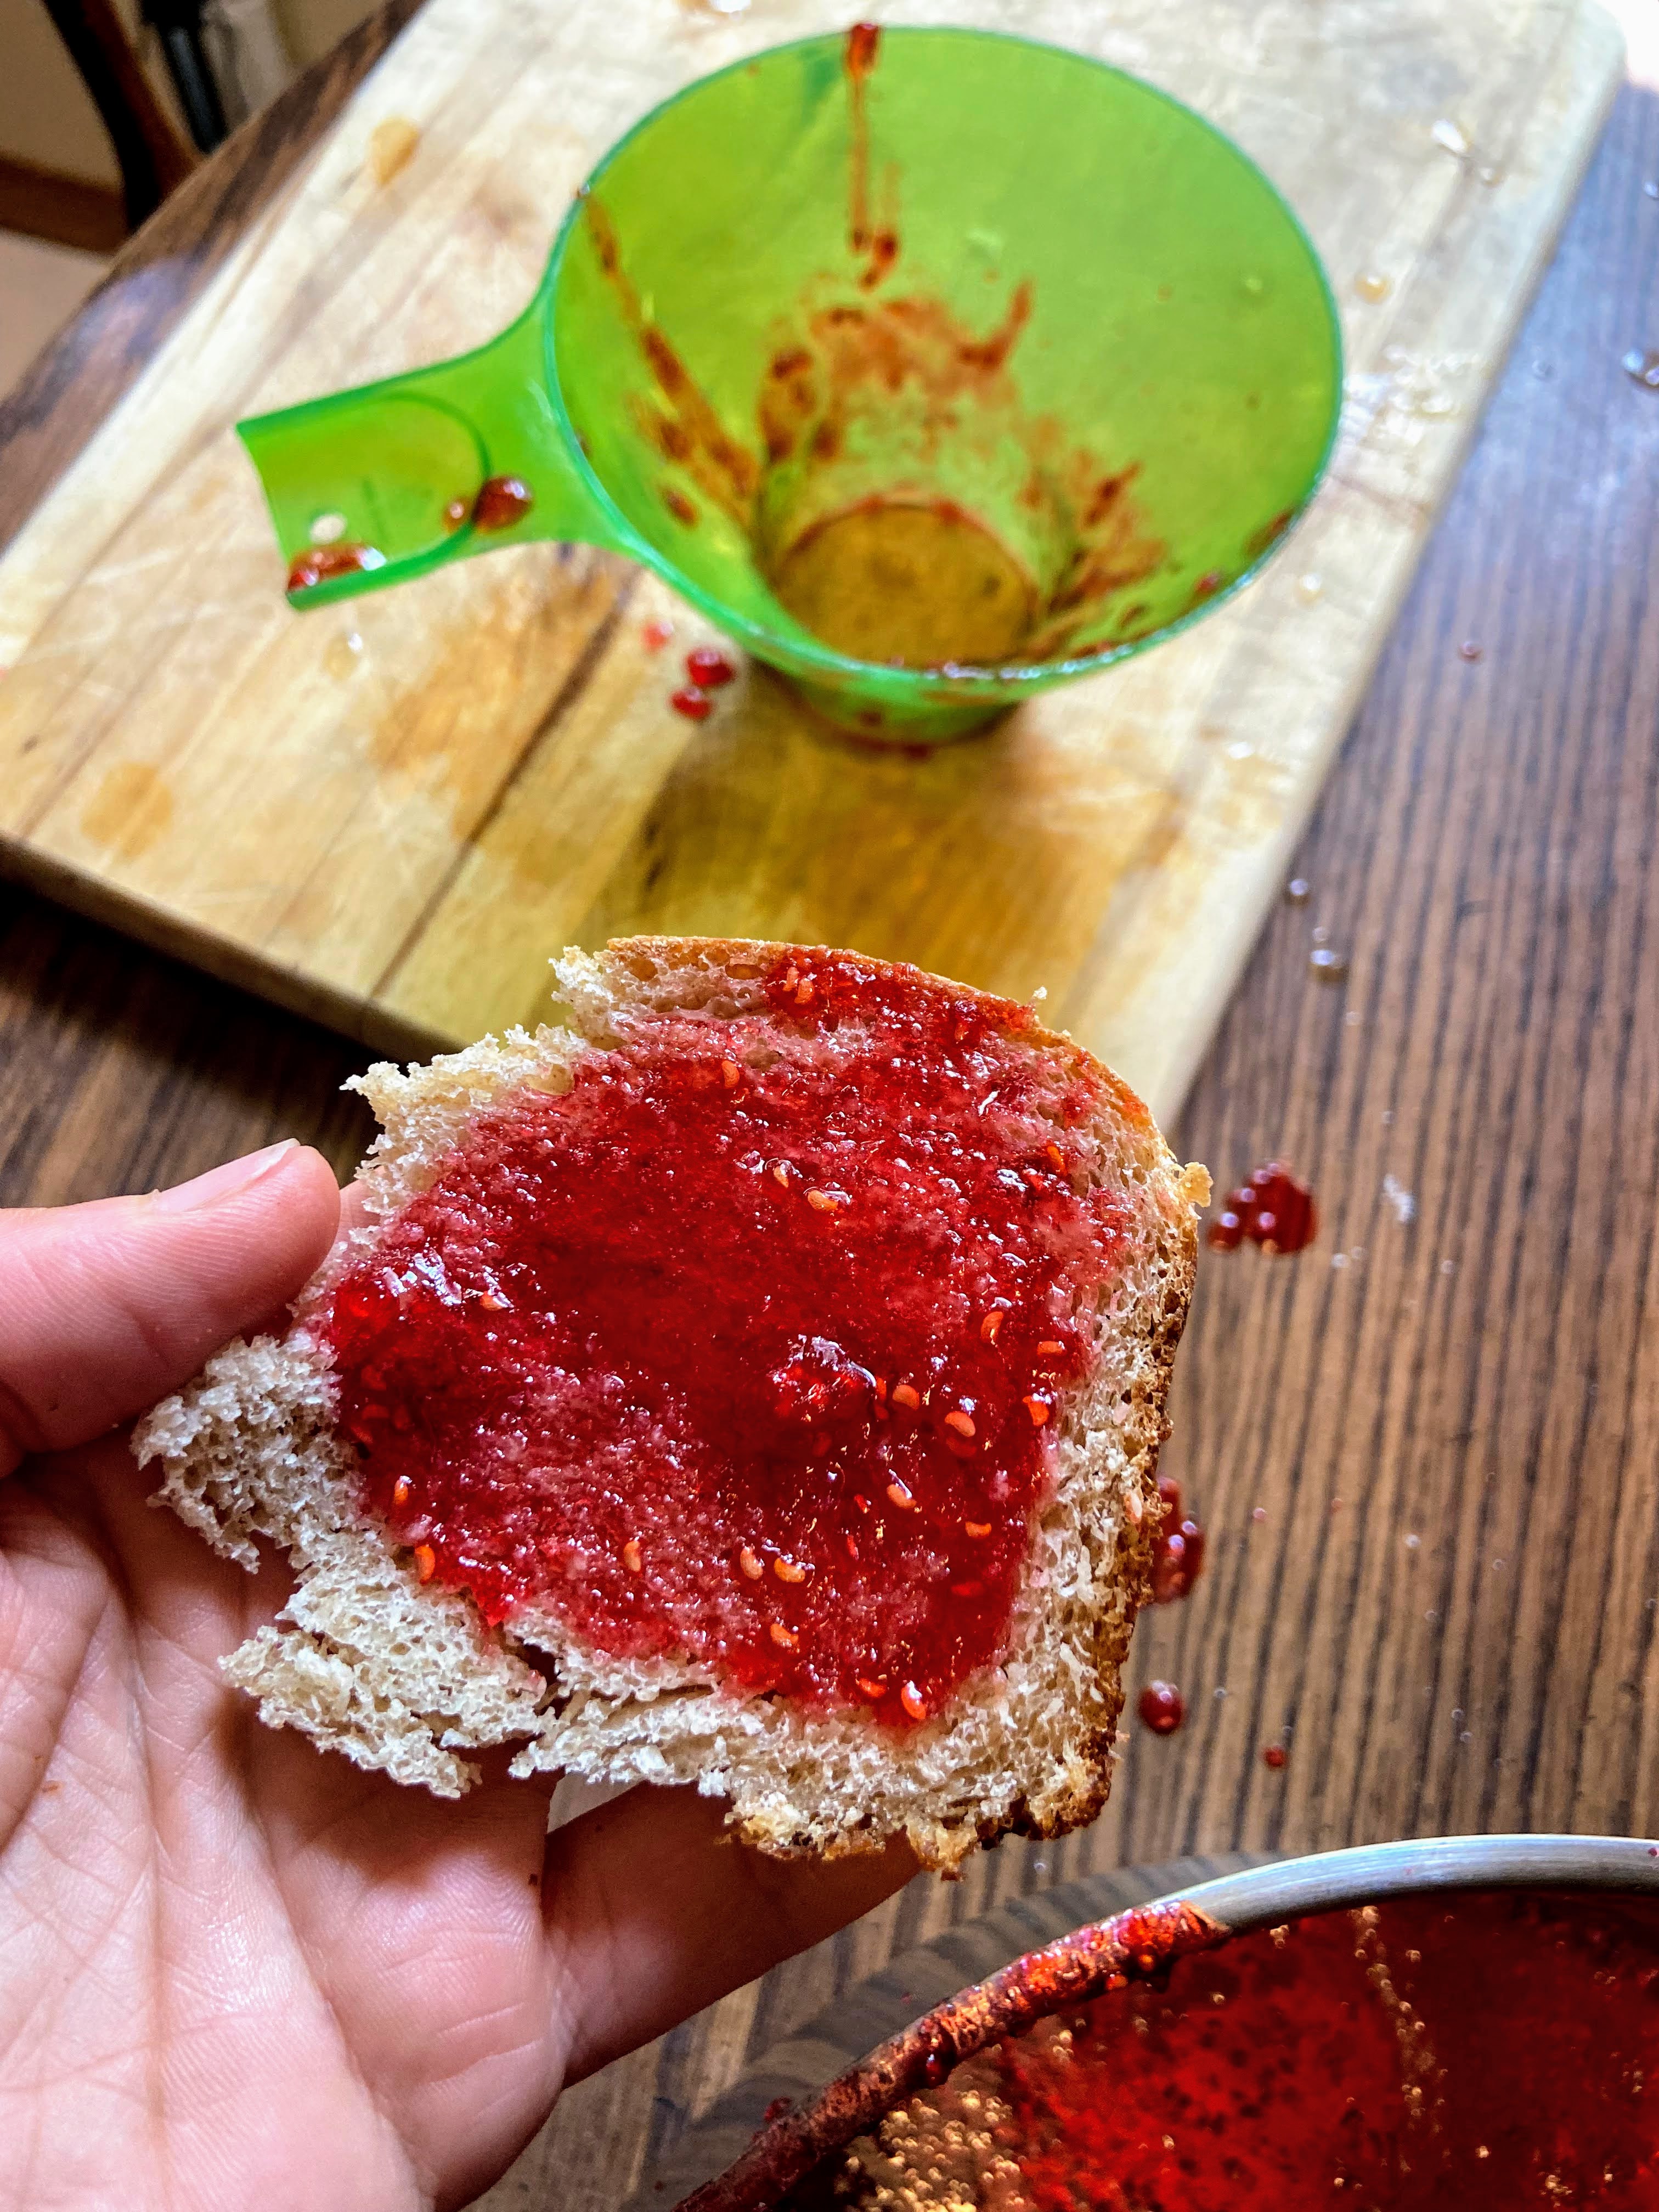
Ladle hot jam into jars using the canning funnel, leaving ¼” head space. Wipe rims of the jars as you go, top with a lid, and put on a ring so that it is finger tip tight. Finger tip tight means you know its tight but you aren’t sealing it so much so that it wouln’t leak on it’s side, if that makes sense. (Any leftover jam can go in a small container and get placed in the fridge to be enjoyed immediately)

Place jars in JUST about boiling water bath canner. Cover and raise heat until a rolling boil is reached. Cook jam for 10 minutes (adjusting for your altitude…under 1000 feet, you’re good. Over? Add 5 minutes for every 1000 feet). Once the time is complete, remove canner from heat and remove the cover. Allow the jam to sit in the canner an additional 5 minutes. Then remove and place on a towel on the counter. 

Afterward…

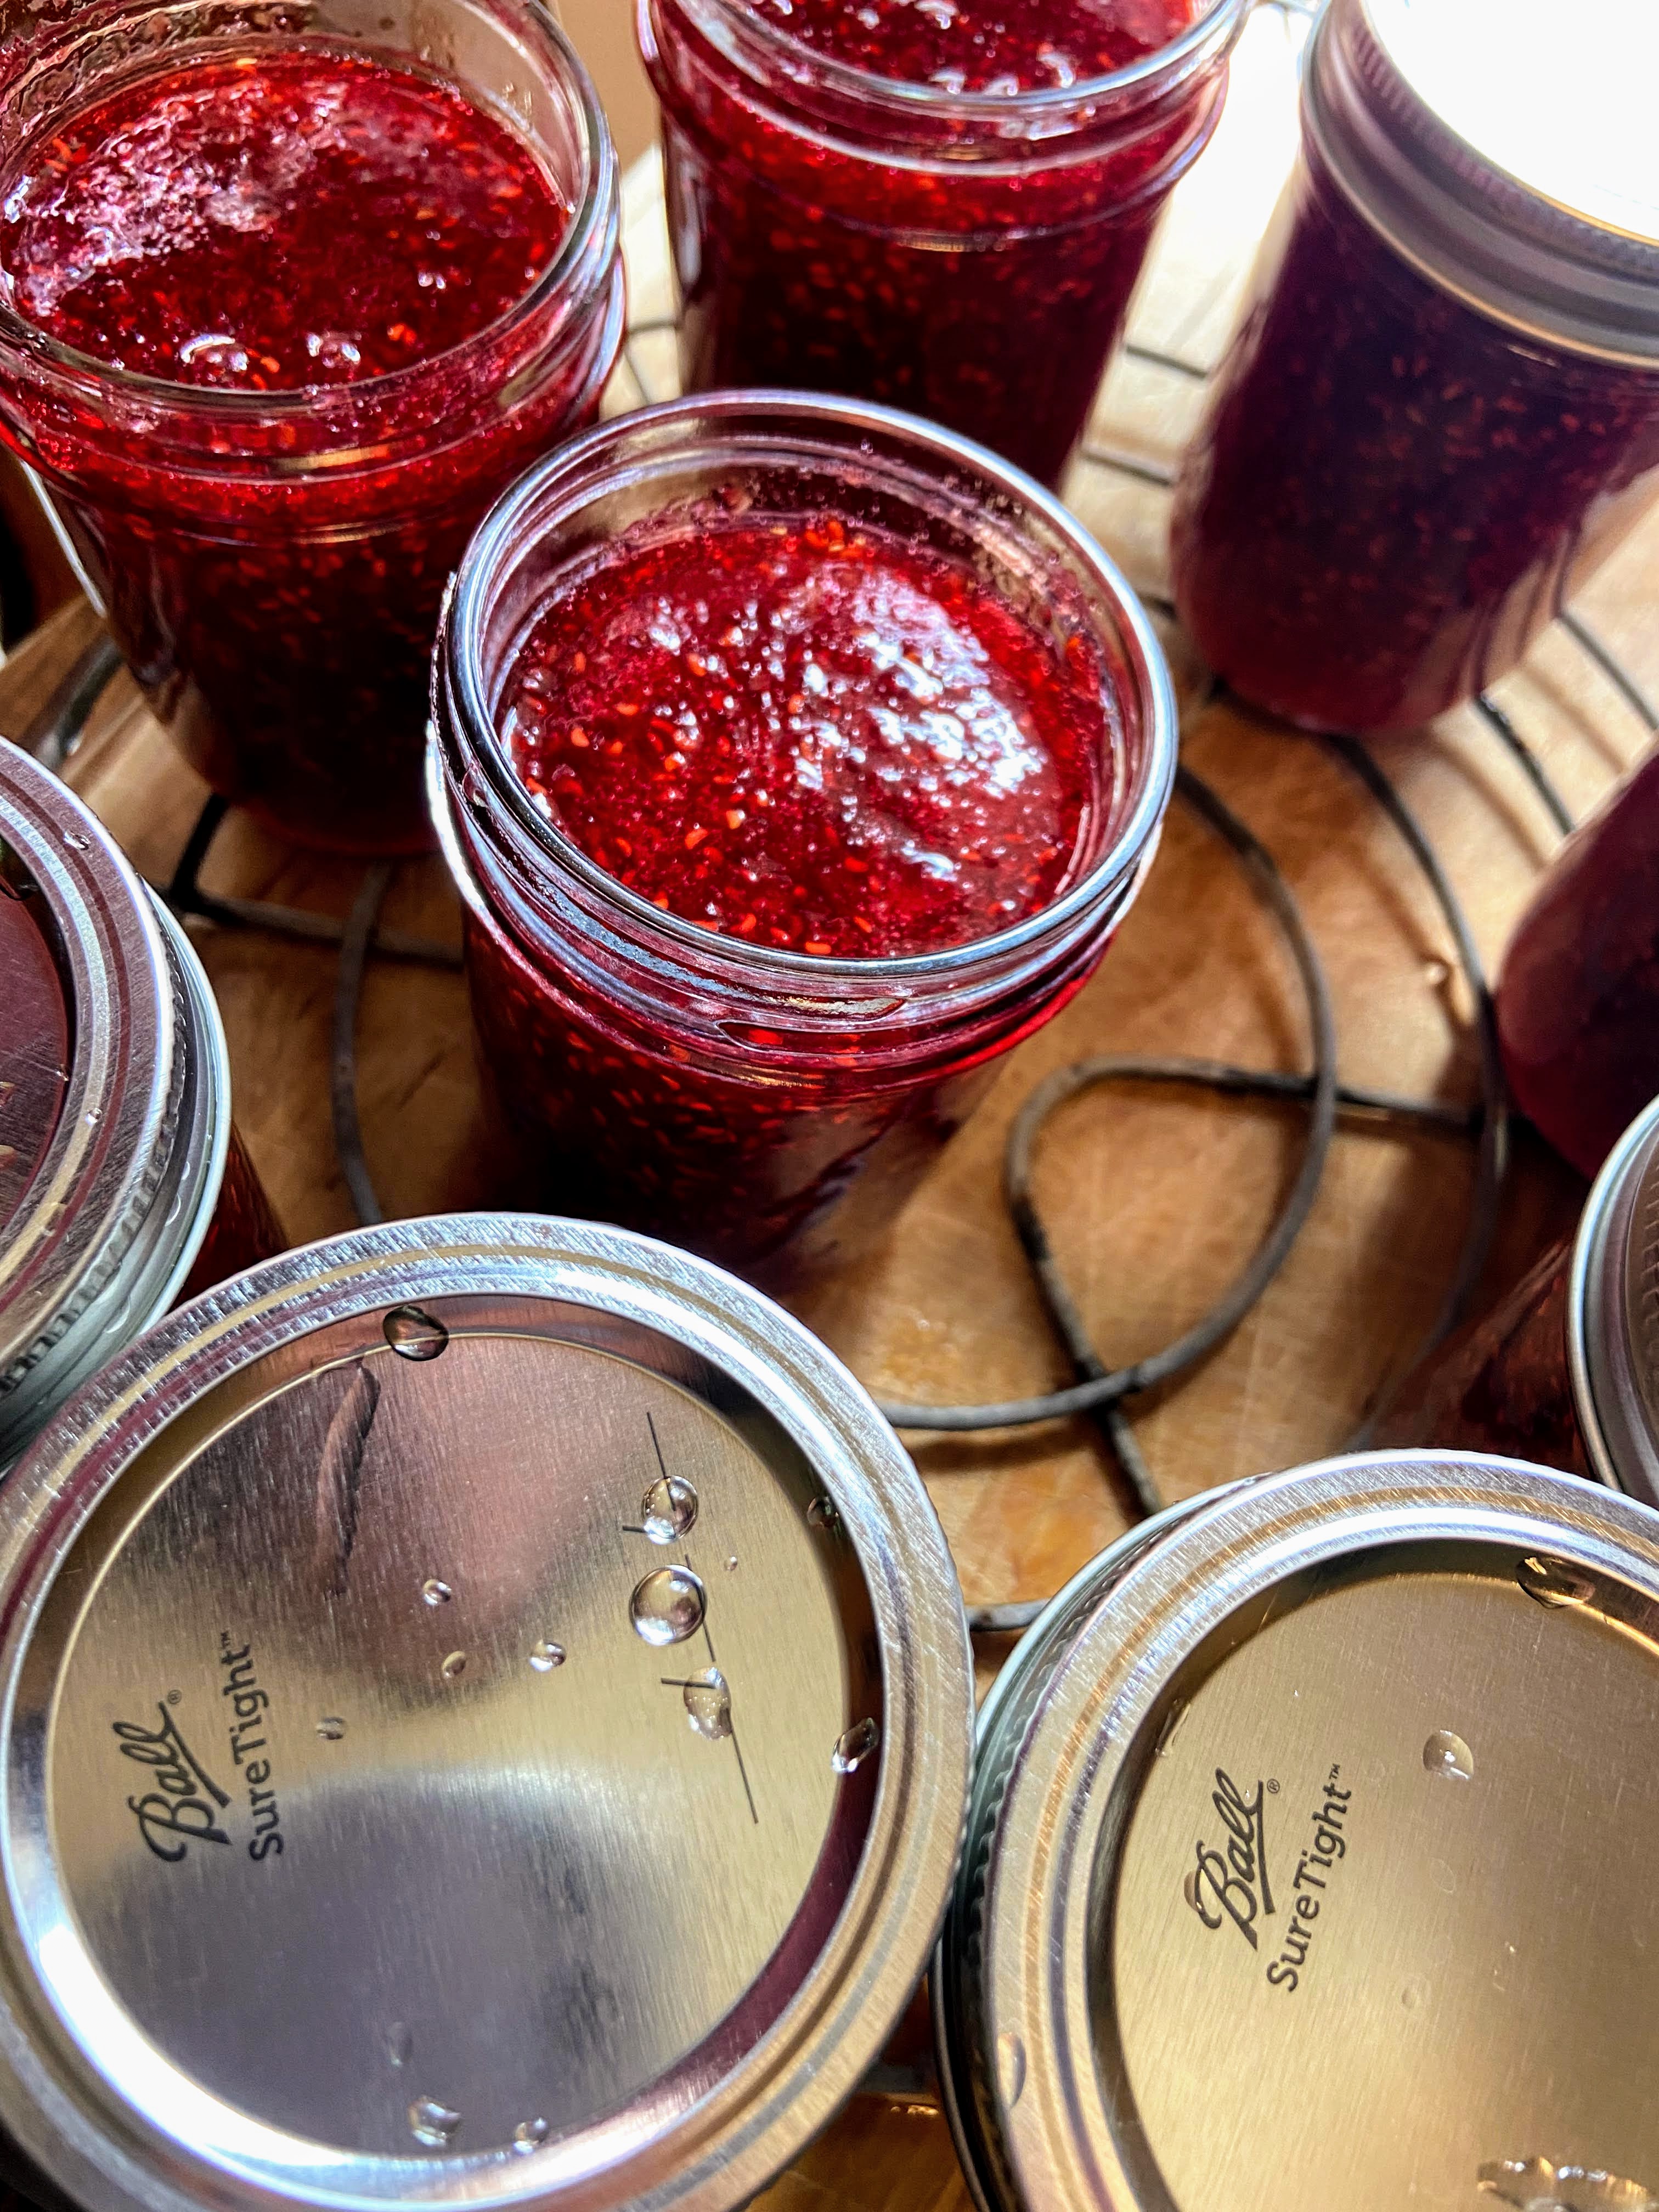
Listen for the ping as the jars seal and just let them be for 24 hours. I know it will be hard to let them be because you’ll be so proud, but it’s recommended to make sure you get a good seal. Any jars that do not seal can be refrigerated and enjoyed right away. Note: It is recommended to store canned goods with their rings removed so that you can know if a false seal occurs. I generally just loosen them as loose as they can go. 
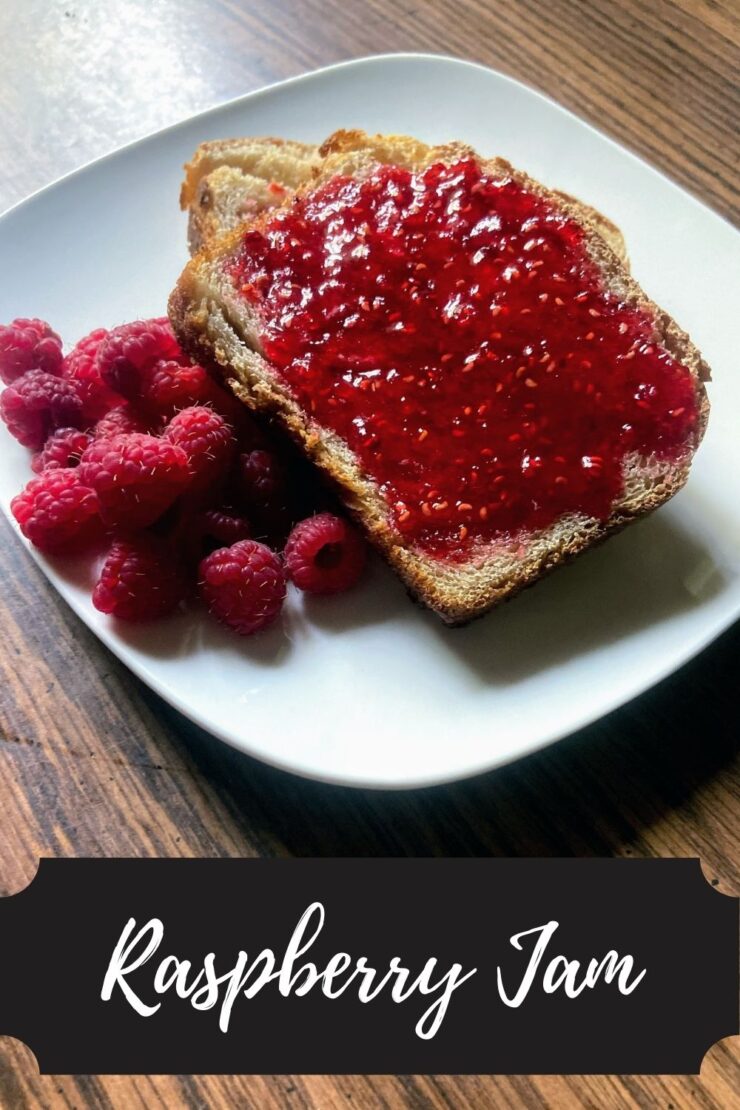
Raspberry Jam

The flavor of summer in a jar ready for your next breakfast or peanut butter and jelly.
Prep Time 10 minutes
Cook Time 40 minutes
Course Appetizer
Cuisine Canning
Servings 12

Ingredients
  

  • 8 cups raspberries
  • 6 cups sugar
  • ¼ teaspoon butter optional
  • 1 box powder pectin

Instructions
 

  • Prepare your water bath canner. Fill the canner with enough water so that once the jars are in the canner, they will be covered by at least one inch of water. Cover and begin to heat over a medium-high heat.
  • Measure out sugar. Set aside.
  • Place the raspberries in a large, non reactive kettle. Crush them with potato masher. Add ¼ teaspoon of butter, if desired, to reduce foaming.
  • Sprinkle and stir in the pectin. Cook over high heat until a rolling boil is reached, stirring consistently.
  • Once a rolling boil is reached, slowly stir in sugar.
  • Continue to stir until you reach another rolling boil that can not be stirred down. Once a rolling boil is reached, cook for 1 minute, stirring constantly.
  • Ladle jelly into prepared jelly jars, wipe the rims with a damp cloth, add lids, and tighten rings to fingertip tight. Put into the water bath canner. When the canner has a steady boil going, time and process for 10 minutes.
  • Once the jelly is done processing, remove the canner from heat and let jars rest in the water for an additional 5 minutes. Finally, remove jars from the canner and allow to cool for 12-24 hours before moving.

Notes

  • Make sure you are using powdered pectin rather than liquid pectin. They do not set the same. 
  • If you have never canned, you can reference the instructions within the pectin box for additional, more detailed directions. 
  • Sealed jars are shelf-stable, meaning they can be stored on a shelf unrefrigerated. If your jars don’t ping (a sign that they have sealed), they are still good. You will just need to store them in the refrigerator. 
  • Most sources recommend removing the rings from jars for storage so that you will know if they unseal for any reason. I generally just loosen them as much as I can without removing them.
Keyword Canning, Jam, Jam Recipes, raspberries, Raspberry, raspberry jam, raspberry recipes
Tried this recipe?Let us know how it was!

Looking for other Raspberry Recipes?

Check out some of my favorites below!

Fudge Brownies

As a high school teacher, I get invited to a lot of graduation parties. That equals all the arrays of food from walking tacos to pulled pork to catered pasta. It also means cake, or if I am lucky brownies or Rice Krispy treats. Gosh, I am a sucker for either of those and I get excited when the parties have them. This is my take on a quick made from scratch fudge brownies. 

You see, my daughter doesn’t fall far from the tree and when it was her birthday, she asked for mama to bake homemade brownies. I love a good black bean brownie, but she didn’t want the “healthy” ones. Well, her brother didn’t want the healthy ones, and if you have kids, you know. If you don’t, perhaps you were once a sibling who always did what you could to convince your brother or sister to cave to your wims. Either way, black bean brownies weren’t happening. 

And so, these little beauties were born. Simple and delicious. And even a tweak or two to maybe, maybe make them a wee bit healthier. But really, who goes into a brownie trying to be healthy? I don’t know about you, but I am all about a warm fudge brownie with a little vanilla ice cream. Maybe it’s the result of working at a beloved drive in for years. Maybe it’s just because it’s darn good. We will never know. 

So if you are a sucker for brownies like I am, let’s get baking friends. You’ll have warm, wonderful fudge brownies in under 40 minutes. 

Your Ingredients

  • ½ cup coconut oil 
  • 3 ounces semisweet chocolate 
  • 1 cup brown sugar, packed
  • 2 teaspoons vanilla
  • 3 eggs
  • ½ cup + 2 tablespoons whole wheat flour (all purpose would work too!) (Check the whole wheat flour from Sunrise Flour Mill. It’s amazing!)
  • ¼ cup cocoa powder
  • 1 teaspoon salt 

Your Steps

Preheat the oven to 350 degrees. Prepare a 9×9 baking dish by spraying with non stick cooking spray. 

Add chocolate to a microwave safe bowl. Microwave in 30 second increments, stirring in between. Add the coconut oil after 1 minute and melt as well. Stir until well combined. Mix in  brown sugar and vanilla. Allow to cool slightly before whisking in eggs. 

Add flour, cocoa powder, and salt. Mix until just combined. If you are an extra chocolate lover, you could totally add ¼ cup of chocolate chips here as well. 

Pour brownie batter into prepared pan. Bake in the middle of your oven for 23-27 minutes, until a toothpick inserted in the center comes out clean. 

And if I may recommend, slice a warm brownie (okay, wait just a little bit) and add just a small scoop of plain vanilla ice cream. And maybe some chopped peanuts? I mean, how can that be bad?! 

Enjoy! 

Looking for other baked goodies to try? Check out my baking page by clicking below!

Fudge Brownies

Eight simple ingredients come together in these quick from scratch fudge brownies that are sure to bring smiles to the whole family!
Prep Time 10 minutes
Cook Time 25 minutes
Course Dessert
Cuisine American
Servings 16 brownies

Ingredients
  

  • ½ cup coconut oil
  • 3 ounces semisweet chocolate
  • 1 cup brown sugar packed
  • 2 teaspoons vanilla
  • 3 eggs
  • ½ cup + 2 tablespoons whole wheat flour all purpose would work too!
  • ¼ cup cocoa powder
  • 1 teaspoon salt

Instructions
 

  • Preheat the oven to 350 degrees. Prepare a 9×9 baking dish by spraying with non stick cooking spray.
  • Add chocolate to a microwave safe bowl. Microwave in 30 second increments, stirring in between. Add the coconut oil after 1 minute and melt as well. Stir until well combined. Mix in brown sugar and vanilla. Allow to cool slightly before whisking in eggs.
  • Add flour, cocoa powder, and salt. Mix until just combined.
  • Pour brownie batter into prepared pan. Bake in the middle of your oven for 23-27 minutes, until a toothpick inserted in the center comes out clean.

Notes

Feel free to add in extra surprises for the brownies: 1/2 cup chocolate chips, chocolate chunks, or even walnuts would be great! 
Keyword brownies, chocolate, dessert
Tried this recipe?Let us know how it was!

Homemade Baked Granola Bars

The internet is full of no bake energy balls, granolas, you name it. And don’t get me wrong, I dig them. I mean, I have my own recipe for energy balls that is dynamite. However, no bake energy balls and granola bars typically need to be refrigerated, and as an active runner, this isn’t always ideal. So of course I set out to create my own homemade baked granola bars. And oh my goodness, these are a delight. 

These homemade baked granola bars are full of simple, clean eating ingredients that are likely to be in your pantry if you are a homemade granola kind of friend. They also come together quickly, with a total bake time of under 30 minutes and all your work can be done in the first 8 minutes or so. How great is that? And friends, they pair a little peanut butter and chocolate without being overwhelming. All the winning, am I right? Let’s get baking!

Your Ingredients for Homemade Baked Granola Bars

  • 1 cup old fashioned oats
  • 1 cup oat flour (store bought, or better yet, just processed in your food processor)
  • ½ cup unsweetened, shredded coconut
  • ½ cup chopped nuts (walnuts, almonds, peanuts, etc)
  • ¼ cup creamy peanut butter
  • ½ cup honey 
  • ¼ teaspoon salt
  • ¼ cup chocolate chips 
  • 1 tablespoon ground flaxseed
  • 1 tablespoon chia seeds

Your Steps

Preheat oven to 350 degrees. Spray a baking sheet with nonstick cooking spray. Spread oats, oat flour, coconut, and nuts on the sheet. Bake in the oven for 8 minutes, until just becoming toasted (I sprayed the top of mine with some olive oil cooking spray as well). Remove from the oven and immediately place in a large mixing bowl. 

Add remaining ingredients to oatmeal mixture. Stir until well combined. Set aside. Line a 9×12 glass baking dish with foil. Spray with nonstick cooking spray. Press the granola mixture into the pan. Bake for 13-18 minutes at 350 degrees, cutting into bars halfway through (A steel scraper/chopper like this guy works great!). If you want them softer, less crunchy, stick with the 13-15 minute range. Dig a crunchier granola bar, shoot for 15-18 minutes.  

Once bars are done baking, cut on the lines once more. Allow to cool completely in the pan. Remove by lifting the foil. Break bars apart and store in an airtight container. 

Looking for other great breakfast baked goods? Check out my baking page by clicking the button below!

Homemade Baked Granola Bars

Why eat packaged granola bars when you can make your own homemade baked granola bars! Create your own with items from your pantry!
Prep Time 5 minutes
Cook Time 25 minutes
Course Breakfast
Cuisine American
Servings 20 bars

Ingredients
  

  • 1 cup old fashioned oats
  • 1 cup oat flour store bought or just processed in your food processor
  • ½ cup unsweetened shredded coconut
  • ½ cup chopped nuts
  • ¼ cup creamy peanut butter
  • ½ cup honey
  • ¼ teaspoon salt
  • ¼ cup chocolate chips
  • 1 tablespoon ground flaxseed
  • 1 tablespoon chia seeds

Instructions
 

  • Preheat oven to 350 degrees. Spray a baking sheet with nonstick cooking spray.
  • Spread oats, oat flour, coconut, and nuts on the sheet. Bake in the oven for 8 minutes, until just becoming toasted.
  • Remove from the oven and immediately place in a large mixing bowl.
  • Add remaining ingredients to oatmeal mixture. Stir until well combined.
  • Set aside. Line a 9×12 glass baking dish with foil. Spray with nonstick cooking spray.
  • Press the granola mixture into the pan. Bake for 13-18 minutes at 350 degrees, cutting into bars halfway through.
  • For a softer granola bar, bake for 13-15 minutes. For a crunchier granola bar, bake 15-18 minutes.
  • Once bars are done baking, cut on the lines once more.
  • Allow to cool completely in the pan. Remove by lifting the foil. Break bars apart and store in an airtight container.
Keyword granola, granola bar, oatmeal, snacks
Tried this recipe?Let us know how it was!

Banana Oat Muffins

I have an eleven year old boy this summer. If you have ever had an eleven year old, you know this means he’s eating CONSTANTLY. We try to encourage healthy foods for his forever snacking, and generally begin our sentences with “have a banana or a string cheese.” Then he eats three of them. What’s a mom to do? This also means we buy bananas in bulk. Most of the time we are making second trips to the grocery store for more. But sometimes we end up with some overly ripe ones. When that happens, I make banana bread, banana ice cream, or banana oat muffins. 

This banana oat muffin recipe is everything you would hope for. They are beautifully dense. Perfectly sweet using maple syrup for the sweetener. They have texture and the right amount of chocolate chips to make anyone happy. And friends, it’s gluten free to boot. It’s full of good for you ingredients and only two tablespoons of oil. How can you go wrong, right? 

These muffins will pair great with your coffee in the morning, as a mid morning snack to get you to lunch time or for a guilt free dessert (although I totally believe in not feeling bad about dessert, but that’s another story for another time). I’m excited for you to give them a try and share them with your littles or your bigs or better yet, keep them to yourself. (You did hear I have an eleven year old right? I have to start hiding my favorite foods and treats from him!) 

Let’s get baking some banana oat muffins

YOUR INGREDIENTS FOR THE BANANA Oat Muffins

  • 2 cups old fashioned oats
  • 1 teaspoon baking soda
  • 1/2 teaspoon salt
  • 3 very ripe bananas, mashed (My go to tool for this? A pastry cutter. It works great AND young kids can easily get involved and do this step for you)
  • 2 eggs
  • 1/4 cup real maple syrup
  • 2 tablespoons melted coconut oil
  • 1/4 mini chocolate chips

Your Steps to the banana Oat Muffins

First, preheat the oven to 350 degrees. Prepare a 12 muffin tin with non stick cooking spray. Then measure out and combine:

  • 2 cups old fashioned oats
  • 1 teaspoon baking soda
  • 1/2 teaspoon salt

Pulse these three ingredients in a food processor until they are a coarse flour texture.

In an additional bowl, combine:

  • 3 very ripe bananas, mashed (My go to tool for this? A pastry cutter. It works great AND young kids can easily get involved and do this step for you)
  • 2 eggs
  • 1/4 cup real maple syrup

Once mixed, stir in the oat mixture until just combined. Finally, fold in the melted coconut oil and 1/4 cup mini chocolate chips. Fill each muffin using a 1/4 cup measuring cup. Bake for 22-25 minutes, until cooked through.

I love that I can enjoy a good breakfast bread that is filling and the perfect amount of sweetness without overdoing it on the added sugar. It is also a perfect mid morning snack to get you to lunch! Give it a try!

A few Notes…

I always thought that a small, 2 cup food processor was good enough. It’s what my mom used growing up, and if it was good enough for her, it was good enough for me. However, a few holidays ago, I asked for a 7 cup Kitchen Aid Mixer. It’s AMAZING and I can’t tell you how often I use it. Highly recommend the investment. It’s great for chopping veggies for salsa, making oat flour, or even mixing banana ice cream. Click the image below to check out a similar model!

Banana Oat Muffins

Simple wholesome ingredients come together with a food processor to make these gluten free and perfectly sweet banana oat muffins
Prep Time 10 minutes
Cook Time 25 minutes
Total Time 1 hour
Course Breakfast
Cuisine American
Servings 12 muffins

Ingredients
  

  • 2 cups old fashioned oats
  • 1 teaspoon baking soda
  • 1/2 teaspoon salt
  • 3 bananas very ripe
  • 2 eggs
  • 1/4 cup maple syrup
  • 2 tablespoons coconut oil melted
  • 1/4 cup mini chocolate chips

Instructions
 

  • Preheat oven to 350° F. Prepare a muffin tin by spraying with non-stick cooking spray.
  • Combine oats, salt, and baking soda in a food processor. Pulse until a coarse flour texture is obtained.
  • In a large bowl, mash bananas. Add honey and eggs. Mix well.
  • Stir oat mixture into mashed bananas. Add chocolate chips and coconut oil. Mix until just combined.
  • Place about 1/4 cup batter in each cup. Bake for 22-25 minutes, until cooked through
Keyword Banana Bread, Breakfast, Gluten Free
Tried this recipe?Let us know how it was!

Looking for other Tasty treats?

Check out my baking page or maybe my breakfast page. Or perhaps you want to check out one of my favorites below?

Cherry Almond Glazed Donuts

If you’ve followed me for any length of time, you likely know that I often declare, “I don’t like donuts, but you’ll always get me at a good scone.” I’m changing my tune just a little: “I don’t like donuts besides a beautiful cherry almond glazed cake donut.” 

My family loves donuts. Any stop at Kwik Trip results in a box of glazers coming home with us. They have to count and make sure everyone gets their fair share. This mom isn’t included in the count. I even joined a district where a certain group provides donuts every Thursday. I never took a one. 

Then we were in Door County this last fall and some Door County cherry donuts were calling my name. We bought some and they were heavenly. More recently, Kwik Trip started carrying some plain cherry cake donuts. They were no Door County cherry, but they were dang good. And I knew I had to make my own version.

I generally try to make my versions of recipes healthier. This will not be one of those. These cherry almond glazed donuts are airy and perfectly pink. My son declared them the best donuts he’s ever eaten. I don’t know if that’s true, but I sure know I ate two of them and wanted two more. And I “don’t like donuts.” 

Your ingredients for the cherry almond donuts 

  • 1 cup maraschino cherries, primarily drained and blended with an immersion blender until smooth (save the syrup!) (I love my Kitchen Aid blender!
  • 6 tablespoons butter, melted 
  • 1 tablespoon oil 
  • ¾ cup white sugar 
  • ½ teaspoon vanilla extract
  • 2 eggs
  • ½ teaspoon almond extract 
  • ½ cup Greek yogurt 
  • 2 ¼ cup all purpose flour 
  • 1 ½ teaspoon baking powder 
  • ¾ teaspoon salt 
  • ¾ teaspoon baking soda 
  • additional cherry syrup 

Your ingredients for the cherry glaze 

  • 4 tablespoons butter, softened
  • 2 cups powdered sugar 
  • ¼ cup cherry syrup 
  • 1 teaspoon vanilla extract 

And Finally, Your Steps to Cherry Almond donuts 

Preheat the oven to 350 degrees. Spray a regular donut pan with non-stick cooking spray. 

In a large bowl, combine butter, oil, sugar, eggs, vanilla, almond extract, and yogurt. Whisk until smooth. Stir in blended cherries. In a separate bowl, combine flour, salt, baking soda, and baking powder. Add to wet ingredients and stir until fully incorporated. You may want to add just an additional ½ tablespoon of cherry juice here to amp up the flavor a little more if you’re a guy or gal that gives the batter a taste test. 

Divide the batter among 16 donut cavities, filling ¾ of the way full. Bake for 12-14 minutes, until firm to the touch or passes the toothpick test (a toothpick inserted comes out clean). Allow to cool in the pan for 10 minutes. Remove the donuts from the pan and place on a cooling rack. 

While the donuts finish cooling, mix softened butter, powdered sugar, vanilla, and cherry syrup for a glaze. If you dig a thicker glaze, add a touch more powdered sugar. Dig a thinner glaze? Add more cherry syrup. Whisk until smooth. 

Dip cooled donuts in the glaze. I only did one side, but you can totally flip them to fully coat. If you choose to do both sides, you will need to double the glaze recipe. Best enjoyed within 48 hours of baking, but I bet they won’t last that long! 

Tools of the Trade

I have a couple tools I love for these donuts. I totally dig my Kitchen Aid Immersion blender for all things. My banana nice cream, you name it. And if you are going to make donuts, you need a good donut pan, right?

Cherry Almond Glazed Donuts

You can't go wrong with the combination of almond and cherry in these light and airy almond cherry glazed donuts that are a cinch to make!
Prep Time 20 minutes
Cook Time 14 minutes
Cooling Time 20 minutes
Course Breakfast
Cuisine American
Servings 16 donuts

Ingredients
  

Batter Ingredients

  • 1 cup maraschino cherries primarily drained and blended with an immersion blender until smooth (save the syrup)
  • 6 tablespoons butter melted
  • 1 tablespoon oil
  • ¾ cup white sugar
  • 2 eggs
  • ½ teaspoon vanilla extract
  • ½ teaspoon almond extract
  • ½ cup Greek yogurt
  • 2 ¼ cup all purpose flour
  • 1 ⅓ teaspoon baking powder
  • ¾ teaspoon salt
  • ¾ teaspoon baking soda
  • additional cherry syrup

Cherry Glaze Ingredients

  • 4 tablespoons butter softened
  • 2 cups powdered sugar
  • ¼ cup cherry syrup from cherries
  • 1 teaspoon vanilla extract

Instructions
 

  • Preheat the oven to 350 degrees. Spray a regular donut pan with non-stick cooking spray.
  • In a large bowl, combine butter, oil, sugar, eggs, vanilla, almond extract, and yogurt. Whisk until smooth. Stir in blended cherries.
  • In a separate bowl, combine flour, salt, baking soda, and baking powder. Add to wet ingredients and stir until fully incorporated.
  • You may want to add just an additional ½ tablespoon of cherry juice here to amp up the flavor a little more if you’re a guy or gal that gives the batter a taste test.
  • Divide the batter among 16 donut cavities, filling ¾ of the way full. Bake for 12-14 minutes, until firm to the touch or passes the toothpick test (a toothpick inserted comes out clean). Allow to cool in the pan for 10 minutes. Remove the donuts from the pan and place on a cooling rack.
  • While the donuts finish cooling, mix softened butter, powdered sugar, vanilla, and cherry syrup for a glaze. If you dig a thicker glaze, add a touch more powdered sugar. Dig a thinner glaze? Add more cherry syrup. Whisk until smooth.
  • Dip cooled donuts in the glaze. I only did one side, but you can totally flip them to fully coat. If you choose to do both sides, you will need to double the glaze recipe.
Keyword almond, baking, cherry, donuts
Tried this recipe?Let us know how it was!

Looking for other sweet treats?

Here are a couple I love!

Rhubarb Pie

I’ve always declared myself, “not a pie person.” At Thanksgiving, it’s okay, but not something I crave. My husband, on the other hand, LOVES pie. His mom also loves to make it. It’s a rare weekend that we visit and a pie hasn’t been made. It’s also pretty typical to have her make a pie at our home out of whatever we happen to have in the freezer when she comes to visit. So, it makes sense that pie is always my husband’s request for his birthday; rhubarb pie to be precise. 

One of the reasons I don’t love to make pie is the crust. I like to say I just don’t like to make it, but perhaps it’s more that it intimates me. Also, if I am going to pick a favorite pie, I’m going with banana creme and everyone knows those babies are best with a graham cracker crust. Am I right or am I right? 

All that being said, after being married for 12 years, pie is growing on me. I still don’t dig the crust part of things, but I have you covered in this recipe. My mother in law has a crazy simple crust that I dig as the base for not only this rhubarb pie, but also an apple pie that use this great apple pie filling I freeze in the fall. 

So it is May and the rhubarb is plentiful. Let’s put together a simple tart and delicious rhubarb pie everyone can enjoy! (And hey, if it isn’t May, you can always use frozen rhubarb too! Just thaw and drain it out first!)

Your Ingredients

For the crust: 

  • 1 ½ cups all purpose flour
  • ½ tablespoon sugar
  • 1 teaspoon salt
  • ½ cup oil of your choice
  • 2 tablespoons milk

For the filling: 

  • 4 cups diced rhubarb (fresh or frozen. If frozen, thaw and drain off ¾ of the liquid or so)
  • 1 ⅓ cups sugar
  • 6 tablespoons all purpose flour

Your Steps to Rhubarb Pie

Preheat the oven to 450 degrees. 

In your pie plate, combine the flour, sugar, and salt for the crust. Mix together with a fork. Add oil and milk and whisk until well combined. Press into the ungreased pie plate. (If you are worried you’ll be too messy whisking right in the pie plate, feel free to do this in a bowl first. My mother in law taught me to do mix right in the pie plate to avoid one more dish. Genius!) Note: The pie crust mix will be wet. That’s okay. 

In a medium bowl, combine the flour and sugar for the filling. Sprinkle approximately ⅓ cup of the mixture onto the pie crust. Mix rhubarb into the remaining flour and sugar and pour onto the unbaked pie crust that has been topped with the flour/sugar mixture. 

Bake for 15 minutes at 450 degrees. Then drop the temperature to 350 degrees and bake an additional 30-40 minutes, until the rhubarb has set. It will set more after you pull it from the oven as well. Enjoy straight away! 

Rhubarb Pie

Sweet and tart combine in this simple to put together rhubarb pie!
Prep Time 20 minutes
Cook Time 50 minutes
Course Dessert
Cuisine American
Servings 8

Ingredients
  

For the Crust:

  • 1 ½ cups all purpose flour
  • ½ tablespoon sugar
  • 1 teaspoon salt
  • ½ cup oil of your choice
  • 2 tablespoons milk

For the filling:

  • 4 cups diced rhubarb fresh or frozen. If frozen, thaw and drain off ¾ of the liquid or so
  • 1 ⅓ cups sugar
  • 6 tablespoons all purpose flour

Instructions
 

  • Preheat the oven to 450 degrees.
  • In your pie plate, combine the flour, sugar, and salt for the crust. Mix together with a fork.
  • Add oil and milk and whisk until well combined. Press into the ungreased pie plate.
  • The pie crust mix will be wet. That’s okay.
  • In a medium bowl, combine the flour and sugar for the filling.
  • Sprinkle approximately ⅓ cup of the mixture onto the pie crust.
  • Mix rhubarb into the remaining flour and sugar and pour onto the unbaked pie crust that has been topped with the flour/sugar mixture.
  • Bake for 15 minutes at 450 degrees. Then drop the temperature to 350 degrees and bake an additional 30-40 minutes, until the rhubarb has set. It will set more after you pull it from the oven as well.
Keyword pie, Rhubarb, rhubarb pie
Tried this recipe?Let us know how it was!

Looking for some other great rhubarb treats?

Check out some of the posts below~

Quick Peanut Butter Oat Energy Balls

I am an avid runner and overall fitness nut. As such, I am always looking for healthy ways to fuel my body quickly and easily. I also enjoy snacking….a lot. My sister and I were just talking about how there has to be a snack break between breakfast and lunch. We can’t make it otherwise–and these quick peanut butter oat energy balls are perfect for that!

When I am cooking and meal prepping, I can tell I have a winning clean eating recipe when my husband approves. With this recipe, he has been known to say, “You know what we are almost out of…thos yummy energy balls. You need to make more!”

Guys, that’s a big deal. He is generally the biggest critic of my “overly-healthy” recipes so when he said that, you can bet I got into the kitchen and made another batch! I hope you enjoy them as much as we do! (This version is inspired by Rachel from Clean Food Crush, but has been modified by me to meet our needs at home)

Here are your ingredients

  • 1/2 cup coconut flour ( It smells so delightful!)
  • 2 cups ground old-fashioned oatmeal (see details in the recipe)
  • 1/2 cup real maple syrup (honey would work too!)
  • 1/2 cup natural peanut butter
  • 1/4 t kosher salt
  • 1 tablespoons coconut oil, melted
  • 1/3 cup semisweet chocolate chips
  • 1/2 teaspoon almond extract (I LOVE the flavor this brings in)

Your Steps to Quick Peanut Butter Oat Energy Balls

First, grind the oats to make a sort of oatmeal flour. To do this, place the old fashioned oats and coconut flour into a food processor and pulse them until you have a very coarse flour like texture.

Then, combine all the ingredients in a large bowl and mix them with a wooden spoon until well mixed. Form them into 1-2 inch balls (whatever suits your family. We like 1 inch energy balls around here so I used a tablespoon to measure out the the dough.). Place on a cookie sheet. Place the cookie in the fridge for approximately an hour to harden. Remove from the pan, place in an airtight container, and store them back in the fridge.

These are great to make a few batches up and store for later. Perhaps whip up a few batches and put them in the freezer for a grab and go snack that can thaw over a few hours. (I’m thinking they would be great packed in a lunch and used for that sweet treat at the end to finish up your meal. As for me, I like to pack a few for my morning and afternoon snacks at work (See, I love all the snacks. My husband calls me a squirrel because I always have some food on hand…). As for my kids, they eat them like an after dinner treat, so I think I am winning. I hope you enjoy! –Jess

Tool of the Trade

Honestly, there is only one thing you really need for this recipe. A large food processor. Maybe you’re like me and think you don’t need it (Who needs ANOTHER kitchen gadget?!) But this guy gets a lot of use at our home and is perfect for fun sweet recipes like this one, but also is great in this cranberry jalapeño dip. I can’t recommend it enough, even if you do have to find a spot for it 😉

Quick Peanut Butter Oat Energy Balls

After school or between meals, we all can use a snack to satisfy our hunger cravings. These quick peanut butter oat energy balls fit the ticket! Bite size, easy to make, and tasty on all levels!
Prep Time 19 minutes
Chill Time 1 hour
Course Snack
Cuisine American
Servings 3 dozen

Ingredients
  

  • 1/2 cup coconut flour
  • 2 cups ground old-fashioned oatmeal see details in the recipe
  • 1/2 cup real maple syrup honey would work too!
  • 1/2 cup natural peanut butter
  • 1/4 t kosher salt
  • 1 tablespoons coconut oil melted
  • 1/3 cup semisweet chocolate chips
  • 1/2 teaspoon almond extract

Instructions
 

  • First, grind the oats to make a sort of oatmeal flour. To do this, place the old fashioned oats into a food processor and pulse them until you have a very coarse flour like texture.
  • Combine all remaining ingredients in a large bowl and mix them with a wooden spoon until well mixed.
  • Form them into 1 inch balls using a tablespoon to measure.
  • Place on a cookie sheet and then chill in the fridge for approximately an hour to harden.
  • Remove from the pan, place in an airtight container, and store them back in the fridge
Keyword chocolate and peanut butter, energy balls, oatmeal, peanut butter
Tried this recipe?Let us know how it was!

Looking for other delicious recipes?

Give some of these a try!

Salty and Sweet Puppy Chow

My very first memory of puppy chow comes from junior high family and consumer education class. I am certain all the upperclassmen knew and perhaps helped schedule puppy chow day as they found all the kids who made it and immediately requested that they share it. It’s one of those oh so simple, yet delightful treats for that I will always had the ingredients on hand. Then a friend shared that she added pretzels to hers for a salty and sweet puppy chow and oh man, it’s a game changer. Add pretzels, dry roasted peanuts, and Chex cereal to your shopping lists friends. This is a must for a quick sweet treat!

Your Ingredients

  • 5 cups Chex cereal
  • 2 cups crushed pretzels
  • 1 cup roasted peanuts
  • 1 cup chocolate chips
  • ½ cup creamy peanut butter 
  • 2 tablespoons butter
  • 1 teaspoon vanilla
  • 1 ½ cups powdered sugar, divided

Your Steps to Salty and Sweet Puppy Chow

In a large container (that has a cover. I love these containers for all things Chex and also for my sourdough bread baking), combine the cereal, pretzels, and roasted peanuts. Set aside. In a microwave safe container, contain chocolate chips, creamy peanut butter, and butter. Microwave on high for 90 seconds, stirring after 60 seconds. Once smooth, stir in vanilla. Pour chocolate mixture over the cereal mixture and stir well. Allow to cool for 5-10 minutes. Sprinkle with 1 cup powdered sugar. Cover the container and shake and shake and shake some more. You may need to stir it a bit to break it apart from the side, but sure as heck don’t dirty another bowl or container here.

Once fully coated, allow to cool for 5-10 more minutes. Add remaining powered sugar and shake once more. Now, in theory, you should spread this out on a cookie sheet and allow to cool completely to room temperature. In theory. But I am seriously against making extra dirty dishes. I avoid it at all costs. If you are like me, simply stir it every 10-15 minutes to allow it to cool all the way through.

Looking to bake something else to satisfy your sweet tooth? Maybe check out my baking page for information! Click the button below!

Tools of the Trade

I seriously dig these containers. I use them for all sorts of things in our kitchen. Baked sourdough bread? Throw it in a container. Mixing my bread together? Put it in a container. Making Chex Mix or Puppy Chow? It goes into these containers!

Salty and Sweet Puppy Chow

Two great pairings: salty and sweet and chocolate and peanut butter come together in this twist on a familiar recipe!
Prep Time 5 minutes
Cook Time 1 minute
Course Dessert
Cuisine American
Servings 10

Ingredients
  

  • 5 cups Chex cereal
  • 2 cups crushed pretzels
  • 1 cup roasted peanuts
  • 1 cup chocolate chips
  • ½ cup peanut butter
  • 2 tablespoons butter
  • 1 teaspoon vanilla
  • 1 ½ cups powdered sugar

Instructions
 

  • In a large container with a lid, combine cereal, pretzels, and peanuts.
  • Combine chocolate chips, peanut butter, and butter in a microwave safe container. Microwave for 90 seconds, stirring after 60 seconds. Heat until smooth. Stir in vanilla.
  • Pour chocolate mixture over the cereal mixture. Stir until coated completely. Allow to rest 5-10 minutes.
  • Add 1 cup of powdered sugar, cover and shake until fully coated. Allow to rest an additional 5-10 minutes.
  • Add remaining powdered sugar. Cover and shake once more.
  • Spread on a baking sheet and allow to fully cool before returning to the airtight container.
Keyword chocolate, dessert, holiday treats, no bake, peanut butter, salty and sweet, sweets
Tried this recipe?Let us know how it was!

Lemon Rosemary Shortbread Cookies: Little Sweet, Little Savory

I know what you’re thinking, “Rosemary? In a cookie?” But yes, these lemon rosemary shortbread cookies are the type of cookies that make your tastebuds rejoice simply because they such a unique combination of flavors!

I’m a sucker for rosemary. Once I discovered the herb as a college student in a wild rice pilaf my mom started to make as a staple potluck dish, my world was changed.

I always search for places to add it, try recipes that all for it, and you can bet when I go out and find it listed on a fancy drink menu or in a sweet dish, I am intrigued. I almost always give it a try!

Recently, I saw rosemary in a shortbread cookie at a local restaurant. I gave it a try, and LOVED the flavor of a lemon-rosemary shortbread. It was light and buttery and just that hint of herb was a pleasant surprise. I had to try to duplicate it, and I think I did a bang up job (as my dad would say ). I hope you take a step outside your flavor comfort zone and try these sweet and savory lemon rosemary shortbread cookies.

Your ingredients:

  • 1/2 cup butter, softened (I let mine sit on the counter for a number of hours)
  • 1/2 cup powdered sugar
  • zest from 1/3 of a lemon
  • 1/2 tablespoon lemon juice (I freshly squeezed it)
  • 1/4 teaspoon ground rosemary
  • 1/2 tablespoon honey
  • 1 cup all purpose flour

Your Steps for Lemon Rosemary Shortbread Cookies

Preheat the oven to 325 degrees. In a medium bowl, cream together the butter and powdered sugar well. To this, mix in lemon juice, zest, ground rosemary, and honey. Mix well. Stir in flour until combined. I like small, bite sized cookies, so I rolled about 1 Tablespoon of the dough into a ball and placed on an ungreased cookie sheet. You choose your size.

Take a flat bottomed glass, press into additional powdered sugar and flattened the cookies to about 1/4 of an inch thick. Bake for 9-11 minutes, or until just starting to get golden brown on the edges. Let cool for 2 minutes on the cookie sheet before removing to cool. Shortbread cookies are best a few days later, but I bet you won’t be able to stop enjoying these! (This is a small batch recipe, making about 20 cookies)


cookies with lemon

Lemon Rosemary Shortbread Cookies

Lemon and rosemary pair together in these sweet and savory lemon rosemary shortbread cookies that will melt in your mouth and leave you wanting more!
Prep Time 15 minutes
Cook Time 10 minutes
Course Dessert
Cuisine American
Servings 20 cookies

Ingredients
  

  • 1/2 cup butter softened
  • 1/2 cup powdered sugar
  • zest from 1/3 of a lemon
  • 1/2 tablespoon lemon juice
  • 1/4 teaspoon ground rosemary
  • 1/2 tablespoon honey
  • 1 cup all purpose flour

Instructions
 

  • Preheat the oven to 325 degrees.
  • In a medium bowl, cream together the butter and powdered sugar well.
  • To this, mix in lemon juice, zest, ground rosemary, and honey. Mix well.
  • Stir in flour until combined.
  • Roll about 1 Tablespoon of the dough into a ball and placed on an ungreased cookie sheet.
  • Take a flat bottomed glass, press into additional powdered sugar and flattened the cookies to about 1/4 of an inch thick.
  • Bake for 9-11 minutes, or until just starting to get golden brown on the edges.
  • Let cool for 2 minutes on the cookie sheet before removing to cool.
Keyword Cookies, lemon, lemon cookies, rosemary, Shortbread
Tried this recipe?Let us know how it was!

Looking for other baking recipes? Check out my baking page by clicking the link below!

For the Holidays Cranberry Apple Preserves

“Tis the season for cranberries, right? Now if you ask me, any season is cranberry season. But right now, fresh, whole cranberries are fully stocked at all the grocery stores, just yearning to create something delicious in your kitchen. I know Thanksgiving is over, but that doesn’t mean your time with cranberries needs to be. Give these cranberry apple preserves a try! 

One of my favorite things about living in Wisconsin is that all things cranberry are readily available. I thought that was standard in all states. I was telling a friend in Texas how much I adore cranberry wine (I am not a fancy wine girl, clearly). Her response was, “THEY MAKE CRANBERRY WINE?!” Yup, they do. And it’s delish. If you’re interested, check out Door Peninsula Winery (I love their Cranbernet) or Three Lakes Winery (I love…all their wine. All of it.) They even ship to lots of states! 

I will buy anything cranberry related. Add some citrus, and I am in heaven. So this cranberry apple preserve recipe is a great one. It has all the deliciousness of a well prepared cranberry sauce while being the consistency of jam. Can you go wrong?! Even if you aren’t a typical canner, you can do this recipe. 

Before we Start, The supplies

This cranberry apple preserves recipe will result in approximately seven 8 ounce jelly jars. You can use wide mouth or narrow mouth jars. Just be sure you have rings and lids for them and that they will all fit in your canner at once. 

You will need a water bath canner or large stock pot with a lid. The jars need to be off the bottom of the pot. A water bath canner will have a rack to use if you go that route. If you use a stock pot, I would invest in canning racks. You can also put a towel down in a pinch, but it is MESSY in terms of getting water everywhere.  

It is also helpful to have the tools in a canning kit like this, but it isn’t necessary. Canning would be crazy challenging without the jar funnel and jar tongs. The lid lifter is also very handy. 

New to canning? Check out the Ball’s Book of Canning or The National Center for Home Food Preservation for more detailed information. I will give you the low down, but it will be short and sweet. You will want to read up more, I promise  

Your Ingredients

  • 24 ounces whole cranberries, rinsed and picked through 
  • 3 apples, cored, peeled and diced
  • 1 clementine orange, chopped finely with peels
  • 2 ¾ cup sugar
  • 2 cups water 
  • ⅓ cup honey 

Your Steps to Cranberry Apple Preserves 

To begin, prepare your water bath canner. Fill the canner with enough water so that once the jars are in the canner, they will be covered by at least one inch of water. Too much water is better than not enough, but remember that some water will be displaced by the jars. Cover and begin to heat over a medium heat. 

You will also need to wash and prepare 8 ounce canning jars (approximately 7 jars will be produced with this recipe). I typically do this while my preserves are just starting to cook down. Wash rings, lids, and jars. Place jars in the rack in the canner, elevated above the water. This will keep them warm. Follow directions for your specific lids. I typically wash and place in simmering water on the stove. 

Now, begin to prepare the jam. Combine all ingredients in a large saucepan. Bring to a boil over a high heat, stirring until the sugar dissolves. Continue to cook and stir over the high heat until the mixture reaches 219 degrees (However, for every 1000 feet of altitude you have, subtract 2 degrees). Once temperature is reached, remove from heat. (Note: It takes some time to reach this temperature. But it will go from 214 degrees to done quicker than you expect. Just watch the temperature closely)

Time to Can!

Ladle hot preserves into hot jars, leaving ¼ inch headspace. Wipe rims with a damp cloth, add lids and adjust band to fingertip tight. Place jars into water bath canner and process for 15 minutes. Turn off heat and remove cover. Allow jars to cool 5 minutes in the canner, then remove and allow to cool for 12-24 hours. Do not retighten bands. Check seal after cool to be sure they are self-stable. Label and store. Any jars that did not seal can be stored in the refrigerator. 

Tools of the Trade

Not a Canner (…yet)? 

You can 100% complete this recipe and store it in the refrigerator. Fill the jars with hot jam, wipe, adjust lid and ring. Allow to cool before storing in the refrigerator. Since you will likely get about 7 jars of jam, I would recommend cutting the recipe in half. 

Ready to can and preserve more?

Check out my pages for canning and preserving for other inspiration below:

sourdough and jam

Cranberry Apple Preserves

As the weather gets cooler, cranberries become a tasty, tart treat. These preserves are sure to make your taste buds dance with the combination of cranberry, apple, and orange.
Prep Time 5 minutes
Cook Time 40 minutes
Waterbath 15 minutes
Servings 12

Equipment

Ingredients
  

  • 24 ounces whole cranberries rinsed and picked through
  • 3 apples cored, peeled and diced
  • 1 mandrin orange chopped finely with peels
  • 2 ¾ cup sugar
  • 2 cups water
  • cup honey

Instructions
 

  • Prepare your water bath canner. Fill the canner with enough water so that once the jars are in the canner, they will be covered by at least one inch of water. Cover and begin to heat over a medium heat.
  • Wash and prepare 8 ounce canning jars (approximately 7 jars will be produced with this recipe).
  • Now, begin to prepare the jam. Combine all ingredients in a large saucepan.
  • Bring to a boil over a high heat, stirring until the sugar dissolves.
  • Continue to cook and stir over the high heat until the mixture reaches 219 degrees (However, for every 1000 feet of altitude you have, subtract 2 degrees).
  • Once temperature is reached, remove from heat.
  • Ladle hot preserves into hot jars, leaving ¼ inch headspace.
  • Wipe rims with a damp cloth, add lids and adjust band to fingertip tight.
  • Place jars into water bath canner and process for 15 minutes. Turn off heat and remove cover.
  • Allow jars to cool 5 minutes in the canner, then remove and allow to cool for 12-24 hours. Do not retighten bands. Check seal after cool to be sure they are self-stable. Label and store.

Notes

Any jars that did not seal can be stored in the refrigerator.
Tried this recipe?Let us know how it was!